















GR9SHKXKB01 Whirlpool Refrigerator - Instructions
Keep searches simple. Use keywords, e.g. "leaking", "pump", "broken" or "fit".
Freezer occasionally had a temperature alarm.Clicking noise also.
Was told capacitor was problem 90% of the time.Capacior was not the problem.Bad start relay.
Parts Used:

-
Barry from FORD CITY, PA
-
Difficulty Level:Really Easy
-
Total Repair Time:Less than 15 mins
1 person
found this instruction helpful.
Was this instruction helpful to you?
Thank you for voting!
no drawer
-
Xiaoping from KIRKLAND, WA
-
Difficulty Level:Really Easy
-
Total Repair Time:Less than 15 mins
1 person
found this instruction helpful.
Was this instruction helpful to you?
Thank you for voting!
door hinge broke.
-
Bernard from DONALDSONVLLE, LA
-
Difficulty Level:Really Easy
-
Total Repair Time:15 - 30 mins
-
Tools:Nutdriver, Screw drivers
2 of 4 people
found this instruction helpful.
Was this instruction helpful to you?
Thank you for voting!
freezer would not freeze
inst said,"50 pct of the time this calls for new capacitor," so we changed the capacitor. Same prob. It also said,"25 pct of the time it's the bi-metal thermostat" So we ordered it. We removed the plastic rear panel from inside the freezer comp. using small nut driver. Here we found much ICE surrounding the defrost unit, three inches thick. We thawed the whole mess. and the freezer has worked fine ever since. I think my habit of getting ice cubes from the inside container rather than from the ice cube dispenser, had kep t the freezer door open too much, interfering with the normal defrost cycle and allowing ice to build up over time so that it finally defeated the system. My new rule, "get ice cubes only from the front."
Parts Used:
-
Michael from HELENDALE, CA
-
Difficulty Level:A Bit Difficult
-
Total Repair Time:30 - 60 mins
-
Tools:Nutdriver, Screw drivers
1 person
found this instruction helpful.
Was this instruction helpful to you?
Thank you for voting!
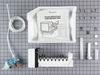
Installed Ice Maker in Freezer
Installed ice machine components using kit and included instructions. Easy! Ran a copper line from under sink valve to back of refrigerator under the floor. Drilled two holes to run copper line. Plumber turned water off and replaced single valve with a double valve (one line to faucet and the other for the copper line). Installed shut off valve and filter at the other end of copper line. Then stainless hose to refrigerator. Everything went smooth. Double check the factory installed plastic line from the electric valve to the inlet for your freezer. Mine was barely inserted and leaked. I pushed it in all the way and it is fine now... Ice maker works really well! Wish I had done this sooner!
Parts Used:
-
Chris from SACRAMENTO, CA
-
Difficulty Level:Easy
-
Total Repair Time:1- 2 hours
-
Tools:Nutdriver, Screw drivers
1 person
found this instruction helpful.
Was this instruction helpful to you?
Thank you for voting!
The Light Socket Burned Out.
I pulled the socket out and unplugged the wires. I replaced the light socket by plugging in the wires and snapping the light socket into place. A very simple fix.
Parts Used:
-
MATTHEW from STOCKTON, CA
-
Difficulty Level:Really Easy
-
Total Repair Time:Less than 15 mins
5 of 13 people
found this instruction helpful.
Was this instruction helpful to you?
Thank you for voting!
Light switch broke
Pried out old part with screwdriver. Unplugged. When new part came, just plugged it in and pushed the part into place.
Parts Used:

-
Carolee from Spokane Valley, WA
-
Difficulty Level:Really Easy
-
Total Repair Time:Less than 15 mins
-
Tools:Screw drivers
2 of 4 people
found this instruction helpful.
Was this instruction helpful to you?
Thank you for voting!
No problems.

-
Cynthia from DUCHESNE, UT
-
Difficulty Level:Really Easy
-
Total Repair Time:Less than 15 mins
1 person
found this instruction helpful.
Was this instruction helpful to you?
Thank you for voting!
gasket sagging at the bottom and was not airtight.
I followed the instructions on the video you provided with my order. Removed the freezer door and used the putty knife to loosen the old gasket and installed the new one. I'm a 77 year old female and if I can do it, so can you.
Parts Used:

-
Joyce from GALESBURG, IL
-
Difficulty Level:Really Easy
-
Total Repair Time:30 - 60 mins
-
Tools:Socket set
1 person
found this instruction helpful.
Was this instruction helpful to you?
Thank you for voting!
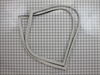
Gasket had several tears in it at the corners and was leaking air into the fresh food compartment
Removed the old gasket and ran the hard edged lip into the opening behind the door liner. Concerned that the gasket does not seem to be attaching itself to the door well. First put it on the side of the refigerator and it would not adhere enough to support itself. While it closes it just doesn't seem to attach with the magnets in the gasket. These magnetic strips have a weak magnet side and a strong magnet side. I wonder if they put the wrong side facing the door when they assembled it. Counter this with a new gasket for an upright freezer which was twice the length and attached itself firmly to the side wall of the freezer and did not slide down.
Parts Used:
-
James from BATON ROUGE, LA
-
Difficulty Level:A Bit Difficult
-
Total Repair Time:30 - 60 mins
-
Tools:Screw drivers
1 person
found this instruction helpful.
Was this instruction helpful to you?
Thank you for voting!
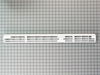
Broken grille on front of refrigerator.
Got on floor, pulled broken parts off front of refrigerator. Clipped in new grille. Looks great!
Parts Used:
-
Kathleen from EUGENE, OR
-
Difficulty Level:Really Easy
-
Total Repair Time:30 - 60 mins
1 person
found this instruction helpful.
Was this instruction helpful to you?
Thank you for voting!
Freezer was working but fridge was barely cooling. Look further into how to test thermostat.
I just replaced my defrost thermostat after using the place-in-ice-water method, and I think it may not have been necessary. My timeline: my fridge was not getting cold enough. I realized it the day before going on a trip. I vacuumed the (very dusty) coils at the bottom, and the next morning the fridge seemed colder, but I thought I should order parts just in case. I ordered a heater and a thermostat. The fridge seemed to be operating normally when I returned from my trip, but I had the parts, so I thought I'd go ahead and dismantle the freezer and test the existing parts. My intention was to return both parts if the old ones passed the tests. I opened up the back of the freezer and there was no ice on the fins. I thought, great, the existing heater works! I cut out the thermostat, placed it in ice water, and didn't get continuity. So I decided to go ahead and put in the new thermostat. Because I'm not experienced with using a multimeter, I thought I'd test the new thermostat to see how the test should work. To my surprise, the new thermostat also failed the test! Stumped, I thought I might as well install the new thermostat, since I had opened the package and couldn't return it.
Further internet research suggests the place-in-ice-water method of testing is not adequate. One YouTube video by Parts Dr says to place the part in a working freezer. I froze my old thermostat and tested it; still no continuity. This thermostat may not be typical, though. The video discussed the temperature ratings on thermostats. The temperature rating on both (old and new) thermostats is L8.9-16.7C. That converts to 48-63 degrees fahrenheit, which obviously are not freezing temperatures. I'm not convinced I needed a new thermostat, but I trusted the videos I consulted earlier.
I cleaned the fridge thoroughly, so at least now I have a nice clean fridge to show for my efforts.
Further internet research suggests the place-in-ice-water method of testing is not adequate. One YouTube video by Parts Dr says to place the part in a working freezer. I froze my old thermostat and tested it; still no continuity. This thermostat may not be typical, though. The video discussed the temperature ratings on thermostats. The temperature rating on both (old and new) thermostats is L8.9-16.7C. That converts to 48-63 degrees fahrenheit, which obviously are not freezing temperatures. I'm not convinced I needed a new thermostat, but I trusted the videos I consulted earlier.
I cleaned the fridge thoroughly, so at least now I have a nice clean fridge to show for my efforts.
Parts Used:

-
Bonnie E from MODESTO, CA
-
Difficulty Level:A Bit Difficult
-
Total Repair Time:30 - 60 mins
-
Tools:Nutdriver
1 person
found this instruction helpful.
Was this instruction helpful to you?
Thank you for voting!
Original door gasket split from age, no longer sealing snugly to refrig.
Inserted scraper behind gasket breaking it free from door, permitting a hand hold. While putting tension on gasket, slid scraper around door gently removing old gasket. Replaced gasket starting at top gradually working around door. No need to remove door.
Parts Used:
-
William from LYNBROOK, NY
-
Difficulty Level:Easy
-
Total Repair Time:15 - 30 mins
1 person
found this instruction helpful.
Was this instruction helpful to you?
Thank you for voting!
My refrigerator would not defrost.
The first part I changed was the defrost timer but it did
not solve the problem, I replaced the bi-metal defrost sensor
and I have the same problem.
I can defrost by turning the clock manually and heater works.
problem.
not solve the problem, I replaced the bi-metal defrost sensor
and I have the same problem.
I can defrost by turning the clock manually and heater works.
problem.
Parts Used:
-
Eddie from BRONSTON, KY
-
Difficulty Level:Very Easy
-
Total Repair Time:Less than 15 mins
1 person
found this instruction helpful.
Was this instruction helpful to you?
Thank you for voting!
3 screws
Ice maker fit perfectly over 2 top screws. I tightened them and put the one on the bottom. I was done in less than 10minutes. Everything fit perfectly as expected. Couldn't have been eaiser. Parts Select is my go to online store.
Parts Used:
-
Michael from SALINA, KS
-
Difficulty Level:Very Easy
-
Total Repair Time:Less than 15 mins
-
Tools:Nutdriver
1 person
found this instruction helpful.
Was this instruction helpful to you?
Thank you for voting!