















GR9SHKXKB01 Whirlpool Refrigerator - Instructions
Keep searches simple. Use keywords, e.g. "leaking", "pump", "broken" or "fit".
Replacing the bulb in the freezer side
Removed the ice brucket,
Removed the light shield by releasing one screw using a nutdriver.
Replacing the bulb and reinstalled the light shield.
Your web site is one of the best and most helpfull service sites I ever used. Just wish that in the future you will ship parts overseas.
Removed the light shield by releasing one screw using a nutdriver.
Replacing the bulb and reinstalled the light shield.
Your web site is one of the best and most helpfull service sites I ever used. Just wish that in the future you will ship parts overseas.
Parts Used:

-
Yafa (and David) from Bothell, WA
-
Difficulty Level:Easy
-
Total Repair Time:Less than 15 mins
-
Tools:Nutdriver
5 of 11 people
found this instruction helpful.
Was this instruction helpful to you?
Thank you for voting!
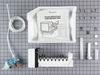
ordered a new ice maker, new refrigerator did not come with one.
I watched the video that was included with my on line order, it was helpful, although different model shown . I would say it was not difficult to install, the enclosed instructions were a bit confusing.
Parts Used:
-
Scott from ROCHESTER, NY
-
Difficulty Level:Easy
-
Total Repair Time:30 - 60 mins
-
Tools:Nutdriver, Screw drivers, Wrench (Adjustable)
2 of 2 people
found this instruction helpful.
Was this instruction helpful to you?
Thank you for voting!
install ice maker with all parts for refridgerator with no ice cube hardware on it.
-
Vincent from THE VILLAGES, FL
-
Difficulty Level:Really Easy
-
Total Repair Time:1- 2 hours
-
Tools:Nutdriver, Pliers, Screw drivers, Socket set, Wrench (Adjustable)
2 of 2 people
found this instruction helpful.
Was this instruction helpful to you?
Thank you for voting!
Drain clogging causing water to leak bottom of fridge
After watching videos how to replace went very easy.removed ice maker cut wires replaced switch put back together now working ok so far.
Parts Used:

-
Ted C from DSRT HOT SPGS, CA
-
Difficulty Level:Really Easy
-
Total Repair Time:15 - 30 mins
-
Tools:Nutdriver
2 of 2 people
found this instruction helpful.
Was this instruction helpful to you?
Thank you for voting!
Freezer Bulb failed
-
Kevin from SWANVILLE, ME
-
Difficulty Level:Very Easy
-
Total Repair Time:Less than 15 mins
3 of 5 people
found this instruction helpful.
Was this instruction helpful to you?
Thank you for voting!
ice maker
-
Ann from MC CUNE, KS
-
Difficulty Level:Really Easy
-
Total Repair Time:30 - 60 mins
2 of 2 people
found this instruction helpful.
Was this instruction helpful to you?
Thank you for voting!
The door shelf brace was missing.
I snapped the two end caps into the shelf rail and pushed it into place on the bottom of the inside door.Tolls were not needed as it was a perfect fit.
Parts Used:


-
Gary from COLUMBUS, OH
-
Difficulty Level:Really Easy
-
Total Repair Time:Less than 15 mins
2 of 2 people
found this instruction helpful.
Was this instruction helpful to you?
Thank you for voting!
OLDER Ice Maker on the fritz
Grat help on the phone. We saw repair on YouTube. my wife and I worked it together. It was child's play!! It went beautifully. we were able to "chill out" with ice aplenty!!Thanks...eric
Parts Used:
-
Eric S from Boca Raton, FL
-
Difficulty Level:Really Easy
-
Total Repair Time:15 - 30 mins
-
Tools:Nutdriver, Wrench set
6 of 14 people
found this instruction helpful.
Was this instruction helpful to you?
Thank you for voting!
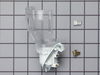
Faulty light socket
-
Larry from HOUSTON, TX
-
Difficulty Level:Very Easy
-
Total Repair Time:15 - 30 mins
-
Tools:Screw drivers
3 of 5 people
found this instruction helpful.
Was this instruction helpful to you?
Thank you for voting!
Crisper drawer rail broken at one end
The rail just snapped into place with a light pressure. I worried it would require manipulation or heavy pressure and I would break the end while installing it.
Parts Used:

-
MARTY from GREAT FALLS, MT
-
Difficulty Level:Very Easy
-
Total Repair Time:30 - 60 mins
2 of 2 people
found this instruction helpful.
Was this instruction helpful to you?
Thank you for voting!
Ice buildup in freezer causing leaking water into fridge section
In my case the defrost thermostat was not the problem. Not worth going through the hassle of checking the thermostat as I would have had to cut it out and test it in another freezer (while the food that was in the freezer was being stored elsewhere). I just ended up buying it and replacing it. So, like I said the defrost thermostat was NOT the issue. I ended up getting a drain tube heater strap, and have been keeping my eye on the fridge. It hasn't been long enough to say the strap fixed the problem, but all indications are pointing to that being the case.
Parts Used:
-
Diane from Brighton, MI
-
Difficulty Level:Very Easy
-
Total Repair Time:30 - 60 mins
-
Tools:Nutdriver, Pliers
2 of 2 people
found this instruction helpful.
Was this instruction helpful to you?
Thank you for voting!
Door light switch disintegrated
Very simple fix, remove 3 screws, two connectors to the old switch
Parts Used:

-
Thomas from Roseville, CA
-
Difficulty Level:Really Easy
-
Total Repair Time:Less than 15 mins
-
Tools:Screw drivers
2 of 2 people
found this instruction helpful.
Was this instruction helpful to you?
Thank you for voting!
fridge door switch did not work
I removed the switch housing (4 screws), replacing the switch in the housing was a snap. It took 5 minutes, cost $8 and light works like new!
Why didn't I order this part and do the repair earlier? Very simple.
Why didn't I order this part and do the repair earlier? Very simple.
Parts Used:
-
stu from richmond, VA
-
Difficulty Level:Easy
-
Total Repair Time:Less than 15 mins
-
Tools:Socket set
2 of 2 people
found this instruction helpful.
Was this instruction helpful to you?
Thank you for voting!
Light didnt go on
The light rocker switch wasnt working. I found the part on the web site. It was so easy. I used a screw driver to pop out the old one and pop the new one in. It took 5 min. Thanks!!!
Parts Used:
-
dorotea from staten island, NY
-
Difficulty Level:Really Easy
-
Total Repair Time:Less than 15 mins
-
Tools:Screw drivers
3 of 5 people
found this instruction helpful.
Was this instruction helpful to you?
Thank you for voting!
Refrigerator light would not turn on.
I first replaced the switch and had no results, I then ordered the Light Socket Kit, and because I had the experience of removing the panel to replace the switch, it took a few minutes to remove the two screws behind the panel, removing the temperature control knobs and then releasing the face plate which is secured by tabs at the bottom. The kit came with extra connectors in case they were needed, but they were not in my case and so I pulled off the wires, pushed the old socket out and the new one in. Attaching the wires to the correct pins, I screwed in the light bulb to be sure that the fix was correct and determining that, I replaced the screws that held the panel in place. Voila, I'm a happy camper who found some outdated jars in the back corners of the newly lighted shelves.
Parts Used:
-
Suzanne from STERLING HTS, MI
-
Difficulty Level:Really Easy
-
Total Repair Time:Less than 15 mins
-
Tools:Nutdriver
3 of 6 people
found this instruction helpful.
Was this instruction helpful to you?
Thank you for voting!