















GMB939JC119 General Electric Dishwasher - Instructions
Keep searches simple. Use keywords, e.g. "leaking", "pump", "broken" or "fit".
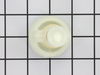
dishwasher didn't drain
took out 4 screws pulled piston out and changed put back together. very easy and inexpensive!! thanks
Parts Used:
-
JACALYN from TREVOR, WI
-
Difficulty Level:Really Easy
-
Total Repair Time:15 - 30 mins
-
Tools:Socket set
1 person
found this instruction helpful.
Was this instruction helpful to you?
Thank you for voting!
1-2 inches standing water at end of cycle.
Remove shield in rear. Unscrew valve using hand. Screw new valve in place.
Parts Used:
-
Ernest from Johnson City, NY
-
Difficulty Level:Really Easy
-
Total Repair Time:15 - 30 mins
-
Tools:Nutdriver
1 person
found this instruction helpful.
Was this instruction helpful to you?
Thank you for voting!
Dishwasher wouldn't drain completely between cycles, causing it to overflow.
First I opened the dishwasher and removed the lower basket. Next I removed the 4 screws that hold the food filter plate in place at the back of the tub. Then I unscrewed the Piston/Check Valve assembly counterclockwise, located at the back center of the tub, by hand. I replaced the old part with the new one and reinstalled the filter plate. I ran a rinse cycle to verify that that all of the water was purged. Finally, I reinstalled the lower basket and resumed using my dishwasher.
Parts Used:
-
Ohlen from Springfield, SC
-
Difficulty Level:Really Easy
-
Total Repair Time:Less than 15 mins
-
Tools:Nutdriver
1 person
found this instruction helpful.
Was this instruction helpful to you?
Thank you for voting!
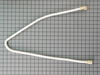
Had a leak in the line from the pump underneath up to the spayer attachment on the top.
Replaced the old hose with new one; very inexpensive part, only cost me 10 dollars. Way better than replacing the entire dish washer. Thank you so much for providing the "do it yourselfer" the items for simple and easy tasks. :)
Parts Used:
-
dan from NACOGDOCHES, TX
-
Difficulty Level:Very Easy
-
Total Repair Time:Less than 15 mins
-
Tools:Screw drivers
1 person
found this instruction helpful.
Was this instruction helpful to you?
Thank you for voting!
Dishwasher would not drain completly after each cycle
removed screen at back of dishwasher from the inside. Twisted piston & nut assembly out by hand and replaced with new one. Very, very simple. Dishwasher works perfectly now.
Parts Used:
-
joel from Allendale, MI
-
Difficulty Level:Really Easy
-
Total Repair Time:Less than 15 mins
-
Tools:Nutdriver
1 person
found this instruction helpful.
Was this instruction helpful to you?
Thank you for voting!
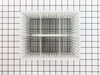
Replace dishwasher basket
Pulled out old basket with holes at bottom and replaced it with new basket. Perfect fit!
Parts Used:
-
Kim from DETROIT, MI
-
Difficulty Level:Very Easy
-
Total Repair Time:Less than 15 mins
1 person
found this instruction helpful.
Was this instruction helpful to you?
Thank you for voting!
Dishwasher not draining and not getting dishes completely clean.
First I removed the bottom dishwasher rack. Using a 1/4" nutdriver I removed (4) 1/4" screws from the drain cover that is inside the dishwasher all the way in the back. This will allow you to get to the piston and nut assembly which was easily removed with no tools by simply grasping and unscrewing. Used a wash cloth to wipe "gunk" from around the threads. I then screwed the new piston and nut assembly in place. Used no tools to tighten, just "snug up" by hand. The seal on my old piston and nut assembly was 50 percent gone, not sealing at all. I guess the years had taken their toll. This solved my problem. The dishwasher washes and drains as it should. Super easy fix. Took me about 10 minutes to do the repair.
Parts Used:
-
John W. from SEMMES, AL
-
Difficulty Level:Very Easy
-
Total Repair Time:Less than 15 mins
-
Tools:Nutdriver
1 person
found this instruction helpful.
Was this instruction helpful to you?
Thank you for voting!
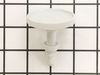
Fill Cap Just Keep Turning, Not Locking In Place
-
Broggie from Burlington, NJ
-
Difficulty Level:Really Easy
-
Total Repair Time:Less than 15 mins
6 of 16 people
found this instruction helpful.
Was this instruction helpful to you?
Thank you for voting!
Inch Of Clean Water Left In Machine After Each Cycle
First let me say, it's so easy even a caveman can do it. I removed the water out of the bottom. Then I removed the cover in the very back of the machine with a wrench. As soon as I did that, I could see the piston. Next, I twisted the white piston out with my fingers (this was the hardest part). I could see the piston had partially disintigrated. I ordered a new one, had it delivered in a few days, and put it all back in reverse. It took minutes. Thanks to the guy that posted his story, I was able to fix mine for $18.
Parts Used:
-
LINDY from COLORADO SPRINGS, CO
-
Difficulty Level:Really Easy
-
Total Repair Time:Less than 15 mins
-
Tools:Wrench (Adjustable)
1 person
found this instruction helpful.
Was this instruction helpful to you?
Thank you for voting!
standing water at the bottom of the dishwasher
remove the screen at the back bottom of dishwaser. (4 screws). Unthread piston and and nut assembly for check valve....thread in new one.
Problem solved....no more water $10 part....no repair person !!!
Problem solved....no more water $10 part....no repair person !!!
Parts Used:
-
renee from shelby twp, MI
-
Difficulty Level:Really Easy
-
Total Repair Time:15 - 30 mins
-
Tools:Socket set, Wrench set
1 person
found this instruction helpful.
Was this instruction helpful to you?
Thank you for voting!
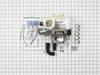
leak between motor and pump housing
repair kit was complete and directions were easy to follow. my model of dishwasher disnt even require any of the adapters. really only required removing a couple of clamps and replacing everything as a single unit
Parts Used:
-
kevin from longmont, CO
-
Difficulty Level:Really Easy
-
Total Repair Time:30 - 60 mins
-
Tools:Nutdriver, Pliers, Screw drivers
1 person
found this instruction helpful.
Was this instruction helpful to you?
Thank you for voting!
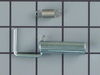
Would not drain
The repair kit solenoid was mounted in a metal bracket. My unit has the solenoid and mounting bracket as one piece. If the solenoid was separate it would have been an easy fix. As it was I had to cut the solenoid out of the bracket to mount it in my unit which this kit was suppose to fit.
Parts Used:
-
David from Doylestown, OH
-
Difficulty Level:A Bit Difficult
-
Total Repair Time:30 - 60 mins
-
Tools:Nutdriver
3 of 7 people
found this instruction helpful.
Was this instruction helpful to you?
Thank you for voting!
water would not pump out of machine
-
clyde from DUNCANNON, PA
-
Difficulty Level:Really Easy
-
Total Repair Time:30 - 60 mins
-
Tools:Nutdriver
1 person
found this instruction helpful.
Was this instruction helpful to you?
Thank you for voting!
Pump seal was leaking
I disconnected the power shut off water supply. I then removed the drain hoses and water supply to the old pump. I removed the ground wire and the mounting rod to the old pump. Once removed, I followed the easy illustrated diagrams and instructions that came with the replacement pump.
I mounted the new pump using the supplied hardware and reconnected suply line and drain hose. I turned water supply and power back on. Ran a test cycle before reinserting under countertop. Amazingly quiet and no leaks. Repair a success.
I would use this service again if needed for additonal home appliances.
Thank you
Mr. Buddy King
I mounted the new pump using the supplied hardware and reconnected suply line and drain hose. I turned water supply and power back on. Ran a test cycle before reinserting under countertop. Amazingly quiet and no leaks. Repair a success.
I would use this service again if needed for additonal home appliances.
Thank you
Mr. Buddy King
Parts Used:
-
Buddy from Danville, IL
-
Difficulty Level:Really Easy
-
Total Repair Time:1- 2 hours
-
Tools:Nutdriver, Pliers, Screw drivers
1 person
found this instruction helpful.
Was this instruction helpful to you?
Thank you for voting!
End of cycle water in bottom of nDishwasher
Removed screen bottom rear andfound a plunger type part, unscrewed plunger and found it was distressed around it and did not close of a tight seal. Placed new part into location and dishwasher now proforms perfect...
Parts Used:
-
Bonita from Alexandria, VA
-
Difficulty Level:Easy
-
Total Repair Time:30 - 60 mins
-
Tools:Screw drivers
1 person
found this instruction helpful.
Was this instruction helpful to you?
Thank you for voting!