















GLRT188WDB4 Frigidaire Refrigerator - Instructions
Keep searches simple. Use keywords, e.g. "leaking", "pump", "broken" or "fit".
unit was in storage,froze and broke the housing
First I removed the cover for the filter.(long nut driver) then the two screws holding the filter housing, held the retaining plungers in, and removed the filter housing. Then reversed the process and put it all back together. Simple.
Parts Used:
-
Richard from Paris, IL
-
Difficulty Level:Really Easy
-
Total Repair Time:30 - 60 mins
-
Tools:Nutdriver, Screw drivers
6 of 9 people
found this instruction helpful.
Was this instruction helpful to you?
Thank you for voting!
The replacement substitute stipulated and shipped to us was not compatible with this appliance.
After receipt of the incompatible LED bulb, customer service gave us the phone # of Frigidaire and they helped us to get the correct LED for this appliance. We returned the incorrect bulb to parts Select and are now waiting for a credit to our account at this point. It’s been a long process but our Frigidaire at least is now lighted.
Parts Used:
-
Gary from CAMAS, WA
-
Difficulty Level:Difficult
-
Total Repair Time:More than 2 hours
5 of 6 people
found this instruction helpful.
Was this instruction helpful to you?
Thank you for voting!
Ice maker line was freezing
Pulled the unit out from the wall and with a flat head screwdriver and a utility knife I replaced the valve assembly. It was no problem at all.
Parts Used:
-
John from Ellsworth, WI
-
Difficulty Level:Easy
-
Total Repair Time:15 - 30 mins
-
Tools:Screw drivers
5 of 6 people
found this instruction helpful.
Was this instruction helpful to you?
Thank you for voting!
water filter was 2 years old
I unscrewed the cover, took out old filter, put in new filter and replaced cover. End of story. Oh...don't forget to turn off the incoming water supply.
Parts Used:
-
James from scottsville, KY
-
Difficulty Level:Really Easy
-
Total Repair Time:Less than 15 mins
5 of 6 people
found this instruction helpful.
Was this instruction helpful to you?
Thank you for voting!
Broken Plastic Edge
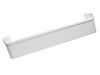
-
Julie L from Eureka, CA
-
Difficulty Level:Easy
-
Total Repair Time:Less than 15 mins
6 of 9 people
found this instruction helpful.
Was this instruction helpful to you?
Thank you for voting!
unit quit cooling
First I removed the two screws that hold the element in place. I then pulled the element out about 3 inches and disconnected the wiring harness plug, replaced the old timer with the new one, re-connected the wiring harness and reinstalled the mount in position. Hardest thing about it was lying on the floor.
Parts Used:
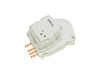
-
Steve from Cedar Park, TX
-
Difficulty Level:Really Easy
-
Total Repair Time:Less than 15 mins
-
Tools:Screw drivers
5 of 6 people
found this instruction helpful.
Was this instruction helpful to you?
Thank you for voting!
fan motor quit working
A little difficult getting out due to restricted space, I took off the fan blade, that gave extra working room. Then it went well going back together,and it all worked as advertised. Thanks. p
Parts Used:
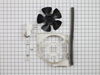
-
Phillip from SUNDANCE, WY
-
Difficulty Level:Really Easy
-
Total Repair Time:30 - 60 mins
-
Tools:Nutdriver, Pliers, Screw drivers, Socket set, Wrench (Adjustable)
4 of 4 people
found this instruction helpful.
Was this instruction helpful to you?
Thank you for voting!
Freezer was not defrosting
Turned off fridge circuit breaker
Removed all food from freezer and put in cooler.
Removed shelves from freezer
Removed ice maker
Removed 2 hex head screws
Tilted back evaporator cover and tried to unplug connection.
Found connection was iced over with a huge block of ice coming from water inlet to ice maker
Spent several hours trying to melt and chip away ice without damaging fridge.
Finally was able to break up ice with long flat head screwdriver and hammer.
Unplugged connector and was able to remove evaporator cover.
Cut wires near thermostat and removed
Stripped wire as needed and crimped new thermostat in place.
Used heat gun and lighter to melt heat shrink. This took a long time and required a lot more heat than expected.
Reconnected evaporator cover connection and reattached cover.
Reinstalled ice maker
Reinstalled shelves.
Put food back in
Turned circuit breaker back on.
Removed all food from freezer and put in cooler.
Removed shelves from freezer
Removed ice maker
Removed 2 hex head screws
Tilted back evaporator cover and tried to unplug connection.
Found connection was iced over with a huge block of ice coming from water inlet to ice maker
Spent several hours trying to melt and chip away ice without damaging fridge.
Finally was able to break up ice with long flat head screwdriver and hammer.
Unplugged connector and was able to remove evaporator cover.
Cut wires near thermostat and removed
Stripped wire as needed and crimped new thermostat in place.
Used heat gun and lighter to melt heat shrink. This took a long time and required a lot more heat than expected.
Reconnected evaporator cover connection and reattached cover.
Reinstalled ice maker
Reinstalled shelves.
Put food back in
Turned circuit breaker back on.
Parts Used:
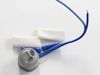
-
David from N KINGSTOWN, RI
-
Difficulty Level:A Bit Difficult
-
Total Repair Time:More than 2 hours
-
Tools:Nutdriver, Pliers, Screw drivers
4 of 4 people
found this instruction helpful.
Was this instruction helpful to you?
Thank you for voting!
Wanted to change water filter to assure the best tasting water and ice
Simply unscrewed cover on water filter and pulled old filter out. New filter comes with o-ring on filter. Simply reversed procedure and installed new filter.
Parts Used:
-
Terry from Medina, TN
-
Difficulty Level:Really Easy
-
Total Repair Time:Less than 15 mins
6 of 10 people
found this instruction helpful.
Was this instruction helpful to you?
Thank you for voting!
8 loud pops and then dump ice .
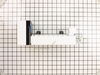
Turn off power. Remove ice tray. Back out the two screws with nut driver and just lift ice maker off screws. Do not bend the water fill tube in the back . Now unplug the wire and remove ice maker .
To replace, match the color of wires on plug. Adjust wires in place and water fill tube and back on to the screws. Hold in place and snug screws. Turn power back on. In 4 to 5 hours your ice will start .
FED-EX UT to MN was 13 days to deliver .
To replace, match the color of wires on plug. Adjust wires in place and water fill tube and back on to the screws. Hold in place and snug screws. Turn power back on. In 4 to 5 hours your ice will start .
FED-EX UT to MN was 13 days to deliver .
Parts Used:
-
Douglas from INVER GROVE, MN
-
Difficulty Level:Very Easy
-
Total Repair Time:Less than 15 mins
-
Tools:Nutdriver
4 of 4 people
found this instruction helpful.
Was this instruction helpful to you?
Thank you for voting!
Broken Crisper Glass
Very easy. Watched a video on your site prior to getting the glass replacement. Removed the crisper drawers. Placed the glass in the front and placed it down. Took just a few minutes. Love your site and will come back again when needed. Thank-you.
Parts Used:

-
Wendy from OCALA, FL
-
Difficulty Level:Very Easy
-
Total Repair Time:Less than 15 mins
4 of 4 people
found this instruction helpful.
Was this instruction helpful to you?
Thank you for voting!
Light bulb went out
-
Brenda from JONESBORO, GA
-
Difficulty Level:Very Easy
-
Total Repair Time:Less than 15 mins
4 of 4 people
found this instruction helpful.
Was this instruction helpful to you?
Thank you for voting!
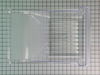
Accidently dropped the crisper drawer and it broke on the left front corner.
We received the crisper drawer in magnificent time and unpacked it and washed it and dryed it, and just slid it into the refrigerator. Thank you for your very prompt service.!!!!!!!
Parts Used:
-
Carol from ROCKVILLE, IN
-
Difficulty Level:Very Easy
-
Total Repair Time:Less than 15 mins
5 of 7 people
found this instruction helpful.
Was this instruction helpful to you?
Thank you for voting!
There was no problem with the installation just finding out what was wrong with it not making ice
Replaced bad parts with new parts it went easy
Parts Used:
-
Michael from CANON, GA
-
Difficulty Level:Very Easy
-
Total Repair Time:30 - 60 mins
-
Tools:Nutdriver, Wrench (Adjustable)
6 of 10 people
found this instruction helpful.
Was this instruction helpful to you?
Thank you for voting!
Icemaker worked sporadically, infrequently, not at all
Not knowing the history of the refrigerator/freezer and observing that the icemaker would cycle (ice ejector fingers would rotate when the off/on arm was toggled), I concluded that the water valve must have some hard water scale in it which was causing it to stick. I replaced the water valve and the exact same behavior continued. By elimination, I concluded that the microswitch in the icemaker must be sticking. I removed the icemaker, used a hair blow-dryer to heat/dry out the microswitches and then a little shot of WD-40 on the mechanical arms, switches, and cams fixed it.
Parts Used:
-
Allen from Palmer Lake, CO
-
Difficulty Level:Easy
-
Total Repair Time:More than 2 hours
-
Tools:Nutdriver, Screw drivers, Wrench (Adjustable)
5 of 7 people
found this instruction helpful.
Was this instruction helpful to you?
Thank you for voting!