















GLGF376DQF Frigidaire Range - Instructions
Keep searches simple. Use keywords, e.g. "leaking", "pump", "broken" or "fit".
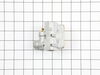
Regulator had propane leak past diaphragm
removed two screws disconnected inlet pipe and two outlet pipes, removed regulator. Replaced with new regulator. performed leak Test.
Parts Used:
-
Albern from Bainbridge IS., WA
-
Difficulty Level:Easy
-
Total Repair Time:30 - 60 mins
-
Tools:Nutdriver, Wrench set
14 of 19 people
found this instruction helpful.
Was this instruction helpful to you?
Thank you for voting!
Oven would not ignite, gas smell, igniter glows
Disconnected power, I removed the igniter from oven. Measured the resistance (275 ohms) and then the current draw. DO NOT ATTEMPT THIS UNLESS YOU ARE ABLE TO ACCOMPLISH THIS SAFELY. I made a harness and connected the old igniter to 110 V ac, Current draw thru the meter settled at 2.7 Amps. Too weak to fully open gas valve. Valve requires 3.2 - 3.6 amps to fully operate properly. New igniter measured 300 ohms and current draw was 3.4 amps. Installed new part and everything works fine. Correct part and good service from this site
Parts Used:

-
John from PORT JEFF STA, NY
-
Difficulty Level:Really Easy
-
Total Repair Time:30 - 60 mins
-
Tools:Nutdriver, Screw drivers, Socket set
11 of 13 people
found this instruction helpful.
Was this instruction helpful to you?
Thank you for voting!
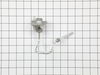
Right front ignitor would not light
Removed grates and range cover, unscrewed all sheet metal screws and removed cover plate. Disconnect electrical connector and then removed old ignitor/orifice ass and replaced it with the new one. Replaced all screws in cover plate and then reattached range cover and grates. Turned on the gas and it lit after a few sparks took place.
Parts Used:
-
Terry from Acton, MA
-
Difficulty Level:A Bit Difficult
-
Total Repair Time:30 - 60 mins
-
Tools:Nutdriver, Pliers, Screw drivers
12 of 16 people
found this instruction helpful.
Was this instruction helpful to you?
Thank you for voting!
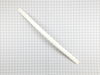
Broken oven door handle
I made the repair by removing two screws from the ends of the handle that were attached to the oven door and then reattaching the $88 plastic oven door handle with the same screws in the existing holes. At that price the door handle and I both got screwed very well!
Parts Used:
-
Richard from Hagerstown, MD
-
Difficulty Level:Really Easy
-
Total Repair Time:Less than 15 mins
-
Tools:Screw drivers
12 of 16 people
found this instruction helpful.
Was this instruction helpful to you?
Thank you for voting!
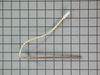
Oven would kick off after preheating to temp.
Sensor very accessible. Pull off the back panel, disconect the sensor and slide out from back of oven. The original plug was cut off the sensor, as well as the new one to get the proper connector type on the new sensor. Soldered and heat shrink, and presto we had our new sensor ready for install. Install was about 5 minutes which included putting the back panel on the range. Pretty easy and works like new. Total time for project was about 20 minutes.
Parts Used:
-
Mary from Castle Rock, CO
-
Difficulty Level:Easy
-
Total Repair Time:15 - 30 mins
-
Tools:Nutdriver
12 of 18 people
found this instruction helpful.
Was this instruction helpful to you?
Thank you for voting!
broken ceramic burner element
Simple: remove the element by hand and replace new one.
I can't believe how quickly I received my new part -literally next day.
I can't believe how quickly I received my new part -literally next day.
Parts Used:
-
Phillip from Saint Simons Island, GA
-
Difficulty Level:Really Easy
-
Total Repair Time:Less than 15 mins
9 of 12 people
found this instruction helpful.
Was this instruction helpful to you?
Thank you for voting!
Oven light bulb went dark; it needed replacing

-
Lise from CEDAR GROVE, NJ
-
Difficulty Level:Very Easy
-
Total Repair Time:Less than 15 mins
10 of 17 people
found this instruction helpful.
Was this instruction helpful to you?
Thank you for voting!
the new burners had no threads for the screws
had to use a tap and cut new threads. Also had to remove the top of the range, and the metal cover under the top.
Parts Used:
-
Steve from NORTH PEKIN, IL
-
Difficulty Level:A Bit Difficult
-
Total Repair Time:30 - 60 mins
-
Tools:Nutdriver, Screw drivers, Wrench (Adjustable)
6 of 6 people
found this instruction helpful.
Was this instruction helpful to you?
Thank you for voting!
Refrigerator Light bulb went out
I replaced the bulb using my hands to twist the bulb in the socket located at the top of the refrigerator.
Parts Used:
-
ANGELA from MEBANE, NC
-
Difficulty Level:Very Easy
-
Total Repair Time:Less than 15 mins
7 of 10 people
found this instruction helpful.
Was this instruction helpful to you?
Thank you for voting!
broken lens over oven light
Your service was OUTSTANDING...Ordered one afternoon, and before lunch time the next day, the delivery man rang my door bell...Thanks a bunch for you excellent service.....
Parts Used:
-
Leslie from Warsaw, VA
-
Difficulty Level:Really Easy
-
Total Repair Time:Less than 15 mins
11 of 22 people
found this instruction helpful.
Was this instruction helpful to you?
Thank you for voting!
The bolts holding the readburner were rusted and broke
The range top had to be taken off along with the front panel to get access to the place the burner pipe connects. It took more time to unassemble and assemble the range than repacing the burner. The only issue was that the burner was sent without the bolts that will hold it in place so I had to go to local hardware store to get appropriate bolts.
Parts Used:
-
Neeru from Princeton, NJ
-
Difficulty Level:A Bit Difficult
-
Total Repair Time:30 - 60 mins
-
Tools:Nutdriver, Screw drivers, Wrench set
7 of 12 people
found this instruction helpful.
Was this instruction helpful to you?
Thank you for voting!
burnt in aluminum foil...unable to remove
took the two screws out by hand, slipped out the ruined panel, slid the new one in place, replaced the two screws...simple as that
Parts Used:
-
Michael from Lamoni, IA
-
Difficulty Level:Really Easy
-
Total Repair Time:Less than 15 mins
5 of 6 people
found this instruction helpful.
Was this instruction helpful to you?
Thank you for voting!
Rusted leveling foot
I couldn't unscrew the leveling foot because it was rusted and corroded. The bracket holding it was easy to remove so I took the bracket with the corroded foot off and replaced it with the new foot and bracket. Very simple. I made sure I oiled it so it wouldn't rust again.
Parts Used:

-
Melinda from Three Rivers, MA
-
Difficulty Level:Really Easy
-
Total Repair Time:Less than 15 mins
-
Tools:Pliers, Screw drivers, Socket set, Wrench (Adjustable)
6 of 9 people
found this instruction helpful.
Was this instruction helpful to you?
Thank you for voting!
Broken ; oven door inner glass
Watched the repair video on your web site. Used the video as a step by step guide in the actual repair.
Parts Used:
-
Garland Futrell from CHESAPEAKE, VA
-
Difficulty Level:Very Easy
-
Total Repair Time:1- 2 hours
-
Tools:Screw drivers, Socket set
5 of 6 people
found this instruction helpful.
Was this instruction helpful to you?
Thank you for voting!
Replaced Bake Burner Tube on Frigidaire Gas Range Model FGGF3058RFC
The installation of the bake burner tube went well. I followed the instructions within the Video as it pertains to replacing the Bake igniter. That video also describes the removal and replacement of the bake burner tube. The original screws that mounted the igniter to the burner tube bracket were damaged. I replaced them with 18-8 Stainless Steel Serrated-Flange Hex Head Screws, 8-32 Thread Size, 3/8" long. As noted in the video, the oven bottom panel is removed using a flat head screwdriver. For all other screws I used a 1/4" socket and ratchet. A Nut Driver would have also worked just as well. On initial start-up after the repair there was a minor light odor from the flame coming into contact with the new metal burner tube that dissipated within a few moments. In all everything went very well.
Parts Used:
-
william from CLINTON TWP, MI
-
Difficulty Level:Easy
-
Total Repair Time:1- 2 hours
-
Tools:Screw drivers, Socket set
4 of 4 people
found this instruction helpful.
Was this instruction helpful to you?
Thank you for voting!