















GI5FSAXVB00 Whirlpool Refrigerator - Instructions
Keep searches simple. Use keywords, e.g. "leaking", "pump", "broken" or "fit".
Fridge would not close left door or close very hard
Replaced mullion and pivot block
The pivot block and the mullion showed signs of wear and tear where they would meet up to close the left door.
The pivot block and the mullion showed signs of wear and tear where they would meet up to close the left door.
Parts Used:

-
Gustav from CORTE MADERA, CA
-
Difficulty Level:Really Easy
-
Total Repair Time:15 - 30 mins
-
Tools:Screw drivers, Wrench set
4 of 4 people
found this instruction helpful.
Was this instruction helpful to you?
Thank you for voting!
Existing Door gasket was cracked allowing the magnetic strips to fall out
Very easy. Just get hold of the gasket with your strong fingers and pull it out of the groove it is in. Clean the groove, I used Windex and paper towels. On the new gasket there are 2 wide areas on the vertical part. these must be facing toward you and on the handle side of the door. start at the tor center of the door and work the gasket in with your fingers outward to the corners then work on the bottom of the gasket in the same manner, then start on the vertical gaskets. when you think every thing is aligned take your thumbs and press very hard all around. You may have to repeat.
Parts Used:
-
Les from N LITTLE ROCK, AR
-
Difficulty Level:Very Easy
-
Total Repair Time:15 - 30 mins
4 of 4 people
found this instruction helpful.
Was this instruction helpful to you?
Thank you for voting!
Left door bar too close to squeeze in seal.
Since it wasn't possible to squeeze the seal in between the door groove and the bar which closes the gap between the two doors, I cut the seal side in half and snaked it in from the top and the bottom. Since the cut is behind the bar when the door is closed there is no compromise in getting a good seal around the door. Note there was no apparent way to easily remove this bar.
Parts Used:
-
Jim from FORT MYERS, FL
-
Difficulty Level:A Bit Difficult
-
Total Repair Time:15 - 30 mins
4 of 4 people
found this instruction helpful.
Was this instruction helpful to you?
Thank you for voting!
broken plastic hinge pieces
one screw and electric plug and the unit slide out. Slide the new one in and your ready to go.
Parts Used:
-
Claude from Laguna Niguel, CA
-
Difficulty Level:Really Easy
-
Total Repair Time:Less than 15 mins
-
Tools:Nutdriver
5 of 7 people
found this instruction helpful.
Was this instruction helpful to you?
Thank you for voting!
Wife used vacuum cleaner and busted blade off fan
Instructions were great five minutes to remove and replace fan....Thank You............ saved big money
Parts Used:
-
Robert from GOSHEN, IN
-
Difficulty Level:Really Easy
-
Total Repair Time:Less than 15 mins
-
Tools:Screw drivers
4 of 4 people
found this instruction helpful.
Was this instruction helpful to you?
Thank you for voting!
Tear in the magnetic seal
Layer it out for 24 hrs used hairdryer on med for the wrenkles.
Parts Used:
-
Pete from Madison, OH
-
Difficulty Level:Very Easy
-
Total Repair Time:Less than 15 mins
4 of 4 people
found this instruction helpful.
Was this instruction helpful to you?
Thank you for voting!
A cover over the water filter was broken
The old cover was off and I just slid the replacement part that I got from you'll, it just slid in place and snapped close. Perfect fit. Thanks guys
Parts Used:
-
Jerry from MIDLOTHIAN, VA
-
Difficulty Level:Very Easy
-
Total Repair Time:Less than 15 mins
4 of 5 people
found this instruction helpful.
Was this instruction helpful to you?
Thank you for voting!
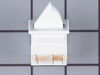
Broken light switch
Watched video. Unplugged refrigerator and popped out switch. In plugged connector and pushed switch in place. Plugged in refrigerator and the light worked
Parts Used:
-
Terry from WARMINSTER, PA
-
Difficulty Level:Really Easy
-
Total Repair Time:15 - 30 mins
-
Tools:Screw drivers
4 of 5 people
found this instruction helpful.
Was this instruction helpful to you?
Thank you for voting!
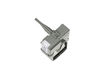
intermittent clicking noise; otherwise fridge seemed to be working fine
Googled "intermittent clicking noise" or something similar and consensus was it was either the capacitor or compressor start relay. You-tubed videos on how to replace these. Looked easy. Just unplug them from the condenser and replace. Contacted Part Select and staff said 50% of the the time it was the capacitor, 50% of the time it was the relay. I was in a time crunch so I ordered both and they came in a couple of days. I replaced the capacitor but the clicking noise continued. I replaced the relay and problem solved! Maybe I could have gotten away with just replacing the relay, but I had them both by then and figured with a 10 year old fridge, better replace them both at the same time and be done with the problem. So far, so good.
Parts Used:

-
Peter from EUGENE, OR
-
Difficulty Level:Really Easy
-
Total Repair Time:15 - 30 mins
-
Tools:Pliers
4 of 5 people
found this instruction helpful.
Was this instruction helpful to you?
Thank you for voting!
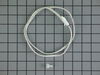
FREEZER WOULD NOT DEFROST.
I initially tested the heating element and defrost thermostat using an ohm meter. the defrost thermostat was incased in ice, so I replaced it first. The refridgerator worked for about a week and then froze up again. I then replaced the thermistor and the unit is working as designed.
Parts Used:
-
JEFF from SEATTLE, WA
-
Difficulty Level:Really Easy
-
Total Repair Time:30 - 60 mins
-
Tools:Nutdriver, Screw drivers
4 of 5 people
found this instruction helpful.
Was this instruction helpful to you?
Thank you for voting!
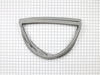
Freezer door leaking on floor.
Open and remove door by loosening two screws on both sides of the door. Lift up and away the door.place the door on flat surface, grab and lift up on seal pulling out of reach. Clean track, alone seal on food before pressing in place. Check to make sure seal is set in place. Install door job done.
Parts Used:
-
Jerome from Goldsboro, NC
-
Difficulty Level:Really Easy
-
Total Repair Time:30 - 60 mins
-
Tools:Nutdriver
3 of 3 people
found this instruction helpful.
Was this instruction helpful to you?
Thank you for voting!
Top section warm, but freezer okay.
Popped off the control panel at the top behind the door. Found the thermistor and replaced it, cutting the wires and splicing the new one in. Immediately the warm section of the refrigerator was getting below freezing temperature readings, so the cooling vent was not opening. I put the old one back on and the temperature readings went back to being accurate. So this was not the problem. I believe now that the fan somehow is not blowing enough cold air up. So now I'll probably buy a fan motor and maybe a blade and try that. Otherwise the computer module I priced at $500 so I hope it isn't that. I replace the fan motor a few years ago already.
Parts Used:
-
Christopher from HOMESTEAD, FL
-
Difficulty Level:Easy
-
Total Repair Time:15 - 30 mins
-
Tools:Screw drivers
3 of 3 people
found this instruction helpful.
Was this instruction helpful to you?
Thank you for voting!
Refrigerator freezer stopped cooling
Prior to ordering I removed freezer panel and checked for ice build up and fan functionality. Then removed rear panel cleaned lint from everything pulled front panel vacuumed out the condenser. Plugged back in and all seems to work with the exception of compressor. I have a little experience so googled in model number and your site popped up. I looked up part and the site gave me a percentage loved that. I ordered wish I would have rushed shipping as took about 10 days. Installed in less than 30 minutes and all runs great ??
Parts Used:
-
Robert from COALINGA, CA
-
Difficulty Level:Really Easy
-
Total Repair Time:15 - 30 mins
-
Tools:Nutdriver
3 of 3 people
found this instruction helpful.
Was this instruction helpful to you?
Thank you for voting!
Ice Maker stopped making ice.
Unplug power to refridg/freezer. Removed the screw in rt. rear bottom of ice maker to remove. After removing slightly, unplug pigtail. Remove ice maker completely. Remove large square cover from left side to expose motor. Remove screws to remove motor. Replce with new. Replace ice maker to freezer, plug pigtail back in, put screw back in rt rear bottom, plug refridg/freezer back into power source. Ice was making in about 2 1/2 hours.
Parts Used:
-
Martin from Palm Coast, FL
-
Difficulty Level:Really Easy
-
Total Repair Time:15 - 30 mins
-
Tools:Screw drivers, Socket set
3 of 3 people
found this instruction helpful.
Was this instruction helpful to you?
Thank you for voting!
Snap on cover broke
-
Arja L. from NEWBURY PARK, CA
-
Difficulty Level:Easy
-
Total Repair Time:Less than 15 mins
3 of 3 people
found this instruction helpful.
Was this instruction helpful to you?
Thank you for voting!