















GDF520PMJ0ES General Electric Dishwasher - Instructions
Keep searches simple. Use keywords, e.g. "leaking", "pump", "broken" or "fit".
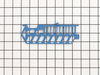
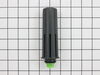
Dish washer wasn't getting the water hot to wash or dry
In did the drain screen, undid two nuts on top, removed panel, undid plastic ring, undid two screws with but driver, pulled sensor up, dried up any water at bottom, installed new sensor and follow steps in reverse. It worked!!!
Parts Used:
-
Daniel from WATERBURY, CT
-
Difficulty Level:Really Easy
-
Total Repair Time:Less than 15 mins
-
Tools:Nutdriver
3 of 3 people
found this instruction helpful.
Was this instruction helpful to you?
Thank you for voting!
Water leak corners of door onto the floor
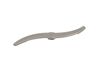
After hours looking for problem. I tried cleaning door gasket. Did not stop leak. Looked at lower water spray arm and it was split. It is literally a 2 minute repair to remove and install. Knock on wood, no leaks in the last 10 washes.
Parts Used:
-
John from Aston, PA
-
Difficulty Level:Really Easy
-
Total Repair Time:Less than 15 mins
3 of 3 people
found this instruction helpful.
Was this instruction helpful to you?
Thank you for voting!
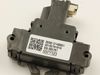
Dish washer would not turn on
took off 2 sheet metal on the bottom, lowered the dish washer, pulled it out enought to unscrew 2 screws, unplugged the old part plugged in the new, put it back together.
Works like a champ.
Works like a champ.
Parts Used:
-
Patrick from BROOKFIELD, WI
-
Difficulty Level:Very Easy
-
Total Repair Time:15 - 30 mins
-
Tools:Screw drivers, Socket set
4 of 6 people
found this instruction helpful.
Was this instruction helpful to you?
Thank you for voting!
The soap dispenser was not opening during the washing cycle
Took off the door and separated the two door pieces. Unscrewed the old dispenser and replaced it with the new one.
Parts Used:
-
Stephanie from Huntsville, AL
-
Difficulty Level:A Bit Difficult
-
Total Repair Time:1- 2 hours
-
Tools:Nutdriver, Pliers, Screw drivers
4 of 7 people
found this instruction helpful.
Was this instruction helpful to you?
Thank you for voting!
Loud banging sound when dishwasher was on.
The base of the spray arm literally just spins a little bit into place like a luer lock. Takes two seconds to replace.
Parts Used:
-
Joseph from KENNEDALE, TX
-
Difficulty Level:Very Easy
-
Total Repair Time:Less than 15 mins
3 of 4 people
found this instruction helpful.
Was this instruction helpful to you?
Thank you for voting!
Old lower rack was rusted
Opened the box took the rack out and placed it in the dishwasher. Good as new.
Parts Used:
-
Russ from SPRING, TX
-
Difficulty Level:Very Easy
-
Total Repair Time:Less than 15 mins
2 of 2 people
found this instruction helpful.
Was this instruction helpful to you?
Thank you for voting!
All 3 spray arms were stoped up.
Replaced all 3 spray arms in less than 10 minutes.The top one came in two pieces,the mounting bracket and the arm.Snap the bracket on the dishwasher first , then attach the arm to the bracket.
Parts Used:
-
Kenneth from SEBRING, FL
-
Difficulty Level:Very Easy
-
Total Repair Time:Less than 15 mins
-
Tools:Screw drivers
3 of 5 people
found this instruction helpful.
Was this instruction helpful to you?
Thank you for voting!
Racks were rusted.
Ordered new parts, unpacked the shipping containers, removed old racks and inserted the new ones. piece of cake. Perfect fit and prompt service.
Parts Used:

-
Charles from MYRTLE BEACH, SC
-
Difficulty Level:Very Easy
-
Total Repair Time:Less than 15 mins
2 of 2 people
found this instruction helpful.
Was this instruction helpful to you?
Thank you for voting!
Original lower rack rusted
-
ANNE from LAKE PLACID, FL
-
Difficulty Level:Really Easy
-
Total Repair Time:Less than 15 mins
2 of 2 people
found this instruction helpful.
Was this instruction helpful to you?
Thank you for voting!
old nasty gasket needed to be replaced
youtube youtube youtube!
No videos for the exact unit, but I got the gist from one video which included the trick of holding the door hinge springs in place with allen wrenches, while the door slid up and away for access to the gasket. I also had to pull the unit out from under the counter by about a foot. No need to disconnect anything. Good luck.
No videos for the exact unit, but I got the gist from one video which included the trick of holding the door hinge springs in place with allen wrenches, while the door slid up and away for access to the gasket. I also had to pull the unit out from under the counter by about a foot. No need to disconnect anything. Good luck.
Parts Used:
-
Peter from N HOLLYWOOD, CA
-
Difficulty Level:Really Easy
-
Total Repair Time:15 - 30 mins
-
Tools:Nutdriver, Pliers
3 of 5 people
found this instruction helpful.
Was this instruction helpful to you?
Thank you for voting!
Old rack had rusted and broken tines
1. Take a picture of the old rack in the dishwasher! Just in case!
2. Remove rail channel end caps and place them on the tabletop on the correct side to make sure you put them back on the correct side.
3. Remove old rack.
4. Carefully snap off the water sprinkling unit. (carefully push down tabs so they don't break).
5. Using your picture as a reference (!) snap the water sprinkling unit on the new rack (it's easy).
6. Put the new rack back onto the rail channel and replace the end caps.
Done! Very easy installation ! Rack was not nearly as expensive as I anticipated and was delivered quickly. Note: You get the rack only. All ot the other parts are from the old unit.
2. Remove rail channel end caps and place them on the tabletop on the correct side to make sure you put them back on the correct side.
3. Remove old rack.
4. Carefully snap off the water sprinkling unit. (carefully push down tabs so they don't break).
5. Using your picture as a reference (!) snap the water sprinkling unit on the new rack (it's easy).
6. Put the new rack back onto the rail channel and replace the end caps.
Done! Very easy installation ! Rack was not nearly as expensive as I anticipated and was delivered quickly. Note: You get the rack only. All ot the other parts are from the old unit.
Parts Used:
-
Andrew from WINONA, MN
-
Difficulty Level:Really Easy
-
Total Repair Time:15 - 30 mins
2 of 2 people
found this instruction helpful.
Was this instruction helpful to you?
Thank you for voting!
Lower dishwasher rack was rusted through
The dishwasher rack was supposed to come with wheels it did not but I was able to use the existing wheels from the lower rack and snap them on was pretty easy
Parts Used:
-
robert from WAUSAU, WI
-
Difficulty Level:Easy
-
Total Repair Time:15 - 30 mins
2 of 2 people
found this instruction helpful.
Was this instruction helpful to you?
Thank you for voting!
Upper rack rusted out
Took out the old and swapped out the parts from the old one and put them on the new rack. Looks great and works great.
Parts Used:
-
James from OMAHA, NE
-
Difficulty Level:Really Easy
-
Total Repair Time:30 - 60 mins
-
Tools:Screw drivers
2 of 2 people
found this instruction helpful.
Was this instruction helpful to you?
Thank you for voting!
Ge Dishwasher was not filling with water
I replaced the Flood Switch Part Number: WD21X10519.
I found that be removing the bottom front cover under dishwasher door, there was a small black plastic clamp holding up the wiring cable. By disconnecting the clamp, it gave me a few more inching of wire inside the machine, which made disconnecting old flood switch easier. It also help in installing the new flood switch. Then finally i reinstall the clamp cable under the machine to finish the job.
I found that be removing the bottom front cover under dishwasher door, there was a small black plastic clamp holding up the wiring cable. By disconnecting the clamp, it gave me a few more inching of wire inside the machine, which made disconnecting old flood switch easier. It also help in installing the new flood switch. Then finally i reinstall the clamp cable under the machine to finish the job.
Parts Used:
-
Robert from DANBURY, CT
-
Difficulty Level:Really Easy
-
Total Repair Time:30 - 60 mins
-
Tools:Nutdriver, Pliers
2 of 2 people
found this instruction helpful.
Was this instruction helpful to you?
Thank you for voting!
Dishwasher dead
Board did not work. The socket for the jumper pins wasn’t installed on the board. Not sure if it was the correct unit. Decided to forget about doing a repair and just replaced the unit
Parts Used:
-
Richard from AMARILLO, TX
-
Difficulty Level:A Bit Difficult
-
Total Repair Time:More than 2 hours
-
Tools:Nutdriver, Screw drivers
2 of 2 people
found this instruction helpful.
Was this instruction helpful to you?
Thank you for voting!