















GCG23YESBFSS General Electric Refrigerator - Instructions
Keep searches simple. Use keywords, e.g. "leaking", "pump", "broken" or "fit".
water was squirting out a crack in water tank assembly.
This was a great opportunity to clean the bottom 3 shelves. I unplugged the frig.,disconnected both water lines, unscrewed water tank, pulled water lines out, put new tank in and pushed new water lines in and connected them, and plugged frig. back in. I grabbed my glass to get a drink and feeling proud but no water. I thought about this for a while and came to the conclusion that the freezer was set to 9 and the water had frozen in the value in the door. I dropped the temp. in the freezer from 9 to 3 and after about 2 days the water worked just fine. I emptied the ice because it was clumped into one big piece. I heard the ice maker going to town all day long. I called for ice later and the motor that dispenses the ice was humming and no ice was dropping. I thought about it and could not come up with the answer so I called tech. at GE and he was no help. So I solved one problem and now I have another that I don't have an answer to. My last attempt is to remove the motor housing to see if gears are jammed or something else.
Parts Used:

-
Fillmore from Asheville, NC
-
Difficulty Level:Really Easy
-
Total Repair Time:15 - 30 mins
6 of 11 people
found this instruction helpful.
Was this instruction helpful to you?
Thank you for voting!
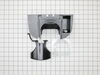
Water/Ice Dispenser worked sporadically.
I used the video Parts Select referenced on YouTube, which showed a technician doing the repair. In my particular instance I did not need to remove the escutcheon around the dispenser using a putty knife or remove screws from underneath. There are two tabs in lieu of the two screws that I used a Phillips screwdriver on to push in which released the control panel. It went just as the video showed w/o a hitch. I'd like to add that this is the second time I've used Parts Select for a different appliance and thank God for their showing you what the part looks like and the videos, it helps bolster your confidence to do the repair correctly! I only wish there was more sites like this.
Parts Used:
-
Douglas from THE VILLAGES, FL
-
Difficulty Level:Really Easy
-
Total Repair Time:30 - 60 mins
-
Tools:Screw drivers
4 of 5 people
found this instruction helpful.
Was this instruction helpful to you?
Thank you for voting!
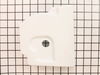
Ice would fall after removing glass.
I took the ice drawer out and turned it upside down. Then removed two philips screws holding the drawer front on. Then with a small straight edge screwdriver pry out the sides to release the locking tabs and remove the auger and crusher assembly. Then on the end of the auger remove the e-clip, slide the auger out and remove the broken part of the crusher dispenser and replace with new. Easier than it sounds. Parts Select was great to deal with. Had my parts in two days.
Parts Used:
-
Michael from Lawerence, MI
-
Difficulty Level:Really Easy
-
Total Repair Time:15 - 30 mins
-
Tools:Screw drivers
5 of 8 people
found this instruction helpful.
Was this instruction helpful to you?
Thank you for voting!
found a large lockwasher and washer in my tea glass
removed the ice, auger, bin assembly and slowly examined it and began disassembly until i found the broken part and then removed them .. i went online and found the parts almost instantly the parts came in 2 days , the repair video,s were most helpful so much so that i decided to replace the ice chute, door solenoid which looked difficult until i watched the repair video and read other peoples feed back well good luck ! DM
Parts Used:
-
David from niceville, FL
-
Difficulty Level:Easy
-
Total Repair Time:15 - 30 mins
-
Tools:Pliers, Screw drivers, Wrench (Adjustable)
4 of 6 people
found this instruction helpful.
Was this instruction helpful to you?
Thank you for voting!
Flapper is stuck open
There are three holes under the front panel in which you push a very small screwdriver in and the front panel comes off.In back of the panel is another panel with 4 screws .1 at each corner.Remove the 4 screws and that will come off exposing the working parts that need to be replaced.This is also a good time to clean anything you can get to in that area.It is very important to remember how everything came out.
Parts Used:
-
mike from hatboro, PA
-
Difficulty Level:Easy
-
Total Repair Time:30 - 60 mins
-
Tools:Screw drivers
6 of 12 people
found this instruction helpful.
Was this instruction helpful to you?
Thank you for voting!
Busted water tank
Removed the lower 2 drawers, lower front grill, rear lower compressor cover. Removed the 2 water lines from the quick connects and screws from the water tank. Pulled lines through the hole in the right rear of the refrigerator and removed tank. Then reversed steps to install new tank. The upper plastic tank cover has 2 buttons on top that are really screws with a plastic cap, these are easily removed with pliers.
Parts Used:
-
Larry from Shepherdsville, KY
-
Difficulty Level:Really Easy
-
Total Repair Time:15 - 30 mins
-
Tools:Nutdriver, Pliers, Screw drivers
4 of 6 people
found this instruction helpful.
Was this instruction helpful to you?
Thank you for voting!
drinking water cooler leaked at the seam.
ordered replacement part with the understanding that tubing to the water valve could be easily removed. The tubes were carefully removed with some difficulty, and when the new tubes were inserted one leaked. The tube seat was not snug. Therefore a new water valve was purchased. The installation was successful within about 20 minutes. If I were to do the job again, both the water resevoir and valve would be ordered together.
Parts Used:
-
Alric H from Waynesville, NC
-
Difficulty Level:A Bit Difficult
-
Total Repair Time:15 - 30 mins
-
Tools:Nutdriver, Pliers, Screw drivers
4 of 6 people
found this instruction helpful.
Was this instruction helpful to you?
Thank you for voting!
refriderator not cooling consistetly
1 opened door 2. pryed cover off from cieling 3.cut and stripped wires on 4. sodered wires from old wires to new sensor. 5 insulated conection.6 put cover back on. This did not fix the problem it was the control moduel.
Parts Used:
-
randall from coopersville, MI
-
Difficulty Level:Easy
-
Total Repair Time:Less than 15 mins
-
Tools:Pliers, Screw drivers
4 of 6 people
found this instruction helpful.
Was this instruction helpful to you?
Thank you for voting!
Can of fruit fell from shelf and broke the switch cover.
Removed broken switch with plastic scraper (press tension latch on bottom), moved two wire terminals to the new switch and pressed the new switch into the hole.
Parts Used:
-
James from KNOXVILLE, TN
-
Difficulty Level:Really Easy
-
Total Repair Time:Less than 15 mins
3 of 3 people
found this instruction helpful.
Was this instruction helpful to you?
Thank you for voting!
Fridge shelf dropped on floor broke front shelf insert
Opened package and just snapped in front insert. Took longer to open package than it took to replace broken insert.
Parts Used:

-
Robert from BREWSTER, MA
-
Difficulty Level:Very Easy
-
Total Repair Time:Less than 15 mins
3 of 3 people
found this instruction helpful.
Was this instruction helpful to you?
Thank you for voting!
The clear insert on on of the shelves on the door brike
-
Lynn from Venice, FL
-
Difficulty Level:Very Easy
-
Total Repair Time:Less than 15 mins
3 of 3 people
found this instruction helpful.
Was this instruction helpful to you?
Thank you for voting!
plastic parts came out of ice dispenser
Removed icemaker from freezer, remove covers allowing access to dispenser. In the next step I removed the auger and broken shield as one assembly. With assembly out of icemaker it was a simple task of taking the broken shield off of auger and putting the new one on. Reassemble in reverse order as removed.
Parts Used:
-
Gene from Springfield, IL
-
Difficulty Level:Really Easy
-
Total Repair Time:Less than 15 mins
-
Tools:Screw drivers
3 of 3 people
found this instruction helpful.
Was this instruction helpful to you?
Thank you for voting!
Fridge getting warer and warmer
remove back panel inside fridge freezer side, everything frosted, unplug and used a hair dryer
1. Took out defrost heater and the bottom and tested (per this site) tested OK.
2. Then looked at the defrost thermostat, it was swollen with the top coming off. so i new it was bad
3.clipped and stripped the 2 wires, spliced in the new one with wire nuts and sealed them with silicone. All better
1. Took out defrost heater and the bottom and tested (per this site) tested OK.
2. Then looked at the defrost thermostat, it was swollen with the top coming off. so i new it was bad
3.clipped and stripped the 2 wires, spliced in the new one with wire nuts and sealed them with silicone. All better
Parts Used:
-
John from Holly Springs, NC
-
Difficulty Level:Really Easy
-
Total Repair Time:Less than 15 mins
-
Tools:Nutdriver
3 of 3 people
found this instruction helpful.
Was this instruction helpful to you?
Thank you for voting!
Not a problem at all.
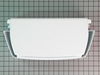
I took out the old bins just as when you take them out to clean them. And then I replaced the bins with the new ones.
Parts Used:
-
Frederick from NAPLES, FL
-
Difficulty Level:Very Easy
-
Total Repair Time:Less than 15 mins
3 of 3 people
found this instruction helpful.
Was this instruction helpful to you?
Thank you for voting!
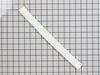
The rubber gasket had torn, and super glue only provided a temporary solution.
1. Emptied the crisper pan,
2. Removed it from the refrigerator,
3. Flipped it upside down,
4. Removed the old one by pulling it off,
5. Replaced it with the new OEM part. and
6. Reversed the process.
2. Removed it from the refrigerator,
3. Flipped it upside down,
4. Removed the old one by pulling it off,
5. Replaced it with the new OEM part. and
6. Reversed the process.
Parts Used:
-
Lee from UPPR MARLBORO, MD
-
Difficulty Level:Very Easy
-
Total Repair Time:Less than 15 mins
3 of 3 people
found this instruction helpful.
Was this instruction helpful to you?
Thank you for voting!