















FEP330GQ0 Roper Range - Instructions
Keep searches simple. Use keywords, e.g. "leaking", "pump", "broken" or "fit".
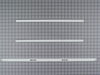
Door trim (sides and bottom) needed replacing.
Remove the bottom drawer. Remove the two Phillips head screws on the top inside of the door. Pull up on the handle (CAUTION: Be sure to hold the glass front against the door while doing this or the glass front can fall, possibly damaging it. Remove the glass front by lifting it towards the top of the door. Remove the two side pieces and the bottom trim piece by unscrewing the Phillips head screws located on the underside of the bottom trim piece. Discard the old trim pieces. Attach the new metal bottom trim piece using three of the previously removed screws. Do not tighten the screws at this time. Each plastic side piece has a nipple at the bottom. Insert this nipple into the outermost hole at each end of the bottom trim piece. The edge of the flange on each side piece should face inward. Have an assistant hold the two side pieces against the door frame while you slide the glass back in. The inward facing flanges go UNDER the glass. Reinstall the top piece making sure the indentations at the top of the side pieces are under the top piece. Install and tighten the two screws that hold the top piece on. Tighten the three screws holding the bottom trim piece.
Parts Used:

-
Ralph from Canon City, CO
-
Difficulty Level:Really Easy
-
Total Repair Time:15 - 30 mins
-
Tools:Screw drivers
Was this instruction helpful to you?
Thank you for voting!
oven element burnt out
unscrew two screws..took old element out, put perfect fit new element in,screw two screws back in.
Parts Used:

-
JoAnne from Harrison, AR
-
Difficulty Level:Really Easy
-
Total Repair Time:15 - 30 mins
-
Tools:Screw drivers
Was this instruction helpful to you?
Thank you for voting!
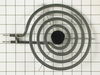
Electric burner would not heat at all
I tested the element with a digital meter and found it was bad but I also followed your great tip to replace the receptacle which it really needed replaced also. Both parts now work and fit like new. Thanks
Parts Used:

-
Jesse from York, PA
-
Difficulty Level:Really Easy
-
Total Repair Time:15 - 30 mins
-
Tools:Screw drivers
Was this instruction helpful to you?
Thank you for voting!
Element terminal connection loose caused overheating and carbon buildup.
Sanded element contact, replaced connector block. The easiest part of the task was ordering the part online. You made it unbelievably easy. I was amazed!
Parts Used:
-
Mark from Louisville, KY
-
Difficulty Level:Really Easy
-
Total Repair Time:15 - 30 mins
-
Tools:Screw drivers
Was this instruction helpful to you?
Thank you for voting!
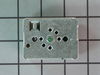
8 Inch electric burner not getting hot
I determined the problem by swapping the 8 inch burner with a 6 inch burner. the 8 inch got hot when connected to the 6 inch wire harness. This told me that the 8 inch burner was good. The 6 inch failed to get hot so I determined the next logical thing was the power to the 8 inch burner. I used a multi meter to determine that power was getting into the control unit but no voltage was getting out. The controller was bad. I ordered a new controller and after unplugging the stove, replaced the controller in about 10 minutes. (Critical part of repair is to unplug unit from wall -220 volts!)
Parts Used:
-
John from Dover, NJ
-
Difficulty Level:Easy
-
Total Repair Time:15 - 30 mins
-
Tools:Pliers, Screw drivers
Was this instruction helpful to you?
Thank you for voting!
lower element burned out
So easy. Unplug the range. (really important. You're working with wiring after all) Unscrew the metal plate holding the bake element in place, gently pull out the wires and detach the element from them. (the element just pulls off, but it was attached pretty tightly so I did have to use needlenose pliers to get a better grip on it.) Then simply plug in the new bake element, push the wires back in, reattach the metal plate and bake a cake! Don't even think about calling a repairman for this one! It took under 10 minutes once I got around to ordering the element. (none of the local stores carried them)
Parts Used:
-
Ann from Weston, WI
-
Difficulty Level:Easy
-
Total Repair Time:15 - 30 mins
-
Tools:Pliers, Screw drivers
Was this instruction helpful to you?
Thank you for voting!
Rear drawer slide was broken.
Undid one screw. Removed the broken slide. Replaced with new slide an fastened with the existing screw. Problem solved.
Parts Used:
-
David from Mauldin, SC
-
Difficulty Level:Really Easy
-
Total Repair Time:Less than 15 mins
-
Tools:Screw drivers
Was this instruction helpful to you?
Thank you for voting!
burned out coil
Simply slide out old coil by lifting cooktop pan; position new coil electirc elements in oven slots, slowly push in, then push coil tab into slot in pan for balance. No problems
Parts Used:
-
L from Richardson, TX
-
Difficulty Level:Really Easy
-
Total Repair Time:Less than 15 mins
Was this instruction helpful to you?
Thank you for voting!
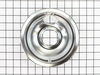
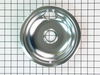
Two drip Bowls needed to be replaced
No tools needed. And it's always great to be able to replace parts on my VERY old counter-top range. It still works very well, and now it also looks great. Delivery was amazingly fast, too! Thanks!
Parts Used:
-
Robin from Boca Raton, FL
-
Difficulty Level:Really Easy
-
Total Repair Time:Less than 15 mins
Was this instruction helpful to you?
Thank you for voting!
Drip Bowl beyond cleaning
Removed old bowl and dropped in new one!!It looks great - the cooktop is probably 30 years old.Your serviceperson was courteous friendly and very rapid.This actually is the second replacement but I was pleasantly surprised that the part was available. Thanks!!
Parts Used:
-
Ann from Memphis, TN
-
Difficulty Level:Really Easy
-
Total Repair Time:Less than 15 mins
Was this instruction helpful to you?
Thank you for voting!
Old burner stopped working right.
Was able to unplug the old burner and plug the new one in. Very easy.
Parts Used:
-
Paulette J. from Connell, WA
-
Difficulty Level:Really Easy
-
Total Repair Time:Less than 15 mins
Was this instruction helpful to you?
Thank you for voting!
Old receptacle was burnt from lots of use.
Just cut the old receptacle wires and splice in new kit. Very simple and worked perfectly.
Parts Used:
-
Brenda from Scurry, TX
-
Difficulty Level:Really Easy
-
Total Repair Time:15 - 30 mins
-
Tools:Screw drivers
Was this instruction helpful to you?
Thank you for voting!
Left front 8 inch burner knob control stop regulating heat temprature.
I purchased a new infinite control switch 6". and replace the old one.
Parts Used:

-
Alfred from Ann Arbor, MI
-
Difficulty Level:Really Easy
-
Total Repair Time:15 - 30 mins
-
Tools:Pliers, Screw drivers
Was this instruction helpful to you?
Thank you for voting!
Broiler element EXPLODED!
Yes... it exploded. Ordered the part which was delivered promptly. Installed in about 30 minutes with a helper. Just unscrew the 4 interior screws and a bunch of the screws (10 maybe?) on the back panel. Drop the back panel, remove the electrical connections from the broiler element and have your helper pull it out. Shove the new one in carefully through the insulation, attach the two electrical connections and reattach all the screws. Worked fine but smelled a bit as it burned off the new coating. About a 30 minute project.
Parts Used:

-
Beth from Draper, UT
-
Difficulty Level:Easy
-
Total Repair Time:15 - 30 mins
-
Tools:Screw drivers
Was this instruction helpful to you?
Thank you for voting!
broken rear drawer glides
-
Jeff from Manhattan, KS
-
Difficulty Level:Really Easy
-
Total Repair Time:15 - 30 mins
-
Tools:Screw drivers
Was this instruction helpful to you?
Thank you for voting!