















FEP310KV2 Roper Range - Instructions
Keep searches simple. Use keywords, e.g. "leaking", "pump", "broken" or "fit".
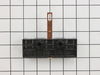
terminal block back of range shorted and burned
EASY!! Repairs saved $300.00 on serviceman fees they will rip you off for this simple repare
Parts Used:
-
Louis from Grantsville, UT
-
Difficulty Level:Really Easy
-
Total Repair Time:15 - 30 mins
-
Tools:Screw drivers, Socket set
Was this instruction helpful to you?
Thank you for voting!
Power block terminal failure
-
Leonard from Brazoria, TX
-
Difficulty Level:Really Easy
-
Total Repair Time:15 - 30 mins
-
Tools:Screw drivers
Was this instruction helpful to you?
Thank you for voting!
Heating element would not get red hot
Replaced Infinite control switch in just a few minutes. Unfortunately the new switch had a lose terminal that was not supposed to be in the switch that came from the factory that way. I connected the switch, turned it on, and it instantly shorted the switch out. At that point the lose terminal was real easy to see.
Parts Used:

-
James from Lewisville, NC
-
Difficulty Level:Really Easy
-
Total Repair Time:Less than 15 mins
-
Tools:Screw drivers
Was this instruction helpful to you?
Thank you for voting!
Wiring Block shorted due to moisture and Stove had no Power
This was very straight forward. Once the sheet metal shroud on the back side was removed just had to undo the one remaining wire, remove the block, and reassemble. Only question I had was which wires went where. The Wiring Block was melted due to the short and the wires were no longer attached. Did a quick google for a typical oven three-wire install and that did the trick.
Parts Used:
-
John from Roberts, MT
-
Difficulty Level:Easy
-
Total Repair Time:15 - 30 mins
-
Tools:Nutdriver, Screw drivers
Was this instruction helpful to you?
Thank you for voting!
top element was burnt out small burn hole in element
removed the screws that were on back side of oven securing panel that covered element terminals disconnected wiring to upper element then went in side oven area removing 4 upper mount screws that were holding upper element in place then removed old element and reinstalled new in same order was removed..
Parts Used:

-
Gregory from kissimmee, FL
-
Difficulty Level:Really Easy
-
Total Repair Time:15 - 30 mins
-
Tools:Screw drivers, Socket set
Was this instruction helpful to you?
Thank you for voting!
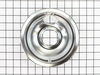
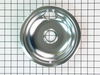
bowls had burnt on food
-
David from Saranac Lake, NY
-
Difficulty Level:Really Easy
-
Total Repair Time:Less than 15 mins
Was this instruction helpful to you?
Thank you for voting!
Contractors on my home did not tighten nuts on terminal block when installing. This caused an arch across terminal burning up unit .
Repair took 10 minutes time. Used Phillips screw driver and pulled terminal block off stove. Pulled wires off with socket set. Replaced terminal block and reattached wires and block to back of stove. I had called sears to order part and lady tried to sell me a 135 dollar part even though I advised her it was a terminal block. WOW I'm glad I know what I needed. That's when I went with parts select. Easy ordering delivered within five days.
Parts Used:
-
Robert from San Antonio, TX
-
Difficulty Level:Really Easy
-
Total Repair Time:Less than 15 mins
-
Tools:Screw drivers, Socket set
Was this instruction helpful to you?
Thank you for voting!
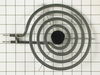
Old burner stopped working right.
Was able to unplug the old burner and plug the new one in. Very easy.
Parts Used:
-
Paulette J. from Connell, WA
-
Difficulty Level:Really Easy
-
Total Repair Time:Less than 15 mins
Was this instruction helpful to you?
Thank you for voting!
The front drawer glide broke
Very easy. A couple of screws and it was repaired. Parts select makes it easy and affordable to do minor repairs on my appliance. This is the second time we have used this company to repair our oven and so far all has gone very well.
Parts Used:

-
Karen from Maryland Heights, MO
-
Difficulty Level:Really Easy
-
Total Repair Time:Less than 15 mins
-
Tools:Screw drivers
Was this instruction helpful to you?
Thank you for voting!
Oven was not heating up to temp.
Pulled the oven away from the wall, unplugged the oven. Unscrewed the back panel(2 screws)that covers the pigtail connection. Pulled the two wires that attached to the heating element. Inside the oven i removed the two screws holding the element in place and removed old element. Put the new element in place and returned screws. The two wires clipped effortlessly on the back, returned cover and screws and plugged the oven back in. Tested the oven and returned it to its position, reset the clock and done.
Parts Used:

-
charlie from glenwood springs, CO
-
Difficulty Level:Really Easy
-
Total Repair Time:Less than 15 mins
-
Tools:Screw drivers
Was this instruction helpful to you?
Thank you for voting!
Bake element not working
Turn power off at breaker box, remove back cover inserted wires into element, done and ready to be use
Parts Used:
-
Eloy from Andrews, TX
-
Difficulty Level:Really Easy
-
Total Repair Time:Less than 15 mins
-
Tools:Screw drivers
Was this instruction helpful to you?
Thank you for voting!
Original Burner always loose from support
For YEARS we put up with the old burner coming loose from support after cleaning. When one burner began to be intermittant, we purchased a replacement from Parts Select. Perfect fit AND much better made as the support and burner are held together in more places. We quickly purchased another to replace the other 8 in burner that had same problem but was working fine. New burners work and fit great.
Parts Used:
-
William from Mint Hill, NC
-
Difficulty Level:Really Easy
-
Total Repair Time:Less than 15 mins
Was this instruction helpful to you?
Thank you for voting!
Drip plans needed replacement
-
Margaret from Vero Beach, FL
-
Difficulty Level:Really Easy
-
Total Repair Time:Less than 15 mins
Was this instruction helpful to you?
Thank you for voting!
Lower element burned out
Went on line to see if the repair could be done by us. Watched repair video and from there on the repair went as smooth as it possibly could.
Parts Used:
-
Sally from Fishers, IN
-
Difficulty Level:Really Easy
-
Total Repair Time:15 - 30 mins
-
Tools:Screw drivers
Was this instruction helpful to you?
Thank you for voting!
Broiler element EXPLODED!
Yes... it exploded. Ordered the part which was delivered promptly. Installed in about 30 minutes with a helper. Just unscrew the 4 interior screws and a bunch of the screws (10 maybe?) on the back panel. Drop the back panel, remove the electrical connections from the broiler element and have your helper pull it out. Shove the new one in carefully through the insulation, attach the two electrical connections and reattach all the screws. Worked fine but smelled a bit as it burned off the new coating. About a 30 minute project.
Parts Used:
-
Beth from Draper, UT
-
Difficulty Level:Easy
-
Total Repair Time:15 - 30 mins
-
Tools:Screw drivers
Was this instruction helpful to you?
Thank you for voting!