















ED20PKXSW01 Whirlpool Refrigerator - Instructions
Keep searches simple. Use keywords, e.g. "leaking", "pump", "broken" or "fit".
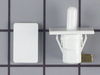
Lights not working some times
-
Harry from COLUMBIA STA, OH
-
Difficulty Level:A Bit Difficult
-
Total Repair Time:30 - 60 mins
-
Tools:Nutdriver, Screw drivers
4 of 5 people
found this instruction helpful.
Was this instruction helpful to you?
Thank you for voting!
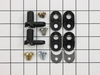
door closing cam was broken
the process was pretty straight forward though the part came without instructions. We were able to replace the part improperly with ease. however, we were not able to get the pieces aligned properly for a long time. We ended up taking the door off many times to try to realign the pieces. After many hours I finally unscrewed the bottom cam while the door was in place. The piece popped into place and all was fixed. Had the part come with directions telling us to do this we would have replaced the cam within 15 minutes!
Parts Used:
-
lizie from nantucket, MA
-
Difficulty Level:A Bit Difficult
-
Total Repair Time:More than 2 hours
-
Tools:Nutdriver, Screw drivers
3 of 3 people
found this instruction helpful.
Was this instruction helpful to you?
Thank you for voting!
lights wouldn't come on/work in refrigerator
Referencing the info/schematics you have on your website, I unscrewed/unattached top-front panel (carefully), from behind the panel you have to detach the wires (2) from the switch, pushed "in" the switch to remove, put in new switch and attach wires to test BEFORE remounting panel. Tada!! Thank you PartSelect! You saved me at least $80...would have been at least $100 to have a repair person come to the house!
Parts Used:

-
Jane from Albuquerque, NM
-
Difficulty Level:Easy
-
Total Repair Time:15 - 30 mins
-
Tools:Pliers, Screw drivers, Socket set
4 of 6 people
found this instruction helpful.
Was this instruction helpful to you?
Thank you for voting!
Raplaced switch
Repair went well,took about five to ten minutes to disconnect the power from the fridge removed the defective switch installed the new one ,reconnected the power,,,and Let there be light and there was light!
Parts Used:
-
Winston A from Brooklyn, NY
-
Difficulty Level:Really Easy
-
Total Repair Time:Less than 15 mins
-
Tools:Pliers
5 of 9 people
found this instruction helpful.
Was this instruction helpful to you?
Thank you for voting!
badly worn cam
Exactly as the demo instructed. It was very detail friendly and was very easy to follow.
Parts Used:
-
harry from KINGSPORT, TN
-
Difficulty Level:Really Easy
-
Total Repair Time:15 - 30 mins
-
Tools:Nutdriver, Screw drivers
3 of 3 people
found this instruction helpful.
Was this instruction helpful to you?
Thank you for voting!
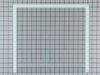
My glass shelf shattered while i was cleaning the refrigerator and I was very skeptical at being able to find a replacement since the refrigerator is a 1991 model.
I ordered the shelf on-line halfway believing it would not fit - it arrived THE NEXT DAY and was the exact fit for the model. I was elated and the whole incident renewed my faith in customer service. PartsSelect was great and I will re-order for future needed repairs.
Parts Used:
-
Charlotte from Leeds, AL
-
Difficulty Level:Really Easy
-
Total Repair Time:Less than 15 mins
4 of 6 people
found this instruction helpful.
Was this instruction helpful to you?
Thank you for voting!
Compressor making excessive noise
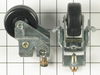
One front roller was flat on one side. Decided to replace all rollers at same time. Placed shims under unit and removed mounting screws for one front and one rear roller. With new rollers in place, I was able to level the refrigerator side to side, but unable to do so, front to back. Left the new front roller in place and reinstalled the old rear roller. Have decided to replace refrigeratorin the near future. This is one of my few repair failures!
Parts Used:

-
chester from Tampa, FL
-
Difficulty Level:Easy
-
Total Repair Time:30 - 60 mins
-
Tools:Nutdriver, Socket set
5 of 9 people
found this instruction helpful.
Was this instruction helpful to you?
Thank you for voting!
Broken Freezer Door Cams
1. Put pieces of wood under door to support it.
2. Unscrew three screws holding door hinge.
3. Disconnect water line.
4. Unscrew screw holding each cam. One to door and one to hinge.
5 Replace cams.
6. Retrieve plate with threaded holes behind frame that the hinge attaches to.
7. Use thin philips screwdriver through the hinge bracket, shim, frame and screw plate to align it for the other two screws.
8. Replace all three hinge screws.
9. Connect water line fitting.
10. Remove wood for door support.
11. Check door for smooth movement and strong pressure when closed.
2. Unscrew three screws holding door hinge.
3. Disconnect water line.
4. Unscrew screw holding each cam. One to door and one to hinge.
5 Replace cams.
6. Retrieve plate with threaded holes behind frame that the hinge attaches to.
7. Use thin philips screwdriver through the hinge bracket, shim, frame and screw plate to align it for the other two screws.
8. Replace all three hinge screws.
9. Connect water line fitting.
10. Remove wood for door support.
11. Check door for smooth movement and strong pressure when closed.
Parts Used:

-
Dennis from Corona, CA
-
Difficulty Level:Easy
-
Total Repair Time:30 - 60 mins
-
Tools:Socket set
3 of 3 people
found this instruction helpful.
Was this instruction helpful to you?
Thank you for voting!
Divider front of fridge hot to touch Condenser fan not working
removed back cover, removed fan motor and replaced with new one. connected new power wires. worked right away
Parts Used:

-
John from Holden, MA
-
Difficulty Level:Easy
-
Total Repair Time:15 - 30 mins
-
Tools:Nutdriver, Pliers
3 of 4 people
found this instruction helpful.
Was this instruction helpful to you?
Thank you for voting!
Refrigerator would not stay cold and freezer would thaw.
I watched the repair video and did exactly as described. Excellent video and step by step instructions. Follow them and you cannot go wrong.
Parts Used:

-
Michael from SYLVA, NC
-
Difficulty Level:Easy
-
Total Repair Time:30 - 60 mins
-
Tools:Nutdriver, Pliers, Screw drivers
3 of 4 people
found this instruction helpful.
Was this instruction helpful to you?
Thank you for voting!
Meat bin support tray was broken
I removed the broken meat bin support tray removed the seals front and rear with pliers. Placed these seals on the meat bin support tray I received from PartSelect placed this in the fridge and slipped in the meat bin. Really easy with no problems and by the way the item was ordered one day and I received it the next. Great service.
Parts Used:

-
Alexander from Charleston, AR
-
Difficulty Level:Really Easy
-
Total Repair Time:Less than 15 mins
-
Tools:Pliers
3 of 4 people
found this instruction helpful.
Was this instruction helpful to you?
Thank you for voting!
frame for top of drawer had plastic side rails cracked
just replaced the frame - easy to remove old broken frame and replace with new one
Parts Used:

-
Andrew from Rockville, MD
-
Difficulty Level:Really Easy
-
Total Repair Time:Less than 15 mins
4 of 7 people
found this instruction helpful.
Was this instruction helpful to you?
Thank you for voting!
side by side freezer door wouldn't close
Friend did for me, had to take off door after disconnecting water like a power cord from top of door, now works fine, also did the cam on frig side too, works better also.
Parts Used:

-
Dorothy M from Galway, NY
-
Difficulty Level:Easy
-
Total Repair Time:15 - 30 mins
-
Tools:Nutdriver, Screw drivers, Socket set
3 of 4 people
found this instruction helpful.
Was this instruction helpful to you?
Thank you for voting!
Refrigerator quit cooling and the freezer wasn't freezing anything
Order the part from the Internet on Sunday, it mailed out on Monday and I received it on Tuesday. I unplugged the fan then undone 3 screws that held the fan bracket to the refrigerator pulled it out unscrewed 3 more nuts and replaced the fan on the bracket and I cut the old wire plug off the old fan and with 2 wire nuts put it on my new fan. Replaced the fan and bracket back on the refrigerator plugged it in and it works like a new refrigerator.
Parts Used:
-
Tonya from Grand Prairie, TX
-
Difficulty Level:Really Easy
-
Total Repair Time:15 - 30 mins
-
Tools:Socket set
4 of 7 people
found this instruction helpful.
Was this instruction helpful to you?
Thank you for voting!
light on inside, fridge and freezer warm up after initially cooling
Fridge/freezer warm. After unpluging and plug in again, both would get cold. Then, ice would partially melt in the freezer only to refreeze later. Noted large temperature swings in freezer-up to 48 degrees during defrost cycle. Finally after a day or two, both sides warming up permanently to room temp. Tapping inside the fridge near the cold control (thermostat) would cause the warm fridge/freezer to cool again. Installation is simple. Remove knobs and snap on face plate in front top of fridge. Remove screws allowing plastic cover to drop down which houses the thermostat at the inside top of fridge. loosen two mounting hex head screws from thermostat mount. Remove two plastic covers concealing thermostat wire that travels to vent at back of fridge. Remove thermostat. remove plastic tube over wire on old thermostat by slipping it forward and slide tube on to new thermostat wire. Install is the same in reverse. A thermometer in the freezer confirms very little temperature variation after install (3-4degrees); ice no longer melts, unit stays on!
Parts Used:
-
paul from patterson, CA
-
Difficulty Level:Really Easy
-
Total Repair Time:30 - 60 mins
-
Tools:Nutdriver, Pliers, Screw drivers
3 of 4 people
found this instruction helpful.
Was this instruction helpful to you?
Thank you for voting!