















ED20PKXSW01 Whirlpool Refrigerator - Instructions
Keep searches simple. Use keywords, e.g. "leaking", "pump", "broken" or "fit".
The frig/freezer shut off too often and would not stay cold.
The new thermostat assembly installed quite easily, just a couple of screws, but the thermostat probe however was kind of a pain in the rear. The probe is about 3 feet long and you have to remove a plastic sleeve from the old part and re-install on the new probe, it fits very tight and takes some time to do. Overall it was a very easy fix.
Parts Used:

-
Ron from Eaton Rapids, MI
-
Difficulty Level:Easy
-
Total Repair Time:Less than 15 mins
-
Tools:Nutdriver, Screw drivers
7 of 11 people
found this instruction helpful.
Was this instruction helpful to you?
Thank you for voting!
The Switch Broke...Absolutely Fell Apart.
I simply removed the old switch using 2 small screwdrivers and the old switch case popped out. I then upluged the wires from the old switch and reversed the process. Didn't take longer than 5 minutes begining to end! Thank you for the great service! Duncan quaid
Parts Used:

-
Duncan from Metairie, LA
-
Difficulty Level:Really Easy
-
Total Repair Time:Less than 15 mins
-
Tools:Screw drivers
5 of 5 people
found this instruction helpful.
Was this instruction helpful to you?
Thank you for voting!
3 years ago, we broke the shelf
When we moved into the house, we cleaned the fridge and broke the glass shelf and thats how it has stayed.Then I finally got over my fear of ordering things "online" and within a week, we had a new shelf which just slid into place.
The shelf was packaged so well that even the UPS guy throwing over our locked gate didn't break it.
Thanks Part Select....job done !!!
The shelf was packaged so well that even the UPS guy throwing over our locked gate didn't break it.
Thanks Part Select....job done !!!
Parts Used:

-
James from Sherman Oaks, CA
-
Difficulty Level:Really Easy
-
Total Repair Time:Less than 15 mins
5 of 6 people
found this instruction helpful.
Was this instruction helpful to you?
Thank you for voting!
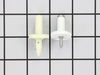
The flat support part of the stud had broken off, and I had removed the part to try to find a replacement. So, the shelf that holds one of the drawershad no front support on one side.
I removed the drawer and the shelf. I looked at the support on the other side to figure out how to insert the new one. Due to the shape of the "hook" part of the support, and the hole it needed to go into, I figured out which way I needed to insert it to be able to twist it so it would stay in place. From another online hint, and from talking to a repairman at a local shop (who had ordered me the wrong part) I knew I needed to twist it after inserting it. I used a pair of pliers to twist it counterclockwise, about a 3/4 turn. I put the shelf in and re-installed the drawer.
Parts Used:
-
Mary from Olympia, WA
-
Difficulty Level:Really Easy
-
Total Repair Time:Less than 15 mins
-
Tools:Pliers
5 of 6 people
found this instruction helpful.
Was this instruction helpful to you?
Thank you for voting!
refrigerator not cooling properly
Replaced refrigerator cooling control. No luck. Replaced freezer cooling control. No luck. Coils were icing up. Unplugged frig and allowed coils to defrost. After more poking around, found that condenser fan was not spinning. Touch it and it'd start. That was definitely in need of replacement. Replacement was easy. Refrigerator is now running as it should.
Parts Used:

-
Ernie from Windsor, CA
-
Difficulty Level:Really Easy
-
Total Repair Time:1- 2 hours
6 of 9 people
found this instruction helpful.
Was this instruction helpful to you?
Thank you for voting!
Refregirator would not turn cooling back on after shutting down.
After spending $250 on repair by calling appliance repair professional who changed relay in the fridge, the problem was not solved. I had to manually turn the switch off and on again to make sure my fridge would maintain its temperature. I read some similar problems on this web site, watched instalation video and decided to give it a try. Part came in very quick and it took me (female) 45 minutes to install the new part and refregirator worked like a champ. I would never call professional again until I try fixing the problem myself.
Parts Used:
-
Olesya from ORLANDO, FL
-
Difficulty Level:Very Easy
-
Total Repair Time:30 - 60 mins
-
Tools:Nutdriver, Pliers, Screw drivers
5 of 6 people
found this instruction helpful.
Was this instruction helpful to you?
Thank you for voting!
Erratic refrigerator temperature. Generally too cold - frozen produce.
The repair video was a great help in this specific repair and matched my refrigerator model exactly. The only issue was an apparent design change in the thermostat that I received. The location of the electrical leads has changed. It might be worth mentioning this in the video. Polarity is not an issue in this case, but if it was, it would be worth noting in the video. So far the refrigerator has been operating normally.
Parts Used:
-
Dave from BRIDGEWATER, MA
-
Difficulty Level:Really Easy
-
Total Repair Time:30 - 60 mins
-
Tools:Nutdriver, Pliers, Screw drivers
4 of 4 people
found this instruction helpful.
Was this instruction helpful to you?
Thank you for voting!
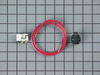
Removed the old parts then connected the new parts.
The compressor immediately started when I plugged the refrigerator back in. Around 24 hours later the freezer compartment was at 0 degrees, and the refrigerator was at 35 degrees.
Parts Used:
-
Jonathan from OLIVE BRANCH, MS
-
Difficulty Level:Really Easy
-
Total Repair Time:30 - 60 mins
-
Tools:Screw drivers
4 of 4 people
found this instruction helpful.
Was this instruction helpful to you?
Thank you for voting!
Not cooling properly and had to tap the thermostat to get it to kick on.
My fridge was not cooling properly as I would have to tap the thermostat at times to get it to kick on again. Ordered the temperature control thermostat from this site t and watched video on how to install. Not hard at all and did it in under an hour. Fridge is working like new..
Parts Used:
-
dee from FERNANDINA, FL
-
Difficulty Level:Really Easy
-
Total Repair Time:30 - 60 mins
-
Tools:Screw drivers
4 of 4 people
found this instruction helpful.
Was this instruction helpful to you?
Thank you for voting!
Loud thud when door opened.
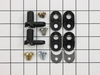
Remove all items from the door shelves. Removed the top hinge cover and removed hinge mounting screws. Lifted door off bottom hinge and laid it on its side. I then replaced bottom hinge cam by removing (1) cap screw. Very simple job.
Parts Used:
-
Floyd from Rushville, IN
-
Difficulty Level:Really Easy
-
Total Repair Time:Less than 15 mins
-
Tools:Socket set
4 of 4 people
found this instruction helpful.
Was this instruction helpful to you?
Thank you for voting!
Refrigerator light would not stay on
Removed the 2 screws holding the light bulb shield, then the 4 uolding the metal panel. Unplugged the olw door switch and replaced.
reassembled the pieces.
reassembled the pieces.
Parts Used:
-
Dave from Manchester Center, VT
-
Difficulty Level:Easy
-
Total Repair Time:15 - 30 mins
-
Tools:Nutdriver, Socket set
4 of 4 people
found this instruction helpful.
Was this instruction helpful to you?
Thank you for voting!
had to push door closed
lifted door 1/2 inch and put blocks of wood under the door and replaced the lower hindge cam.
Parts Used:
-
peter from portsmouth, RI
-
Difficulty Level:Really Easy
-
Total Repair Time:15 - 30 mins
-
Tools:Nutdriver, Screw drivers
4 of 4 people
found this instruction helpful.
Was this instruction helpful to you?
Thank you for voting!
Fridge wouldn't turn on unless I hit the thermostat.
Removed old thermostat and replaced with new one. The video link in the shipping email was great - really detailed even though it was a simple fix.
Parts Used:
-
Vince from CERRO GORDO, IL
-
Difficulty Level:Really Easy
-
Total Repair Time:15 - 30 mins
-
Tools:Nutdriver, Screw drivers
4 of 4 people
found this instruction helpful.
Was this instruction helpful to you?
Thank you for voting!
Lost shelf support bracket
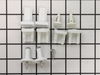
Ordered shelf support stud kit. Product was promptly delivered, and contained the parts as shown on website. Took longer to open the package than to replace the missing shelf support bracket. No problems. Would order from them again.
Parts Used:
-
DAVID from LAFAYETTE, LA
-
Difficulty Level:Really Easy
-
Total Repair Time:Less than 15 mins
4 of 4 people
found this instruction helpful.
Was this instruction helpful to you?
Thank you for voting!
Frig wasn't reliable,kept going off and staying off until I discovered "hitting the knob" trick.
I followed the procedures that others described that had the same problem,very handy
Parts Used:
-
Bob from Norman, OK
-
Difficulty Level:Easy
-
Total Repair Time:15 - 30 mins
-
Tools:Nutdriver, Screw drivers, Wrench (Adjustable)
4 of 5 people
found this instruction helpful.
Was this instruction helpful to you?
Thank you for voting!