















EB2SHKXVQ02 Whirlpool Refrigerator - Instructions
Keep searches simple. Use keywords, e.g. "leaking", "pump", "broken" or "fit".
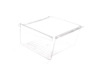
needed a replacement crisper pan drawer for fridge
The part came the next day, very quick. The wrong size ended up in box we recieved. The part # we ordered was correct, just a mix up in the packaging process. I called and the customer service dept. had a new correct crisper pan delivered to my door two days later. Even with the mix up it was very fast and a good price compared to other sites. I would order again in the future.
Parts Used:
-
Angela from Oconomowoc, WI
-
Difficulty Level:Really Easy
-
Total Repair Time:Less than 15 mins
5 of 6 people
found this instruction helpful.
Was this instruction helpful to you?
Thank you for voting!
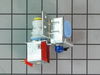
Icemaker just stopped making ice one night
I pulled the refrigerator out from the wali slowly so not to damage the water line to the ice maker. Then with a nut driver I removed all the screws holding the back plate on. Being careful not to kink the water line, I used the adjustable wrench to losen the water line feed nut and the nut that goes to the line to the icemaker. Then I removed the screws holding the valve in place finished unhooking the water lines with my fingers. I then got the new valve and finger tightend the main water supply nut to the inlet side, then I pushed the plastic supply tube going to the icemaker into the valve. The new valve does not use a nut to attach the tubing it is a presure fit very easy.
Parts Used:
-
Robert from Center Moriches, NY
-
Difficulty Level:Really Easy
-
Total Repair Time:15 - 30 mins
-
Tools:Nutdriver, Wrench (Adjustable)
8 of 15 people
found this instruction helpful.
Was this instruction helpful to you?
Thank you for voting!
broken freezer Handle
-
lisa from sunrise, FL
-
Difficulty Level:Really Easy
-
Total Repair Time:Less than 15 mins
-
Tools:Screw drivers
5 of 7 people
found this instruction helpful.
Was this instruction helpful to you?
Thank you for voting!
Broke the Rocker Switch in Fridge side
Popped out with butter knife and unplugged 3 prong connector and reversed with anew switch.
But, unfortunately it got broken again exactly same way as before.
So, I ordered same switch again for 2nd time.
Maytag should recall that Rocker Switch and build with better materials.
But, unfortunately it got broken again exactly same way as before.
So, I ordered same switch again for 2nd time.
Maytag should recall that Rocker Switch and build with better materials.
Parts Used:
-
Sung-Su from BISMARCK, ND
-
Difficulty Level:Very Easy
-
Total Repair Time:Less than 15 mins
4 of 4 people
found this instruction helpful.
Was this instruction helpful to you?
Thank you for voting!
Refrigerator light would not stay on
Removed the 2 screws holding the light bulb shield, then the 4 uolding the metal panel. Unplugged the olw door switch and replaced.
reassembled the pieces.
reassembled the pieces.
Parts Used:

-
Dave from Manchester Center, VT
-
Difficulty Level:Easy
-
Total Repair Time:15 - 30 mins
-
Tools:Nutdriver, Socket set
4 of 4 people
found this instruction helpful.
Was this instruction helpful to you?
Thank you for voting!
Thought motor was bad freezer cold fridge hot
Ordered new fan motor
Got part took fridge apart
Result was the motor was running
The fan blade had come off the motor
Replaced the motor anyway and reinstalled the fan, working well
Got part took fridge apart
Result was the motor was running
The fan blade had come off the motor
Replaced the motor anyway and reinstalled the fan, working well
Parts Used:
-
Wayne from PENNINGTON, NJ
-
Difficulty Level:Really Easy
-
Total Repair Time:30 - 60 mins
4 of 4 people
found this instruction helpful.
Was this instruction helpful to you?
Thank you for voting!
bad gasket
took about 15 min just took off gasket with flat screwdriver cleaned and put it on no glue it has magnets very easy
Parts Used:
-
Donna from Palestine, TX
-
Difficulty Level:Really Easy
-
Total Repair Time:Less than 15 mins
-
Tools:Screw drivers
4 of 4 people
found this instruction helpful.
Was this instruction helpful to you?
Thank you for voting!
Control noisy when opening and closing removed damper housing
Pop off vent cover remove 2 screws removed cover housing and foam. Removed damper by unclipping tabs on left and right side of control lift up and out. Unplugged power wires reinstalled in reverse order.
Parts Used:

-
Nelson from CATSKILL, NY
-
Difficulty Level:Easy
-
Total Repair Time:Less than 15 mins
-
Tools:Screw drivers
4 of 4 people
found this instruction helpful.
Was this instruction helpful to you?
Thank you for voting!
Noisy damper
Easy fix, it's right in the back of the fridge under a cover that just clips in, a piece of foam, and two screws. The hardest part is getting the clips free without breaking them. After replacement it's silent instead of making a grinding noise regularly.
Parts Used:
-
Keith from OLYMPIA, WA
-
Difficulty Level:Really Easy
-
Total Repair Time:Less than 15 mins
-
Tools:Screw drivers
4 of 4 people
found this instruction helpful.
Was this instruction helpful to you?
Thank you for voting!
half of the freezer handle broke off
Not much to describe. Just used philips screwdriver and removed the two screws holding the handle in place. Discarded the broken handle, washed the area where the original handle was and replaced it with a brand new white handle (not yellowed with age)by replacing the two screws.
Parts Used:
-
dave from williamsville, NY
-
Difficulty Level:Really Easy
-
Total Repair Time:Less than 15 mins
-
Tools:Screw drivers
4 of 4 people
found this instruction helpful.
Was this instruction helpful to you?
Thank you for voting!
Ice Maker was leaking
Used socket set to remove screws. Removed the wire harness, then removed lift arm from old ice maker and then put lift arm on the new ice maker. Reinstall wire harness then installed back in freeze with the screws. Video was very helpful. I will do business with Partselect in the future. Shipping was very fast. Thanks Partselect
Parts Used:
-
Robert from Severn, MD
-
Difficulty Level:Really Easy
-
Total Repair Time:Less than 15 mins
-
Tools:Screw drivers, Socket set
4 of 4 people
found this instruction helpful.
Was this instruction helpful to you?
Thank you for voting!
Ice maker eitehr wouldn't make ice, or made odd shaped cubes
First, I shut off the water going to the refrigerator, then removed the ice bin. Then I loosened the two screws on the top of the ice maker (the one toward the front was a little tricky, since you can't see it at all), then removed the screw that fastens the lower bracket to the side of the frig. Then I lifted up on it slightly to remove it from the two upper screws, then unplugged the wiring harness from the side of the refrigerator and lifted the whole unit out of the frig.
I then removed the plastic cover on the front of the ice maker, pressed on the tab to remove the wiring harness from the old ice maker, and installed it on the new ice maker. I then removed the metal arm from the old ice maker and installed it on the new unit as well. The last part that I moved from the old ice maker to the new one was the lower bracket, as the bracket on the new ice maker was bent during shipping.
Once those parts were swapped, I put the plastic cover on the new ice maker, plugged the wiring harness back into the side of the frig, routed the fill tube into the back on the ice maker assembly, and set the unit back on the two upper screws. I then put the screw back in the lower bracket, tightened the two upper screws, and then put the ice bin back in and turned the water back on. After a couple of hours, I threw out the first couple of batches of ice and it is now working as it had in the past.
I also noticed, when looking at the old ice maker, that the black plastic coating was coming off the ice cube tray, so it was a good time to be replacing it anyway. Overall, a very easy job (I was prepared for swearing, parts being slightly off, etc.) and it would have been a shame to have paid someone to do it.
I then removed the plastic cover on the front of the ice maker, pressed on the tab to remove the wiring harness from the old ice maker, and installed it on the new ice maker. I then removed the metal arm from the old ice maker and installed it on the new unit as well. The last part that I moved from the old ice maker to the new one was the lower bracket, as the bracket on the new ice maker was bent during shipping.
Once those parts were swapped, I put the plastic cover on the new ice maker, plugged the wiring harness back into the side of the frig, routed the fill tube into the back on the ice maker assembly, and set the unit back on the two upper screws. I then put the screw back in the lower bracket, tightened the two upper screws, and then put the ice bin back in and turned the water back on. After a couple of hours, I threw out the first couple of batches of ice and it is now working as it had in the past.
I also noticed, when looking at the old ice maker, that the black plastic coating was coming off the ice cube tray, so it was a good time to be replacing it anyway. Overall, a very easy job (I was prepared for swearing, parts being slightly off, etc.) and it would have been a shame to have paid someone to do it.
Parts Used:
-
J. Bradley from Wellsville, NY
-
Difficulty Level:Easy
-
Total Repair Time:Less than 15 mins
-
Tools:Nutdriver
4 of 4 people
found this instruction helpful.
Was this instruction helpful to you?
Thank you for voting!
broken roller
proped up frig, loosened screws, cut pin, installed rooler w/ new pin, rounded pin end, reistalled, lowered frig...everyone happy, thanks again partselect.
Parts Used:

-
John from Capac, MI
-
Difficulty Level:Really Easy
-
Total Repair Time:15 - 30 mins
-
Tools:Nutdriver
4 of 4 people
found this instruction helpful.
Was this instruction helpful to you?
Thank you for voting!
Freezer box frosting up. Refrigerator not cold.
My son (who does HVAC, but not appliance repair) did some investigating by taking front and back panels off and determined that the evaporator coil was freezing over because the defrost wire was not heating up. He and his girlfriend did some real-time internet searching for diagnostic info because NO control diagram was included with the refrigerator. He determined the problem was most likely the electronic control board. Ordered and installed a new board and the refrigerator is back to working fine. Took about 2 hours to diagnose the problem and 1/4 hour to actually install the control board. Kind of disappointing that this control board failed when the refrigerator was less that 4 years old.
Parts Used:

-
Timothy from BELTSVILLE, MD
-
Difficulty Level:A Bit Difficult
-
Total Repair Time:30 - 60 mins
-
Tools:Nutdriver, Screw drivers
4 of 5 people
found this instruction helpful.
Was this instruction helpful to you?
Thank you for voting!
Ice maker just stopped making ice
This was the third icemaker replaced since January 1999. Improvement need to be made in the design of the icemaker so that more than 2-3 years of life is available.
The most difficult part was disconnecting the power plug in the back of the icemaker. You must squeeze the upper and lower tabs together and pull out at the same time to disconnect. Once this is done, take out one nut head screw, lift up on the icemaker and remove from the hanger. Be careful that you don't break the plastic tabs on the hangers. Replace new icemaker in reverse, feed water supply where it must go in the back, resnap onto hangers, replace the nut head screw and snap in the power plug. It took about 2 hours before the icemaker began making ice. It has been working fine ever since. PS. I saved about $200.00 over having a repairman come in and replace the unit.
The most difficult part was disconnecting the power plug in the back of the icemaker. You must squeeze the upper and lower tabs together and pull out at the same time to disconnect. Once this is done, take out one nut head screw, lift up on the icemaker and remove from the hanger. Be careful that you don't break the plastic tabs on the hangers. Replace new icemaker in reverse, feed water supply where it must go in the back, resnap onto hangers, replace the nut head screw and snap in the power plug. It took about 2 hours before the icemaker began making ice. It has been working fine ever since. PS. I saved about $200.00 over having a repairman come in and replace the unit.
Parts Used:
-
Thomas from Valencia, PA
-
Difficulty Level:A Bit Difficult
-
Total Repair Time:1- 2 hours
-
Tools:Nutdriver
4 of 5 people
found this instruction helpful.
Was this instruction helpful to you?
Thank you for voting!