















DWC6402ABE Maytag Dishwasher - Instructions
Keep searches simple. Use keywords, e.g. "leaking", "pump", "broken" or "fit".
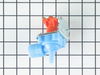
Dishwasher would not fill with water.
Most all of the workable parts on a dishwasher are accessed thru the bottom. Luckily ours is portable. Took the dishwasher to the garage, flipped it on its back on my motorcycle/ATV jack. that makes it so much easier because you can raise it up 24". Used the schematic from Part Select and found the water valve. Removed two screws, two wires and two clamps and viola, water valve comes out. Installed the new one, and reassembled, I thought. I left off the hose that connects to the wash drum. Started it up and had water all over the floor immediately. Took to the garage, flipped it back over and realized what I had done. Felt like a moron. Reconnected hose like it was supposed to be and it runs great.
Parts Used:
-
Mike from Kansas City, MO
-
Difficulty Level:Easy
-
Total Repair Time:1- 2 hours
-
Tools:Nutdriver, Pliers, Screw drivers
12 of 14 people
found this instruction helpful.
Was this instruction helpful to you?
Thank you for voting!
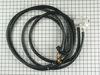
the hose wouldn't grip the faucet anymore it would fall off.
i took the dishwasher apart, took off the old hose and replace it with the new one. it was real easy. i smiled as my two yr. old tried to help me . i'm sure i'll be odering other parts in the future.
Parts Used:
-
madison from greensboro, NC
-
Difficulty Level:Really Easy
-
Total Repair Time:30 - 60 mins
-
Tools:Pliers, Screw drivers
15 of 24 people
found this instruction helpful.
Was this instruction helpful to you?
Thank you for voting!
Leaks on floor in front of washer.
Removed two lower panels using nutdriver. Ran washer through a rinse cycle, to determine for sure where leak was coming from (under door on left). Examined the door gasket and observed buildup of lime deposits and a general depression of the gasket through years of use, especially in lower portions. Removed the old gasket observing how installed. Cleaned out groove with Lime-away and toothbrush. Washed clean using water in a squirt bottle. Dried things out using paper towels, and then pressed new gasket into place, starting at lower left. Readjusted the gasket to fit precisely end to end. Shut door and ran a drip free load.
Parts Used:

-
Jim from Yorba Linda, CA
-
Difficulty Level:Really Easy
-
Total Repair Time:30 - 60 mins
10 of 10 people
found this instruction helpful.
Was this instruction helpful to you?
Thank you for voting!
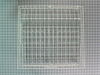
Our 16 year old dishwasher's top rack lost most of the coated metal 'prongs' that separated/supported items on the upper rack.
With a straight edge screwdriver I carefully removed the plastic end caps on the rack support glider-shelves, replaced the old rack with the new rack, and then reattached the end caps.
I felt better about ordering the part Online after having talked to a sales person since there were several racks from which to choose. She reassured me that I was ordering the correct part number. I am a woman and 62 years of age, and I was pretty sure this installation would be a no-brainer. I just wanted to make sure I had the right part for the job.
I felt better about ordering the part Online after having talked to a sales person since there were several racks from which to choose. She reassured me that I was ordering the correct part number. I am a woman and 62 years of age, and I was pretty sure this installation would be a no-brainer. I just wanted to make sure I had the right part for the job.
Parts Used:
-
Cheryl from White Lake, MI
-
Difficulty Level:Really Easy
-
Total Repair Time:30 - 60 mins
-
Tools:Screw drivers
10 of 10 people
found this instruction helpful.
Was this instruction helpful to you?
Thank you for voting!
Leaking
I first changed the dispenser door latch grommet, which was very eazy except for the left side nut screw which was a little awkwaed to get to with the nut driver. Not a big problem but difficult enough that i stripped the threads (plastic) and had to get a larger screw which is working fine so far. Since the grommet didn't stop the leaking although it was obvious it was leaking from the soap trail. I ordered the gasket and got it very promptly put it on and guess what. Still leaked some. I discovered when they installed the dishwasher the door appeared to be warped. To fix this there are two door tension springs under the bottom panel. By adjusting these with a log screw driver problem finally solved.
It is good to have not only a great place to get parts but the idea's from others are terrific. Although this washer is 15 years old it looks new and now acts new. Thanks so much for good service and advise.
It is good to have not only a great place to get parts but the idea's from others are terrific. Although this washer is 15 years old it looks new and now acts new. Thanks so much for good service and advise.
Parts Used:
-
L W from Manning, SC
-
Difficulty Level:A Bit Difficult
-
Total Repair Time:1- 2 hours
-
Tools:Nutdriver, Screw drivers
10 of 11 people
found this instruction helpful.
Was this instruction helpful to you?
Thank you for voting!
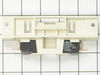
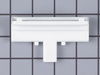
The latch was becoming very difficult to open being almost 10 years old
I had to remove the screws around the door frame and remove the side panels that attached the inside cover from the interior of the door. Once I removed it I could then unscrew the top cover that then allowed me to remove an inside cover for the internal electrical connections and the door latch was then open for repair. The electrical connections to both sides of the door switch and holder assemby had to be pulled from the assembly and I was then able to remove the assembly and the door latch. The new door holder and latch handle had to be connected to the electrical wires and inserted back into the door and the initial process was reversed to reinstall.
Parts Used:
-
Frank from Parker, CO
-
Difficulty Level:Easy
-
Total Repair Time:30 - 60 mins
-
Tools:Nutdriver, Screw drivers
10 of 12 people
found this instruction helpful.
Was this instruction helpful to you?
Thank you for voting!
dishwasher leaked
First replaced rubber seal around door, which did not stop the leaking.
Then ordered insulation foam strip and replaced old one, which fixed problem. Put new strip over the old one because tub was slightly warped.
Very pleased with order speed and cost.
Then ordered insulation foam strip and replaced old one, which fixed problem. Put new strip over the old one because tub was slightly warped.
Very pleased with order speed and cost.
Parts Used:

-
Jean from Gaffney, SC
-
Difficulty Level:Easy
-
Total Repair Time:15 - 30 mins
-
Tools:Screw drivers
10 of 12 people
found this instruction helpful.
Was this instruction helpful to you?
Thank you for voting!
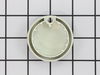
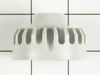
The Spray Diverter Assembly Came Off And Fell On The Heating Element And Melted.
First I installed the spray diverter,then I installed the discharge housing nut and tightened it down. Last I snapped on the spray diverter cap.
Parts Used:

-
JEFFREY from WAVELAND, MS
-
Difficulty Level:Really Easy
-
Total Repair Time:Less than 15 mins
-
Tools:Pliers
12 of 18 people
found this instruction helpful.
Was this instruction helpful to you?
Thank you for voting!
Water leak from the dishwasher door
After replacing the door gasket and seeing that this wasn't the problem, using the schematics found at partselect.com I finally realized that it may be the insulation foam strip. I ordered the product and received it very quickly. Installation went fairly quickly. It was easy to remove the old foam strip and install the new one. The only problem was that the foam strip was about 1/4 " too short and it didn't cover the entire bottom. I improvised a little bit and cut off some of the old strip and covered the gap. So far the leak seems to have been fixed. In addition to the foam strip I had to buy a torx screwdriver for $11 at the local hardware store. The total spent was around $25.
Parts Used:
-
Michael from Bronx, NY
-
Difficulty Level:Easy
-
Total Repair Time:15 - 30 mins
9 of 10 people
found this instruction helpful.
Was this instruction helpful to you?
Thank you for voting!
Broken door spring linage and lost spring
Took off bottom plate for access. Slid part that holds bottom of spring forward so I could reach it without pulling dishwasher out of position. Hooked spring to bottom attachment, then connected door spring linkage to holder that is attached to the dishwasher frame. Adjusted the tension with the tension screw and buttoned up bottom plate.
Parts Used:
-
David from Mesa, AZ
-
Difficulty Level:A Bit Difficult
-
Total Repair Time:30 - 60 mins
-
Tools:Nutdriver, Pliers, Screw drivers
9 of 10 people
found this instruction helpful.
Was this instruction helpful to you?
Thank you for voting!
leaking door
Removed the old gasket, without tools, and fit the new gasket into the space, making sure it was in the groove correctly all around, job done, works great. The ordering of the gasket on this site was easy and the shipping time was amazing, one day. Would use this company again, and recommend to anyone needing parts that wants to do repairs themself. I am sure saved a whole lot over hiring someone, and got the job done sooner also.
Parts Used:
-
VIOLA from BOUCKVILLE, NY
-
Difficulty Level:Really Easy
-
Total Repair Time:15 - 30 mins
9 of 10 people
found this instruction helpful.
Was this instruction helpful to you?
Thank you for voting!
Small / slow leak at bottom corner of dishwasher door.
After examining the door and main seal around the dishwasher I thought everything looked okay. I looked online to order a new seal anyway and discovered from others that the leak was probably the insulation strip inside the door rather than the seal around the dishwasher. I ordered an insulation strip and it arrived a couple days later. I removed the seven screws of the interior door cover and disconnected the electrical. After removing the old insulation strip and installig the new one I reconnected the electrical wiring/plugs, put the door cover back on, and reinstalled the screws. Total time was about 15-20 minutes and the leak stopped. It was very easy and saved the cost of a repairman or a new dishwasher. I'm very glad that I "listened" to others and went with the new insulation strip.
Parts Used:
-
Adam from Acworth, GA
-
Difficulty Level:Really Easy
-
Total Repair Time:15 - 30 mins
-
Tools:Screw drivers
10 of 14 people
found this instruction helpful.
Was this instruction helpful to you?
Thank you for voting!
water leak through door
1- turn power off. 2- remove 7 screws to take door apart 3- remove 2 screws to take dispenser out. 4- i unhooked electic plug from it. 5- replace grommet and all back together. not bad to be 72 years old.
Parts Used:
-
marvis from barbourville, KY
-
Difficulty Level:Easy
-
Total Repair Time:30 - 60 mins
-
Tools:Nutdriver, Screw drivers
8 of 8 people
found this instruction helpful.
Was this instruction helpful to you?
Thank you for voting!
Lost the faucet adapter
I had to replace the faucet in the kitchen sink orignnally. However since I use a porteable dishwasher, its hose connects to the kitchen faucet. The new faucets aerator is threaded differently than the old so that the dishwasher adapter would not screw in. I had misplaced the adappter kit that came with the dishwasher last year, so I ordered the adapter from partselect.com. when the part came a few day it was a simple as screw out the old aerator, screwing in the new adapted and then putting the modified aerator from the old faucet back in so that the dishwasher can be connected as needed.
Parts Used:

-
Victor from Demotte, IN
-
Difficulty Level:Really Easy
-
Total Repair Time:Less than 15 mins
-
Tools:Pliers
10 of 14 people
found this instruction helpful.
Was this instruction helpful to you?
Thank you for voting!
Water leaking around the Inlet injector on side of dishwasher.
My original order was for the "Motor Gasket" in the bottom of the tub that just looked nasty. Not leaking. Replacing that was a little more complicated, but used another customer's recommendations and worked great. Ran an empty load to check for leaks and thats when we discovered that we had a leak on the side of the darn thing. So we ordered the "Injector Seal Ring. Got it in about 5 days and after installing, (2 seconds), we still had a leak! Soooo, ordered the "Water Inlet Injector". 5 days later, we have NO MORE LEAKS!!! I would STRONGLY suggest that anyone who has a leak at the Water Inlet, order a new Injector right along with the Seal Ring. The shipping and handling was WAY more than the price of the parts. I'm happy to say that my 10 year old dishwasher is running like a champ. Thank You.
Parts Used:

-
Juli from Grangeville, ID
-
Difficulty Level:Easy
-
Total Repair Time:30 - 60 mins
-
Tools:Screw drivers
8 of 9 people
found this instruction helpful.
Was this instruction helpful to you?
Thank you for voting!