















DDC4580NDL General Electric Dryer - Instructions
Keep searches simple. Use keywords, e.g. "leaking", "pump", "broken" or "fit".
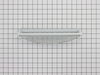
broken lint filter
I only ordered a lint filter with frame but wanted to let other's know that ordering from your site was extremely easy and the shipping was extremely fast!! I received my order with 2 days of placing my order. Thank you!!
Parts Used:
-
Denise from Turnersville, NJ
-
Difficulty Level:Really Easy
-
Total Repair Time:Less than 15 mins
-
Tools:Nutdriver
Was this instruction helpful to you?
Thank you for voting!
no heat
followed video direction ,pulled part ,compared to part on-line ,ordered part delivered in two buisness days and installed ,back in service .very simple and I will shop at your sight again and tell friends and family as well
Parts Used:

-
Paul from Montour Falls, NY
-
Difficulty Level:Really Easy
-
Total Repair Time:Less than 15 mins
-
Tools:Socket set
Was this instruction helpful to you?
Thank you for voting!
Lint trap screen had a gash.
Deftly removed the old lint trap and placed the new frame in place. It worked perfectly. Hands only repair.
Parts Used:
-
Barbara from Palm Beach Gardens, FL
-
Difficulty Level:Really Easy
-
Total Repair Time:Less than 15 mins
Was this instruction helpful to you?
Thank you for voting!
dryer door would not stay closed
-
Dave from Redondo Beach, CA
-
Difficulty Level:Really Easy
-
Total Repair Time:Less than 15 mins
Was this instruction helpful to you?
Thank you for voting!
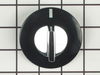
My timer knob cracked after 20 years
Break up the broken knob easily with plyers.Once thats off then push on the new knob with your fingers that took 3 seconds ,fit perfect.
Parts Used:
-
William from Beacon Falls, CT
-
Difficulty Level:Really Easy
-
Total Repair Time:Less than 15 mins
Was this instruction helpful to you?
Thank you for voting!
Dryer door would no longer shut.
Simply popped the old broken part out and popped the new part into place. I wasn't sure if it was the Latch Door or the Door Strike. Once the parts arrived, it was clear the Door Strike was not the issue.
Parts Used:
-
Fawn from Loganville, GA
-
Difficulty Level:Easy
-
Total Repair Time:Less than 15 mins
-
Tools:Screw drivers
Was this instruction helpful to you?
Thank you for voting!
new lint filter
-
Claudia from Hammondsport, NY
-
Difficulty Level:Really Easy
-
Total Repair Time:Less than 15 mins
Was this instruction helpful to you?
Thank you for voting!
NO PROBLEMS---UNWRAP & pop in where old filter was removed--couldn"t be easier & it fit perfectly:-)
-
ROBERT from ALBION, NY
-
Difficulty Level:Really Easy
-
Total Repair Time:Less than 15 mins
Was this instruction helpful to you?
Thank you for voting!
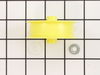
idler pulley broken
Pop off the old, pop on the new. I did it with one hand, the 'hard' part was putting the access panal back on.
Parts Used:
-
James from Pottsville, PA
-
Difficulty Level:Really Easy
-
Total Repair Time:15 - 30 mins
-
Tools:Nutdriver, Pliers
Was this instruction helpful to you?
Thank you for voting!
broken belt
unscrewed and lifted top of dryer put belt around drum closed top put belt around motor pulley and belt tensioner and finished.( remember to unplug unit before working on it.)
Parts Used:

-
Dennis from Hamburg, PA
-
Difficulty Level:Easy
-
Total Repair Time:15 - 30 mins
-
Tools:Nutdriver, Screw drivers, Socket set
Was this instruction helpful to you?
Thank you for voting!
Dryer wouldnt stay heated
Took off the top cover then took off the front panel and installed the new coils on gas valve.
Parts Used:
-
Ron from Parkersburg, WV
-
Difficulty Level:Easy
-
Total Repair Time:15 - 30 mins
-
Tools:Nutdriver, Pliers, Screw drivers
Was this instruction helpful to you?
Thank you for voting!
bearigs,belt squeak
Unscrewed the top lid screws located in door opening.Removed lid.Unscrewed the front cover screws located at top corners of cover, underneath where the top lid was.Pulled out drum,removing belt at same time.Removed the rear bearing unit,installed new one.Really easy.Took front bearing off front cover,it just snaps on.Installed new bearing,with 4 new slides.Reassembled machine,replacing old belt at the same time.Done.It really is that easy.Spent more time cleaning lint out of dryer interior than actual mechanical work,I think.
Parts Used:
-
TIM from NORTH AURORA, IL
-
Difficulty Level:Easy
-
Total Repair Time:15 - 30 mins
-
Tools:Nutdriver, Screw drivers
Was this instruction helpful to you?
Thank you for voting!
The drum stopped turning in the dryer
Based on the symptom (drum not turning), I figured that the belt was shot. I found a video on YouTube that described how to fix it. I also found directions here on this site on how to fix it! Here's what I did: step1: there were two screws holding the top on. took them off and the top swung up, exposing the drum and broken belt. step2: took off the two screws holding the front on. tipped the front forward so I could get the new belt around the drum. step 3: took the back plate off (10 screws). had to remove the exhaust tube first. cleaned out all the lint with the shop vac. there was plenty of lint everywhere. step 4: put the belt onto the motor pulley wrapping around the tension pulley. step5: put everything back together and plugged it in. everything worked fine. it took longer to vacuum all the lint out than it did for the actual repair.
Parts Used:
-
Alan from Wheaton, IL
-
Difficulty Level:Easy
-
Total Repair Time:15 - 30 mins
-
Tools:Nutdriver, Screw drivers
Was this instruction helpful to you?
Thank you for voting!
Loud Sqeaking noise
the replacement part was easy to replace but remembering how the belt went back on took alittle more time..
Parts Used:
-
Michell from Bellefontaine, OH
-
Difficulty Level:Easy
-
Total Repair Time:15 - 30 mins
Was this instruction helpful to you?
Thank you for voting!
intermittent failure to heat air until total failure to heat
Unplugged dryer. Removed access door from lower right front of dryer. Disconnected wiring harness to igniter. Couldn't reach retaining bolt with wrench or socket, but was able to spread igniter clip with fingers to be able to remove old igniter and then work new igniter into position without unbolting retaining clip - ultimately a tool-less operation that could have taken 5 minutes. Reconnect wiring harness and reconnect power. Test dryer then replace access cover.
Parts Used:
-
James from Asbury Park, NJ
-
Difficulty Level:Easy
-
Total Repair Time:15 - 30 mins
Was this instruction helpful to you?
Thank you for voting!