















DDC4498AEL General Electric Dryer - Instructions
Keep searches simple. Use keywords, e.g. "leaking", "pump", "broken" or "fit".
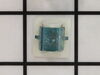
The dryer door wouldn't stay closed.
There is a plastic female closure part in the dryer door that wouldn't close tightly around the metal male closure on the dryer. I popped out the plastic square with a screwdriver, popped the new plastic closure in with my thumb. Works great. I never even installed the new metal portion of the latch.
Parts Used:
-
Jean from Waterford, MI
-
Difficulty Level:Really Easy
-
Total Repair Time:Less than 15 mins
-
Tools:Screw drivers
Was this instruction helpful to you?
Thank you for voting!
no heat
followed video direction ,pulled part ,compared to part on-line ,ordered part delivered in two buisness days and installed ,back in service .very simple and I will shop at your sight again and tell friends and family as well
Parts Used:

-
Paul from Montour Falls, NY
-
Difficulty Level:Really Easy
-
Total Repair Time:Less than 15 mins
-
Tools:Socket set
Was this instruction helpful to you?
Thank you for voting!
dryer door would not stay closed
-
Dave from Redondo Beach, CA
-
Difficulty Level:Really Easy
-
Total Repair Time:Less than 15 mins
Was this instruction helpful to you?
Thank you for voting!
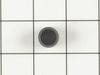
squealing noise while dryer was running
Removed two screws from front by door. Removed back panel to remove belt from tensioner. lifted lid of dryer. removed two more screws from inside to remove front panel. while holding the barrel I removed the front panel then grabbed barrel and pulled out. took off the old bearing, put the new one on and reassembled it the way I took it apart. The whole thing took about 10 min was quick and easy if there is any problems while you are doing it look it up on youtube.com and you can see it done.
Parts Used:
-
robert from Florissant, MO
-
Difficulty Level:Really Easy
-
Total Repair Time:Less than 15 mins
-
Tools:Nutdriver, Screw drivers
Was this instruction helpful to you?
Thank you for voting!
Dryer door would no longer shut.
Simply popped the old broken part out and popped the new part into place. I wasn't sure if it was the Latch Door or the Door Strike. Once the parts arrived, it was clear the Door Strike was not the issue.
Parts Used:
-
Fawn from Loganville, GA
-
Difficulty Level:Easy
-
Total Repair Time:Less than 15 mins
-
Tools:Screw drivers
Was this instruction helpful to you?
Thank you for voting!
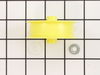
high pitch squeel noise, loud!!
opened back of dryer, located idler pully with broken bushing with plastic rubbing on metal rod making a loud rubbing noise when spinning. ordered part at 10:30 am and had parts by noon the next day, Christmas eve! wow!!!parts fit perfict, shiping time unbelievable, thanks to all !!!
Parts Used:

-
shane from west harrison, IN
-
Difficulty Level:Really Easy
-
Total Repair Time:15 - 30 mins
-
Tools:Nutdriver
Was this instruction helpful to you?
Thank you for voting!
broken belt
unscrewed and lifted top of dryer put belt around drum closed top put belt around motor pulley and belt tensioner and finished.( remember to unplug unit before working on it.)
Parts Used:

-
Dennis from Hamburg, PA
-
Difficulty Level:Easy
-
Total Repair Time:15 - 30 mins
-
Tools:Nutdriver, Screw drivers, Socket set
Was this instruction helpful to you?
Thank you for voting!
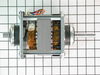
Loud Noise coming from dryer (like motor was going out)
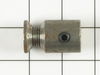
I had to take the top panel off of the dryer which is 2 screws inside the dryer door jam. Then the front panel had to come off which was 2 screws inside the dryer above the tumbler. One on each side. Then it lifts off of two hooks at the bottom. Then the left panel (left if you are looking at the front of the dryer) had to come off which was a few screws on the back, a few on the front, and one on the bottom. Once I had the panels off, I unscrewed the blower wheel which is one screw. I took the blower wheel cabinet loose but didn't remove it. There is a metal collar that holds the motor to the bracket. Pull it off from the top. Unplug all the wires attached to the motor. I took a picture of the wire connections with my phone for reference with the new motor. Remove the belt. The motor should pull out towards you. The new motor comes with a pulley. Put the pulley on the motor and tighten locking screw. Put new motor in dryer and replace the metal collar. Connect all wire connections. Reconnect the blower wheel and tighten all screws to the blower wheel housing. Now, I plugged the dryer back in and tested it without reattaching the belt. Know that if you do it this way, the dryer will not stay on because there is a relay switch that is engaged only when the belt is on the pulley and there is tension on the belt tensioner. When the dryer motor worked properly, I replaced the belt and put all the panels back on. Plugged it up and it worked beautifully.
Parts Used:
-
Chad from New Bern, NC
-
Difficulty Level:Easy
-
Total Repair Time:15 - 30 mins
-
Tools:Nutdriver, Screw drivers
Was this instruction helpful to you?
Thank you for voting!
The drum bearing worn and dryer squeaking.
The info from your web site was helpful. I had never taken a dryer apart and the instructions made the job easy. Used socket set to remove the back panel and top control panel. Then used a phillip's screwdriver to remove the two screws that hold the top of the dryer; these screws are accessed by opening the door to the dryer. To remove the front of the dryer remove to the two screws that are located at the top upper corners where front panel meet the side panel. Once these two screws are removed, remove the belt from around the drum and lift the drum out. The drum bearing is located on the back of the drum; remove the remnants of the old bearing and replace it with the new one. Retrace your steps to put the dryer back together. To get the belt back on track you will have to remove the lower back panel to access the belt drive and tension pulley. It is not difficult. God bless you.
Parts Used:
-
jesse from Denison, TX
-
Difficulty Level:Easy
-
Total Repair Time:15 - 30 mins
-
Tools:Socket set, Wrench set
Was this instruction helpful to you?
Thank you for voting!
idler pulley broken
Pop off the old, pop on the new. I did it with one hand, the 'hard' part was putting the access panal back on.
Parts Used:
-
James from Pottsville, PA
-
Difficulty Level:Really Easy
-
Total Repair Time:15 - 30 mins
-
Tools:Nutdriver, Pliers
Was this instruction helpful to you?
Thank you for voting!
The drum stopped turning in the dryer
Based on the symptom (drum not turning), I figured that the belt was shot. I found a video on YouTube that described how to fix it. I also found directions here on this site on how to fix it! Here's what I did: step1: there were two screws holding the top on. took them off and the top swung up, exposing the drum and broken belt. step2: took off the two screws holding the front on. tipped the front forward so I could get the new belt around the drum. step 3: took the back plate off (10 screws). had to remove the exhaust tube first. cleaned out all the lint with the shop vac. there was plenty of lint everywhere. step 4: put the belt onto the motor pulley wrapping around the tension pulley. step5: put everything back together and plugged it in. everything worked fine. it took longer to vacuum all the lint out than it did for the actual repair.
Parts Used:
-
Alan from Wheaton, IL
-
Difficulty Level:Easy
-
Total Repair Time:15 - 30 mins
-
Tools:Nutdriver, Screw drivers
Was this instruction helpful to you?
Thank you for voting!
Dryer wouldnt stay heated
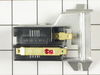
Took off the top cover then took off the front panel and installed the new coils on gas valve.
Parts Used:
-
Ron from Parkersburg, WV
-
Difficulty Level:Easy
-
Total Repair Time:15 - 30 mins
-
Tools:Nutdriver, Pliers, Screw drivers
Was this instruction helpful to you?
Thank you for voting!
bearigs,belt squeak
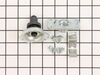
Unscrewed the top lid screws located in door opening.Removed lid.Unscrewed the front cover screws located at top corners of cover, underneath where the top lid was.Pulled out drum,removing belt at same time.Removed the rear bearing unit,installed new one.Really easy.Took front bearing off front cover,it just snaps on.Installed new bearing,with 4 new slides.Reassembled machine,replacing old belt at the same time.Done.It really is that easy.Spent more time cleaning lint out of dryer interior than actual mechanical work,I think.
Parts Used:
-
TIM from NORTH AURORA, IL
-
Difficulty Level:Easy
-
Total Repair Time:15 - 30 mins
-
Tools:Nutdriver, Screw drivers
Was this instruction helpful to you?
Thank you for voting!
High pitched squealing noise while running
My dryer started making a horrible high pitched squealing noise, gradually increasing in volume over a month or so until it was intolerable even being on another floor. Initially, upon reading online, I thought that the rear bearing might be going out. I unscrewed the top of the dryer, and removed the front. Turning the drum by hand, I could reproduce the noise, which sounded like it was coming from the back of the dryer. I opened the rear access panel and turned the drum again by hand to pin the noise down - it sounded like it was coming from the tension pulley or maybe the motor. I pulled the belt off of the drum and spun it again, no noise. I turned the motor by hand, no noise. My best guess was that the old belt was slipping and making the noise (it was in pretty miserable condition), but I decided to buy a pulley assembly in addition to a new belt anyway. Installing both of them fixed the problem (I didn't try only installing one, however, so I don't know which one fixed it).
Parts Used:
-
Brian from Starkville, MS
-
Difficulty Level:Really Easy
-
Total Repair Time:15 - 30 mins
-
Tools:Nutdriver, Screw drivers, Socket set
Was this instruction helpful to you?
Thank you for voting!
Loud Sqeaking noise
the replacement part was easy to replace but remembering how the belt went back on took alittle more time..
Parts Used:
-
Michell from Bellefontaine, OH
-
Difficulty Level:Easy
-
Total Repair Time:15 - 30 mins
Was this instruction helpful to you?
Thank you for voting!