















DCCB330ED0WC General Electric Dryer - Instructions
Keep searches simple. Use keywords, e.g. "leaking", "pump", "broken" or "fit".
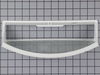
inherited machine, lint filter missing
Searched the sites order # online, called, ordered, delivered PDQ, unpackaged, popped in. That was it.
Parts Used:
-
KAREN from THIBODAUX, LA
-
Difficulty Level:Very Easy
-
Total Repair Time:Less than 15 mins
1 person
found this instruction helpful.
Was this instruction helpful to you?
Thank you for voting!
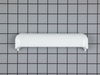
The door handle was comming off had broken hook
I pulled the old handle off and pushed the new one on.
No problem at all.
No problem at all.
Parts Used:
-
John C. from Cincinnati, OH
-
Difficulty Level:Really Easy
-
Total Repair Time:Less than 15 mins
1 person
found this instruction helpful.
Was this instruction helpful to you?
Thank you for voting!
Squeaking noise
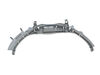
Dryer was making a horrible noise. When I took it apart I noticed that the from side dryer bearing was ruined. Ordered the part with the slide bars and replaced...Works great...
Parts Used:

-
robert from woodstock, GA
-
Difficulty Level:Really Easy
-
Total Repair Time:15 - 30 mins
-
Tools:Screw drivers
1 person
found this instruction helpful.
Was this instruction helpful to you?
Thank you for voting!
squeeking
-
Gary from Chesnee, SC
-
Difficulty Level:Really Easy
-
Total Repair Time:15 - 30 mins
-
Tools:Screw drivers
1 person
found this instruction helpful.
Was this instruction helpful to you?
Thank you for voting!
Door handle broke
-
Cheryl from WILDER, KY
-
Difficulty Level:Really Easy
-
Total Repair Time:30 - 60 mins
1 person
found this instruction helpful.
Was this instruction helpful to you?
Thank you for voting!
dryer had a loud sqeaking noise
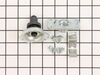
removed top, 2 hex screws, removed front 2 hex screws & 2 star screws. removed belt, slid drum out. Removed old bearing and replaced with new bearing kit. assembled in reverse.
It would help to have another person assist you.
It would help to have another person assist you.
Parts Used:
-
Barbara from Sugar Valley, GA
-
Difficulty Level:Easy
-
Total Repair Time:30 - 60 mins
-
Tools:Screw drivers, Socket set
1 person
found this instruction helpful.
Was this instruction helpful to you?
Thank you for voting!
loud noise when ran for 5 min.
Replaced the rear drum bearing. Not doing it before ,it took about 1 1/2 hrs. Problem was fixed.
Parts Used:
-
Joseph from Freeland, MI
-
Difficulty Level:Easy
-
Total Repair Time:1- 2 hours
-
Tools:Screw drivers, Socket set
1 person
found this instruction helpful.
Was this instruction helpful to you?
Thank you for voting!
Dryer squeaked when running
Took the dryer apart to get to the rear bearing. Took the bearing assembly out, kept the e-ring from the old bearing shaft, replaced the bearing kit, took the o-ring off the new shaft and replaced it with the e-ring, then reassembled the unit. Make sure to place a nail or long screw into into the rear of the drum, so that you can realign bearing on the drum. It is easier with two people when reassembling.
Parts Used:
-
George from Dassel, MN
-
Difficulty Level:A Bit Difficult
-
Total Repair Time:1- 2 hours
-
Tools:Pliers, Screw drivers, Socket set, Wrench set
1 person
found this instruction helpful.
Was this instruction helpful to you?
Thank you for voting!
Plastic tab broke on handle --- temp taped on.
My daughter, who has the dryer in Florida, made the repair herself. She removed the broken handle that had been temporarily taped in place. Cleaned off tape residue with Goo-Gone. Then took the new handle and snapped it into place. Worked just like it was supposed to.
Parts Used:
-
Jay from Niceville, FL
-
Difficulty Level:Really Easy
-
Total Repair Time:Less than 15 mins
1 person
found this instruction helpful.
Was this instruction helpful to you?
Thank you for voting!
no handle
just replaced the unit handle and how my wife can open the dryer without a screwdriver
Parts Used:
-
syd from wilmington, NC
-
Difficulty Level:Really Easy
-
Total Repair Time:Less than 15 mins
1 person
found this instruction helpful.
Was this instruction helpful to you?
Thank you for voting!
broken dryer door handle
removed remaining handle pieces and simply snapped the new part in place. very simple,very easy.
Parts Used:
-
Danny from DOVER, AR
-
Difficulty Level:Very Easy
-
Total Repair Time:Less than 15 mins
-
Tools:Screw drivers
1 person
found this instruction helpful.
Was this instruction helpful to you?
Thank you for voting!
Old lint filter had deteriorated
Removed old one, inserted new one in slot. Just have to be sure it's turned in the right direction.
Parts Used:
-
Doug from INMAN, SC
-
Difficulty Level:Really Easy
-
Total Repair Time:Less than 15 mins
1 person
found this instruction helpful.
Was this instruction helpful to you?
Thank you for voting!
Door handle broke
-
Barbara from HAWLEY, PA
-
Difficulty Level:Very Easy
-
Total Repair Time:Less than 15 mins
1 person
found this instruction helpful.
Was this instruction helpful to you?
Thank you for voting!
Drum was squeaking and making a lot of noise!
Took apart the dryer housing fairly quickly, pulled out the drum, and installed the kit. Was fairly simple. Then reassembled. The hardest part was trying to get the belt on properly and reconnect to the motor. Believe it or not, I wasted most of my time on the belt. Should've watched the video better and listened to my wife and her suggestions.
Parts Used:
-
Timothy from Rochester, NY
-
Difficulty Level:Easy
-
Total Repair Time:30 - 60 mins
-
Tools:Pliers, Screw drivers, Wrench set
1 person
found this instruction helpful.
Was this instruction helpful to you?
Thank you for voting!
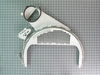
Cracked air duct
Two screws under the dryer door then the top comes off.Then two screws hold the front on come out. 4 screws top is off and front is off the rest is no problem.
Parts Used:
-
Forrest from Mays Landing, NJ
-
Difficulty Level:Easy
-
Total Repair Time:1- 2 hours
-
Tools:Screw drivers
2 of 4 people
found this instruction helpful.
Was this instruction helpful to you?
Thank you for voting!