















CW4202L (PCW4202L) Crosley Washer - Instructions
Keep searches simple. Use keywords, e.g. "leaking", "pump", "broken" or "fit".
noise while spinning
had to completely disasemble whole washer drum and mechanical components to remove upper bearing on transmission,the drum hub was corroded on the shaft. I had to use a gear puller and a propane torch to get the hub off upper shaft of the transmission. then press the bearings in the respective sheet metal supports. reassembly was alot easier than taking it apart. Not a job for an average homeowner. It would not have been repaired without the wheel puller. all the seals were reusable A week and a half of use later no leaks and works great
Parts Used:

-
Bruce from Harrison, OH
-
Difficulty Level:Very Difficult
-
Total Repair Time:More than 2 hours
-
Tools:Nutdriver, Screw drivers, Socket set, Wrench (Adjustable)
2 of 4 people
found this instruction helpful.
Was this instruction helpful to you?
Thank you for voting!
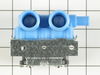
The cold water was barely filling the tub of the washer
First I removed 2 screws that hold the element in place. I then pulled the element out about 3 inches and disconnected the two wires. I connected the new value and put it back in place. I then put the screws back in place.
This was very easy and it solved my problem
Thanks a lot
This was very easy and it solved my problem
Thanks a lot
Parts Used:
-
Stacey A from Richmond, VA
-
Difficulty Level:Easy
-
Total Repair Time:15 - 30 mins
-
Tools:Screw drivers
2 of 4 people
found this instruction helpful.
Was this instruction helpful to you?
Thank you for voting!
Clanging of dryer when rolling

-
John from Bel Air, MD
-
Difficulty Level:Easy
-
Total Repair Time:15 - 30 mins
-
Tools:Nutdriver, Screw drivers
1 of 2 people
found this instruction helpful.
Was this instruction helpful to you?
Thank you for voting!
Washer pump was leaking water
Removed spring, then hoses and then belts. When all was removed we loosen the old washer pump and installed the new pump. Everything was re-installed and was put to wash. At first it leaked water that was already sitting there, but then it work like new. Oh I also read the instruction on this website, I recommend the site to everyone!!
Parts Used:

-
Lizandra from Roxbury, MA
-
Difficulty Level:Really Easy
-
Total Repair Time:15 - 30 mins
-
Tools:Nutdriver, Socket set
1 of 2 people
found this instruction helpful.
Was this instruction helpful to you?
Thank you for voting!
Slow fill on cold cycles.
-
Leonard from Glen Allen, VA
-
Difficulty Level:Easy
-
Total Repair Time:30 - 60 mins
-
Tools:Nutdriver, Screw drivers, Wrench (Adjustable)
2 of 5 people
found this instruction helpful.
Was this instruction helpful to you?
Thank you for voting!
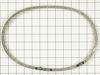
Pump leaking. Replaced aging belt.
Removed front cover of machine. Removed motor/pump assembly which was held in by four (4) bolts. At the same time removed belt from transmission pulley. Removed pump assembly from motor, held in by three (3) torx fasteners. Before installing new pump installed new belt on motor assembly. While setting the motor/assembly in place threaded belt around transmission pulley. Fastened motor/pump assembly. Very easy process!
Parts Used:
-
Christopher from Dearborn, MI
-
Difficulty Level:Really Easy
-
Total Repair Time:15 - 30 mins
-
Tools:Nutdriver
1 of 2 people
found this instruction helpful.
Was this instruction helpful to you?
Thank you for voting!
The knob....she broke.
I pulled off the old metal sheath with a pair needle nose pliers....grueling....then gently slid on the new knob.
Parts Used:

-
Michael from Olmsted Township, OH
-
Difficulty Level:Really Easy
-
Total Repair Time:Less than 15 mins
-
Tools:Pliers
1 of 2 people
found this instruction helpful.
Was this instruction helpful to you?
Thank you for voting!
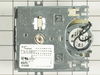
Timer Was Not Engage To Turn Washer On To Wash Sycle
Took the timer nub off by unscrewing then the cover housing the timer unit . 6 Screws . 3 In front 3 in back . Cover came off easy. Un plug the power. Disconect old timer and replace with the new . Plug comes off easy by gently puling it out . Put back cover put back timer nub plug the power on and there it was back as new.
Parts Used:
-
theo from flemington, NJ
-
Difficulty Level:Really Easy
-
Total Repair Time:Less than 15 mins
-
Tools:Screw drivers, Socket set
1 of 2 people
found this instruction helpful.
Was this instruction helpful to you?
Thank you for voting!
Washing Machine was leaking.
First, I removed the screws, then removed the pump. I, then, installed a new pump.
Parts Used:
-
Luis from Homestead, FL
-
Difficulty Level:A Bit Difficult
-
Total Repair Time:30 - 60 mins
-
Tools:Screw drivers
1 of 3 people
found this instruction helpful.
Was this instruction helpful to you?
Thank you for voting!
Was leaking water
Just took it apart and figured out what was leaking. Ordered a piece online through Partselect. Got the piece in 2 days and put it back together. Went real smooth, saved us from buying a new washing machine. Thanks! My husband is quit the handy man too! So I thank him too!
Parts Used:
-
Christine from Marengo, OH
-
Difficulty Level:Really Easy
-
Total Repair Time:1- 2 hours
-
Tools:Nutdriver, Pliers, Socket set, Wrench set
1 of 3 people
found this instruction helpful.
Was this instruction helpful to you?
Thank you for voting!
washing machine pump repair
I ordered my part on Monday. It was delivered on Tuesday, and by four o'clock we were in business. I highly reccomend PartSelect.
Parts Used:
-
Walter from Euless, TX
-
Difficulty Level:A Bit Difficult
-
Total Repair Time:30 - 60 mins
-
Tools:Nutdriver, Pliers, Screw drivers, Socket set
3 of 9 people
found this instruction helpful.
Was this instruction helpful to you?
Thank you for voting!
Washer Wouldn't Turn On
Found out that these switches go from time to time and are usually the culprit when the washer won't operate. Opened the cabinet facing. Warning: there are plenty of YouTube videos on opening Maytag washers. None helped me with this model. I ended up finding the screws to open near the floor on front. Once it's opened, just replace the faulty switch, reconnect and you're in business. Getting the washer opened was about the hardest part of this repair. Total cost: Less than $30.
Parts Used:
-
Jeffrey from Erial, NJ
-
Difficulty Level:Really Easy
-
Total Repair Time:15 - 30 mins
-
Tools:Nutdriver, Screw drivers
0 of 1 people
found this instruction helpful.
Was this instruction helpful to you?
Thank you for voting!
Knob was missing
Placed new knob on the post still present on the machine. Very easy. part fit perfectly and works properly with machine.
Parts Used:
-
cynthia from Temple, TX
-
Difficulty Level:Really Easy
-
Total Repair Time:Less than 15 mins
0 of 1 people
found this instruction helpful.
Was this instruction helpful to you?
Thank you for voting!
Replace washer pump
We noticed that water was on the ground of the laundry room. We initially thought that the washer was leaking. Realized that the washer was going on the spin cycle without draining the water which caused the water the slosh over the edges and then leak on the floor. Well, I had to remove all the wet clothes and suck the water out with a shop vaccuum-this actually took most of the time. After taking the front of the washer off, we noticed the water pump was stripped out. After removing the pump, we then noticed one of our kid's socks jammed in the pump. How the sock got there is still a mistery. We found the replacement part on PartSelect and ordering was easy and fast. Thanks. We're washing clothes again.
Parts Used:
-
Dana L from Los Gatos, CA
-
Difficulty Level:A Bit Difficult
-
Total Repair Time:1- 2 hours
-
Tools:Nutdriver
0 of 1 people
found this instruction helpful.
Was this instruction helpful to you?
Thank you for voting!
Water Pump Leak
I removed the front lower panel. I disconnected the springs holding the motor to the chassis. I removed the belt off the pump pulley. Pay attention to the way the belt runs from the pulley and through the pump. This will aid in placing the pump back on so the belt runs correctly. Disconnected the wires, removed the capacitor bracket so I could take the motor/pump unit out after I removed the 4 bolts holding the motor/pump unit. Removed the 3 torx screws holding the pump to the motor. Matched the new pump to the old to make sure the new one was correct.
Installed in reverse order.
Installed in reverse order.
Parts Used:
-
MIke from Otsego, MI
-
Difficulty Level:Really Easy
-
Total Repair Time:15 - 30 mins
-
Tools:Screw drivers, Socket set, Wrench set
2 of 7 people
found this instruction helpful.
Was this instruction helpful to you?
Thank you for voting!