















CVM2072SM2SS General Electric Microwave - Instructions
Keep searches simple. Use keywords, e.g. "leaking", "pump", "broken" or "fit".
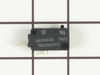
Unit would not come on.
removed access panal, found soft switch as discribed on your web site. removed and replaced.
Parts Used:
-
Phillip from Umatilla, FL
-
Difficulty Level:Really Easy
-
Total Repair Time:Less than 15 mins
-
Tools:Screw drivers
Was this instruction helpful to you?
Thank you for voting!
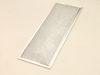
replace bottom grease filters
Just pull down on "O" ring tab and filter will release. Install new filter in same position. you may have to pull on "O" ring to complete fit.
Parts Used:
-
Edwin from Easton, PA
-
Difficulty Level:Really Easy
-
Total Repair Time:Less than 15 mins
Was this instruction helpful to you?
Thank you for voting!
Glass cover for Light Bulb was cracked..
-
Donna from Denver, CO
-
Difficulty Level:Really Easy
-
Total Repair Time:Less than 15 mins
-
Tools:Screw drivers
Was this instruction helpful to you?
Thank you for voting!
All power to the microwave went out.
PartSelect had helpful repair instructions on-line which made the repair easier and faster. Unfortunately, there were other problems with the oven that immediately blew the new fuse I had just installed. It was then determined that additional repair would most likely cost almost as much as a new microwave.
Parts Used:

-
Michael from East China Township, MI
-
Difficulty Level:Easy
-
Total Repair Time:Less than 15 mins
-
Tools:Screw drivers
Was this instruction helpful to you?
Thank you for voting!
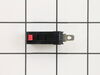
would not turn on - plug in and would shut off right away
-
Vita from Flagstaff, AZ
-
Difficulty Level:Easy
-
Total Repair Time:Less than 15 mins
-
Tools:Screw drivers
Was this instruction helpful to you?
Thank you for voting!
replace grease filter
-
Anthony from San Jose, CA
-
Difficulty Level:Really Easy
-
Total Repair Time:Less than 15 mins
Was this instruction helpful to you?
Thank you for voting!
Film separated from glass door. Window fogged up during food heating.
Removed old film. Put new film on using plastic scraper to smooth and remove air bubbles.
Parts Used:

-
Daniel from Chanhassen, MN
-
Difficulty Level:Easy
-
Total Repair Time:Less than 15 mins
Was this instruction helpful to you?
Thank you for voting!
Air/Grease Filters Were Worn Out
Rec'd the parts within a day or two after ordering and simply placed them where the old ones were removed and wala my stove is back filtering. Only problem, the oven won't ignite while the broiler and stove top burners are fine. Go figure.
Parts Used:
-
peter e from far hills, NJ
-
Difficulty Level:Really Easy
-
Total Repair Time:Less than 15 mins
Was this instruction helpful to you?
Thank you for voting!
Quit working
-
William from Socorro, NM
-
Difficulty Level:Really Easy
-
Total Repair Time:Less than 15 mins
-
Tools:Pliers, Screw drivers
Was this instruction helpful to you?
Thank you for voting!
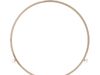
The ring had broken/cracked.
-
Thomas from Arlington, VA
-
Difficulty Level:Really Easy
-
Total Repair Time:Less than 15 mins
Was this instruction helpful to you?
Thank you for voting!
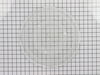
glass cooking tray broke
I laid the new tray in the microwave. There was nothing to really install....but, the woman I spoke to in order to order the tray was terrific and I had the part in two days!! I would recommend this company every time!!!!!!
Parts Used:
-
Patricia from Dublin, OH
-
Difficulty Level:Really Easy
-
Total Repair Time:Less than 15 mins
Was this instruction helpful to you?
Thank you for voting!
change microwave fan discharge from front to top
damper plate was a snap-in part. rotated fan discharge to top of microwave. installed ducting to discharge food odors outside.
Parts Used:
-
James from Newbern, NC
-
Difficulty Level:Really Easy
-
Total Repair Time:Less than 15 mins
Was this instruction helpful to you?
Thank you for voting!
Microwave worked but oven fan came on when door was opened - should onlly come on when oven is operating.
Removed the microwave with the buit in housing from the cabinet. Removed microwave from built in housing. Removed outer cabinet giving access to remove control panel and smart board where switches are located. Removed control panel to get to smartboard. Removed smart board after disconnecting a few wires to allow easy removal. Individually removed and then tested each switch using multimeter. Found seondary Door Switch (bottom of smart board) operation to be intermittent (switch trip button extremely loose and rattle inside this particular switch) Ordered replacement part which came very quickly on standard shipping order. Put new switch on smart board and remounted, reinstalled control panel and reconnected various wire connectors previously disconnected. Then plugged in oven and tested for opertation - didn't work at all! But, after bleeding off capacior charge by removing connectors and discharging capacitor to ground, then reassembling control board and smart board into oven, then trying agian, it has worked perfectly ever since. Do not understand why capacitor disconnect/discharge was required but suspect this reset the control electronics. Easy fix and hope to get another 12 years out of this appliance which is used multiple times every day. Also have two other identical micorwave ovens, one is 20 years old, but these get used relatively infrequently.
Parts Used:
-
Gerald from Mountain View, AR
-
Difficulty Level:Easy
-
Total Repair Time:15 - 30 mins
-
Tools:Screw drivers
Was this instruction helpful to you?
Thank you for voting!
Several weeks with turntable stoppingand going. Turntable motor works OKay.
-
Manuel from Rio Vista, CA
-
Difficulty Level:Really Easy
-
Total Repair Time:15 - 30 mins
-
Tools:Screw drivers
Was this instruction helpful to you?
Thank you for voting!
Door film was damaged by contact with tin foil
Remove old film by peeling away from glass. Lift from corner and pull to remove. Remove backing from new film slowly as you are applying to the door a little at a time. Smooth with a plastic spatular as you apply from one side of the door to the other and you will have no wrinkles or air pockets.
Parts Used:
-
Theodore from Lutz, FL
-
Difficulty Level:Really Easy
-
Total Repair Time:15 - 30 mins
Was this instruction helpful to you?
Thank you for voting!