















CG200L Jenn-Air Cooktop - Instructions
Keep searches simple. Use keywords, e.g. "leaking", "pump", "broken" or "fit".
All of stove top parts grungy/peeling/burnt out
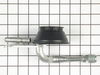
Replaced all 4 burners, grates, pans, middle grate and fan/light switch. No real "repair" except for the switch, which has two phillips screws to remove the little panel the switch is enclosed in. The fasteners holding the switch TO this panel were VERY difficult to remove, you have to destroy them to get them off! Once that is done, removed the wires from old broken switch, placed them on new switch (now attached to the panel) placed panel back in to position, replaced the two screws and DONE! It was all quite easy and the stove looks brand new now.
Parts Used:
-
Donna from Carlsbad, CA
-
Difficulty Level:A Bit Difficult
-
Total Repair Time:15 - 30 mins
-
Tools:Nutdriver, Pliers, Screw drivers, Socket set
0 of 1 people
found this instruction helpful.
Was this instruction helpful to you?
Thank you for voting!
Fan Switch Popped/Broke Through The Housing.,
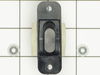
Ok, however, from what I read on the internet those who wrote down their advice and experience regarding this particular part, explained that the push nuts were too small to accomodate the studs. I too had the same problem, and therefore had to get other ones at the local hardware store. Apparently this is inherently a commmon problem. You need to provide push nuts with a slightly larger diameter, so they can be pushed down the studs/pegs.
Parts Used:
-
Bill from Dayton, NV
-
Difficulty Level:A Bit Difficult
-
Total Repair Time:15 - 30 mins
-
Tools:Screw drivers
0 of 1 people
found this instruction helpful.
Was this instruction helpful to you?
Thank you for voting!
Burners would not light sometimes
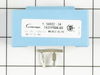
Slide stove out unplug remove cover on back bottom left 3 screws remove wires from old module and plug into new module could not remove old module I glued new to old replaced cover pluged back in slide stove back in and the burners lit
Parts Used:
-
Robert from St. Remy, NY
-
Difficulty Level:Easy
-
Total Repair Time:15 - 30 mins
-
Tools:Pliers, Screw drivers
1 of 4 people
found this instruction helpful.
Was this instruction helpful to you?
Thank you for voting!
Fan switch was broken internally.
After reading the other do-it yourselfers I knew it wasn't going to be an easy task. However, when I received my new switch I saw that the hook up and installation would be a snap. My only problem was removal of the old lock washers so I cut them off with my tin snips and once the new switch was attached to the plate I used a socket on the end of a three inch extension. I placed the socket over the new washer and gently tapped on the end of the extention until the washer was seated. It took about two or three taps on each washer and I was finished. Everything went pretty well. Total time to install was about ten minutes.
Parts Used:
-
Charles from Santa Clarita, CA
-
Difficulty Level:A Bit Difficult
-
Total Repair Time:Less than 15 mins
-
Tools:Socket set
0 of 1 people
found this instruction helpful.
Was this instruction helpful to you?
Thank you for voting!
Old grease filter had hole wore through
Pulled the old one out & inserted the new one. Less than five minutes.
Parts Used:

-
Michael from Mountain Iron, MN
-
Difficulty Level:Really Easy
-
Total Repair Time:Less than 15 mins
0 of 1 people
found this instruction helpful.
Was this instruction helpful to you?
Thank you for voting!
Exhaust vent fan would not start
Removed cover, disconnected 2 wires, attempted to remove push nuts with nutdriver, screw driver, and pliers to no avail. Cut off metal bracket with diagonal cutters, then cut off push nuts with diagonal cutters. Push nuts with kit would not fit the threaded posts. Found washers and regular nuts to attach the switch. Replaced the 2 spades on the wires (both were burnt) and shrink wrapped both spades. Pushed on the spades and reattached the cover to the cooktop.
Parts Used:
-
Jeffrey from Rocklin, CA
-
Difficulty Level:Easy
-
Total Repair Time:1- 2 hours
-
Tools:Nutdriver, Pliers, Screw drivers
0 of 1 people
found this instruction helpful.
Was this instruction helpful to you?
Thank you for voting!
it was painless
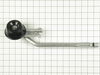
just as stated before. Remove old burners from plate and reattach new burners.
Parts Used:

-
judy from clifton park, NY
-
Difficulty Level:Really Easy
-
Total Repair Time:Less than 15 mins
-
Tools:Screw drivers
0 of 1 people
found this instruction helpful.
Was this instruction helpful to you?
Thank you for voting!
The fan switch broke
remove gas valve knobs, removed two screws holding trim plate on lifted plate removed wires replaced switch and reversed the prior moves.
Very easy
Very easy
Parts Used:
-
David from Traverse City, MI
-
Difficulty Level:Really Easy
-
Total Repair Time:Less than 15 mins
-
Tools:Pliers, Screw drivers
0 of 1 people
found this instruction helpful.
Was this instruction helpful to you?
Thank you for voting!
vent fan cloging up
old filter fell into from removing and cleaning,
removed cover pulled out filter ,replaced it with new one.
removed cover pulled out filter ,replaced it with new one.
Parts Used:
-
JAMES from McALESTER, OK
-
Difficulty Level:Really Easy
-
Total Repair Time:Less than 15 mins
0 of 1 people
found this instruction helpful.
Was this instruction helpful to you?
Thank you for voting!
Burner wouldn't light.
Took out a couple of screws and put in the new part. PartSelect was fast and efficient. Highly recommended.
Parts Used:
-
Clark from Tifton, GA
-
Difficulty Level:Really Easy
-
Total Repair Time:Less than 15 mins
-
Tools:Nutdriver
0 of 1 people
found this instruction helpful.
Was this instruction helpful to you?
Thank you for voting!
Filter replacement.
-
Gerald from Maplefalls, WA
-
Difficulty Level:Really Easy
-
Total Repair Time:Less than 15 mins
0 of 1 people
found this instruction helpful.
Was this instruction helpful to you?
Thank you for voting!
Worn out stove top
We replaced the burner grates, knobs, air filter and burner pan. Looks as good as new!
Parts Used:
-
Redona from Roseville, CA
-
Difficulty Level:Really Easy
-
Total Repair Time:Less than 15 mins
0 of 1 people
found this instruction helpful.
Was this instruction helpful to you?
Thank you for voting!
simple swapping of parts
Undid the bad part and installed the new one
Parts Used:
-
lenny from east freetown, MA
-
Difficulty Level:Really Easy
-
Total Repair Time:Less than 15 mins
-
Tools:Nutdriver
0 of 1 people
found this instruction helpful.
Was this instruction helpful to you?
Thank you for voting!
Burnner rusty and will not start with electric start.
Removed and installed burners in less than 15 min with just a nut driver. Replacing the burn ere did not fix the starting problem, but replacing them did improve the hurried flame.
Parts Used:
-
Robert from Mary Esther, FL
-
Difficulty Level:Really Easy
-
Total Repair Time:Less than 15 mins
-
Tools:Nutdriver
0 of 2 people
found this instruction helpful.
Was this instruction helpful to you?
Thank you for voting!
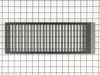
The paint begin popping of my original grill. My son had a friend that said that he could remove the old paint and repaint for me. Unfortunately in the shuffle of a motorcycle performance shop the grill was lost. I have been trying to get help from Jenn-Aire since March and they just kept saying th
Very simple for me!!! Open the box, uncover the new grill and lay it in its place.
Thank you so much!
Thank you so much!
Parts Used:
-
Norma from Salisbury, NC
-
Difficulty Level:Really Easy
-
Total Repair Time:Less than 15 mins
0 of 2 people
found this instruction helpful.
Was this instruction helpful to you?
Thank you for voting!