















CDWT280V00SS General Electric Dishwasher - Instructions
Keep searches simple. Use keywords, e.g. "leaking", "pump", "broken" or "fit".
Water leaking on floor
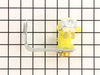
Water was leaking from under refer next to installed under counter dishwasher. Once determined to be dishwasher not refer I removed dishwasher toe place was able to see dripping inlet solenoid valve. I had to disconnect 11V power, shut off inlet water, disconnect inlet water house and remove dishwasher from under counter. Once dishwasher was in center of kitchen I flipped it upside down and removed the electric solenoid inlet valve. Removing the valve took one wrench to remove inlet hose then two wrenches to remove 90 degree brass fitting and another to hold solenoid. I used a nut drive to remove two screws that released the solenoid from the dishwasher frame. I used teflon tape to reattached the 90 degree brass fitting and inlet hose.
Parts Used:
-
Bill from Monterey, CA
-
Difficulty Level:Really Easy
-
Total Repair Time:30 - 60 mins
-
Tools:Nutdriver, Pliers, Screw drivers, Wrench (Adjustable)
Was this instruction helpful to you?
Thank you for voting!
The detergent dispenser would not latch.
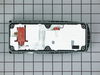
On the Model PDW9880, there are about 14 screws to be removed. I used a large Phillips driver and a pair of needle nose pliers. You cannot use a cordless drill driver for about 10 of the screws unless you have a long bit, as the 10 screws are so close to the body of the dishwasher door that the chuck of the drill will not clear. At the top of the door there are two screws on either side of the latch. The two screws are attached to white plastic blocks that serve as a lip to hold the outer door to the liner. It took a little wrestling with the two plastic blocks to slide them out from under the lip, releasing the outer door. Be sure not to let the outer door drop away, as it will tug on the ribbon cables that connect the display to the dishwasher. Keep a towel or sponge handy to keep the
dishwasher handle from resting on the tile floor. There were 4 electrical connections, including two ribbon cables, both of which just pulled out. I needed a needle nose pliers to remove the 2 spade connectors from the detergent dispenser solenoid, in order to pull on the connector, not tug on the wire. The entire repair is actually pretty straightforward and easy. It took 40 minutes, doing it slowly and carefully. But please don't tell anyone that it is easy, because my wife thinks it was an extremely complex repair, involving the risk of high voltage electricity.
The replacement part fits different makes and models, and does not have any brand identification, other than the Cascade logo cast into the front. Other than that, it appears to be identical to the original. Note: The
soap cup does not open for several minutes in the cycle, so don’t waste time or frustrate yourself (as I did) by checking the dispenser during the first 10 minutes of the cycle. Incidentally, although the company is in Canada, my part shipped from Central California (Fresno) and arrived in the Los Angeles area the next business day.
dishwasher handle from resting on the tile floor. There were 4 electrical connections, including two ribbon cables, both of which just pulled out. I needed a needle nose pliers to remove the 2 spade connectors from the detergent dispenser solenoid, in order to pull on the connector, not tug on the wire. The entire repair is actually pretty straightforward and easy. It took 40 minutes, doing it slowly and carefully. But please don't tell anyone that it is easy, because my wife thinks it was an extremely complex repair, involving the risk of high voltage electricity.
The replacement part fits different makes and models, and does not have any brand identification, other than the Cascade logo cast into the front. Other than that, it appears to be identical to the original. Note: The
soap cup does not open for several minutes in the cycle, so don’t waste time or frustrate yourself (as I did) by checking the dispenser during the first 10 minutes of the cycle. Incidentally, although the company is in Canada, my part shipped from Central California (Fresno) and arrived in the Los Angeles area the next business day.
Parts Used:
-
Eric from La Crescenta, CA
-
Difficulty Level:Easy
-
Total Repair Time:30 - 60 mins
-
Tools:Pliers, Screw drivers
Was this instruction helpful to you?
Thank you for voting!
dishes not getting clean, top rack not washing
remove front lower cover, 2 philips screws, turn off water supply under kitchen sink to dish washer, turn off power to dish washer, remove water supply line to valve, remove power to valve, clip ons, remove two 5/16" screws holding valve on, turn valve gently to access clip holding washer supply hose, push clip up hose and hold hose while pulling valve off. re-install in reverse order, a flash light helps.
Parts Used:
-
Nugent P from Garner, NC
-
Difficulty Level:A Bit Difficult
-
Total Repair Time:30 - 60 mins
-
Tools:Screw drivers, Socket set, Wrench set
Was this instruction helpful to you?
Thank you for voting!
Latch on soap dispenser broke
Replacing the soap dispenser was relatively easy, But a word of caution.when I removed the front panel, as it fell off, it pulled the electrical tape out of the door. That of course ruined the electrical panel. Even better, that panel is no longer made. So unless you really want a new dishwasher, be sure you support the front panel when removing. Probably the easiest way to do that (I found out later) is to sit on the floor with the front panel on your legs as youminscrew it. Do read other reviews about how to do the repair as the part comes with no instructions and GE is of virtually no help.
Parts Used:
-
Robert from Evergreen, CO
-
Difficulty Level:A Bit Difficult
-
Total Repair Time:30 - 60 mins
-
Tools:Screw drivers
Was this instruction helpful to you?
Thank you for voting!
Detergent dispenser latch was broken
I was offered a free dishwasher for the taking. The soap dispenser latch was broken. I ordered the part, it arrived two days later by standard delivery. The door cover has to be opened and seperated. The difficulty is that the door will not stay down or up without assistance. Once open, the dispenser is replaced by removing 6 screws from within the door compartment (between the door front cover and inside door wall. Two electrical leads must be removed and reconected to the new part. Removing them is problematic, since one connecter partially chipped off using pliers to gain a grip. After inserting the new part the 6 screws are installed from behind the part and the leads reconnected. There are two ribbon connectors for the control panel and display. They did not come loose so I left them connected, which made it awkward to manipulate the various parts with the door split open. Putting the ribbons in proper place was easy if careful. Securing the outside and inside halves of the door completes the repair. I found instructions on google. This was tricky but easy, as the door parts were often trying to move out of an accessible position for working. Otherwise it was one of the easiest things I have done. It would be easier with two people, and I had only one good arem to work with due to shoulder surgery, but it was successful. The dishwasher works fine, and the price was right at $45.00 in parts plus shipping for a top of the line model.
Parts Used:
-
Dwight from Phoenix, AZ
-
Difficulty Level:A Bit Difficult
-
Total Repair Time:30 - 60 mins
-
Tools:Nutdriver, Pliers, Screw drivers
Was this instruction helpful to you?
Thank you for voting!
wires on the solnoid hard to get off.dd to get off
-
Debra from Caledonia, MI
-
Difficulty Level:A Bit Difficult
-
Total Repair Time:30 - 60 mins
-
Tools:Screw drivers
Was this instruction helpful to you?
Thank you for voting!
Dishwasher would not dry dishes
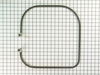
The quiet power 3 has the heating element in the back, so remove the screws holding the unit in place. Remove the bottom cover and disconnect the water inlet pipe, (after turning off the water of course). Discard the copper tubing if applicable, and pull dishwasher out until you can tilt it forward. Unsrew the plastic nuts and remove the wires for the element. Test the old one to make sure that you need to replace it. When sure of the problem reinstall in the reverse order. Replace the copper with stainless steel braided line and test.
Parts Used:
-
Kevin from De Soto, KS
-
Difficulty Level:Easy
-
Total Repair Time:30 - 60 mins
-
Tools:Nutdriver, Screw drivers, Wrench (Adjustable)
Was this instruction helpful to you?
Thank you for voting!
Leeking gaskets
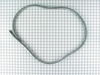
The tub gasket is very easy to replace. First I pulled out the old gasket then using the center marking on the new gasket, I centered the gasket at the top then pushed the gasket into the track. At the bottom I reused the wire that holds the two ends in place making sure I attached the separation wire in the same configuration as with the old one. I had another leaking problem with the seal on the bottom of the door. GE does not sell a repair seal for the door bottom and a new inner door must be purchased at around $200. I made that repair using an old bicycle inner tube. I cut the tube into a one inch strip and epoxyed the strip to the tub where the door meets the tub.. Worked perfectly!
Parts Used:
-
Roger from Bryant, AR
-
Difficulty Level:Really Easy
-
Total Repair Time:30 - 60 mins
Was this instruction helpful to you?
Thank you for voting!
dishwasher was not filling with water
very happy with the product and fast shipping. removed kick plate from dishwasher, inlet valve was on the front left bottom slid out dishwasher removed two screws and disconnected water line,and installed new inlet valve,very simple job if your somewhat handy,make sure you use thred sealant on water line when re installing
Parts Used:
-
Robert from Wantage, NJ
-
Difficulty Level:Easy
-
Total Repair Time:30 - 60 mins
Was this instruction helpful to you?
Thank you for voting!
Fractured brass bezel on bottom of valve- Leaking
simply removed broken valve and replaced with new valve, easy peasy. shipping was GREAT, Overnight. all in all a easy fix.
Parts Used:
-
Kenneth R from Marcellus, MI
-
Difficulty Level:Really Easy
-
Total Repair Time:15 - 30 mins
-
Tools:Screw drivers, Wrench (Adjustable)
Was this instruction helpful to you?
Thank you for voting!
Water leakage
I examined how the old gasket was attached before removing it. I then pushed in the new gasket needing no tools. There has been no water leakage since.
Parts Used:
-
Victoria from Shepherdstown, WV
-
Difficulty Level:Easy
-
Total Repair Time:15 - 30 mins
Was this instruction helpful to you?
Thank you for voting!
Detergent door wouldn't stay closed.
My husband followed the directions included with the replacement part that we ordered. It was so great to read of others' experience installing the part! It works great and we will certainly use this site again. Thank you so much. We saved $100.00 doing it ourselves.
Parts Used:
-
Dorothea from Dallas, GA
-
Difficulty Level:Really Easy
-
Total Repair Time:15 - 30 mins
-
Tools:Screw drivers
Was this instruction helpful to you?
Thank you for voting!
Leak from motor output/pump input shaft
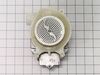
Cut power and water flow to the appliance. Laid appliance on its side, removed the electrical lead from the motor. Remove the mount from the back of the motor and loosened the two clamps- one to the sump and one to the discharge tube. Removed and replaced the pump/motor assy. with the new one, reinstalled the clamps, rear mount and electrical lead. Righted the unit and fired it up. Worked fine.
Parts Used:
-
Donald from The Villages, FL
-
Difficulty Level:Easy
-
Total Repair Time:15 - 30 mins
-
Tools:Nutdriver
Was this instruction helpful to you?
Thank you for voting!
dirty dishes wash after wash
We noticed our detergent door was not opening on cue to dispense the soap and it was leaving our dishes dirty. It came to be that our spring was sprung on the detergent door. I researched it and I could either buy the spring or the whole detergent contraption (installing the contraption was one wrench easier but cost $35 more). Knowing my husband the way I do, I decided to do the more costly route. I followed the instructions from previous installers on here and me and my husband did it in 30 minutes! I do agree that it is a two man job for some of it as I stressed to him NOT to take the front off haphazardly, as it was $400 to replace that! We took the 12 or so screws off, detached the line to the detergent dispenser, reattached, screwed it into the door and replaced the front 12 or so screws again. Easy peasy! Unbelieveable!
Parts Used:
-
Donna from Apollo, PA
-
Difficulty Level:Easy
-
Total Repair Time:15 - 30 mins
-
Tools:Screw drivers
Was this instruction helpful to you?
Thank you for voting!
Soap dispenser door wouldn't close
I've never done this before, so I took my time and it took 25 minutes. Now that I know what it looks like inside, it would only take maybe 15 minutes. There are 12 Phillips head screws to remove the front of the washer door. Once off, you need to unplug the large electrical plug to the "dashboard". Remove the screws holding the detergent dispenser, and unplug the two electrical plugs attached. Plug the two plugs back into the new dispenser, and replace the screws, being careful to not tighten to tight. Replace the front of the dishwasher door, with the 12 screws and you're done. Easy job!
Parts Used:
-
Parry from Vacaville, CA
-
Difficulty Level:Really Easy
-
Total Repair Time:15 - 30 mins
-
Tools:Pliers, Screw drivers
Was this instruction helpful to you?
Thank you for voting!