















CDG20R7AC Crosley Dryer - Instructions
Keep searches simple. Use keywords, e.g. "leaking", "pump", "broken" or "fit".
Female End Of The Door Catch Broke
First I put the square female end iof the door catch kit nto the square hole as snug as I could. Then I gently pushed the door against the piece until I heard it click in to place. That's it!! Sooooo simple--
Parts Used:

-
Tara from North Canton, OH
-
Difficulty Level:Really Easy
-
Total Repair Time:Less than 15 mins
-
Tools:Screw drivers
4 of 4 people
found this instruction helpful.
Was this instruction helpful to you?
Thank you for voting!
Door would not stay shut
Took off the four screws to get to the female clip and used pliers to squeeze it out. Next was using pliers to pinch out the male connector and place the new one in.
Parts Used:
-
Eli from North Stonongton, CT
-
Difficulty Level:Really Easy
-
Total Repair Time:Less than 15 mins
-
Tools:Pliers, Screw drivers
4 of 4 people
found this instruction helpful.
Was this instruction helpful to you?
Thank you for voting!
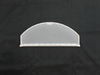
hole in lint filter
-
vernon from chowchilla, CA
-
Difficulty Level:Really Easy
-
Total Repair Time:Less than 15 mins
4 of 4 people
found this instruction helpful.
Was this instruction helpful to you?
Thank you for voting!
The dryer door latch was broken.
The replacement part just snapped into place. (The old part had fallen out) It took less than 30 seconds to do the repair.
Parts Used:
-
Jack from Memphis, TN
-
Difficulty Level:Really Easy
-
Total Repair Time:Less than 15 mins
5 of 7 people
found this instruction helpful.
Was this instruction helpful to you?
Thank you for voting!
No Heat sometimes, But for a moment then None
First and Foremost i was told that my problem was with the Thermal Fuse (Fix Ya.com), Then with the little Electrical knowledge I have thought Fuses don't turn on and off,If the fuse was bad i would get No Heat. (Even for a second) Fuses just don't turn on and turn off intermittently,when they go there done! So after a little research i decided to order the gas coil valve. I tilted the top up, two screws on the front panel, took that off and the valves were exposed,(bottom left) two screws too remove bracket then installed new coils on bracket,put back together and I Have Heat Again! NO problems what so ever since new install. I would say having not been for cleaning lint build up inside the machine (been 6 years) the Whole project took me Ten Minutes.
Parts Used:
-
Scott from Sacramento, CA
-
Difficulty Level:Easy
-
Total Repair Time:Less than 15 mins
-
Tools:Nutdriver, Screw drivers
4 of 4 people
found this instruction helpful.
Was this instruction helpful to you?
Thank you for voting!
Broken Catch
-
James from LARAMIE, WY
-
Difficulty Level:Very Easy
-
Total Repair Time:Less than 15 mins
-
Tools:Nutdriver, Screw drivers
4 of 4 people
found this instruction helpful.
Was this instruction helpful to you?
Thank you for voting!
drum slide worn out
removed front cover, lifted drum up with a clamp and replaced slides. Replaced front cover
Parts Used:
-
Richard from GORHAM, ME
-
Difficulty Level:Really Easy
-
Total Repair Time:30 - 60 mins
-
Tools:Nutdriver, Screw drivers
4 of 4 people
found this instruction helpful.
Was this instruction helpful to you?
Thank you for voting!
No heat...
Removed and replaced both the thermostat sensor and the ignitor. Tested thej dryer and it worked. Replaced the front panel and it was good to go.
Parts Used:
-
Charles from Long Beach, CA
-
Difficulty Level:Easy
-
Total Repair Time:30 - 60 mins
-
Tools:Socket set
5 of 7 people
found this instruction helpful.
Was this instruction helpful to you?
Thank you for voting!
Door wasn't staying closed
popped up top of dryer -- With pliers squeezed clips on inside of latch - - with screw driver pryed latch out -- just pused new latch in.......... Thanks to parts select for sending part sooo fast.. wife was happy.. Thanks, Dale
Parts Used:
-
Dale from Livingston, TX
-
Difficulty Level:Easy
-
Total Repair Time:Less than 15 mins
-
Tools:Pliers, Screw drivers
4 of 5 people
found this instruction helpful.
Was this instruction helpful to you?
Thank you for voting!
My drier would start create heat,than stop heating after 8-10minutes.
After reading the many different common stories,I replaced both coils (m series).Very simply lifted up the top of driver,held by 2 snap springs and 2 lint vent screws.Removed front cover,2 screws and 2 bottom snaps,coils down on bottom left.r/r both coils,reinstalled covers and let there be heat!This website is a blessing!!
Parts Used:
-
Tom from Schaumburg, IL
-
Difficulty Level:Easy
-
Total Repair Time:15 - 30 mins
-
Tools:Nutdriver, Screw drivers
4 of 5 people
found this instruction helpful.
Was this instruction helpful to you?
Thank you for voting!
Too much drying time, not hot enough
I removed the Drier Door and removed the Front Drier Panel exposing the Gas Valve & associated parts. I removed two (2) screws holding the Gas Valve Coils in place & replaced the 2 terminal coil, then replaced the screws, Front Cover & Drier Door. I liked the results so much, I ordered the other Gas Valve Coil and will replace it also when it arrives.
Good trouble shooting information.
Good trouble shooting information.
Parts Used:
-
John from Floyd, VA
-
Difficulty Level:Easy
-
Total Repair Time:15 - 30 mins
-
Tools:Screw drivers
4 of 5 people
found this instruction helpful.
Was this instruction helpful to you?
Thank you for voting!
Dryer heat would go off and timer would not move. Dryer would continuously run
-
chuck from smithtown, NY
-
Difficulty Level:Really Easy
-
Total Repair Time:15 - 30 mins
-
Tools:Nutdriver, Screw drivers
4 of 5 people
found this instruction helpful.
Was this instruction helpful to you?
Thank you for voting!
ignitor failed to ignite gas or would fail to after first ignition.
Watched youtube video to problem shoot. Cause determined to be coils bad. Searched web found Parts Select to be easiest site to deal with and had coils for best price. Followed instructions supplied with parts. Dryer works like new.
Parts Used:
-
CHUCK from HARDIN, KY
-
Difficulty Level:Easy
-
Total Repair Time:15 - 30 mins
-
Tools:Nutdriver, Screw drivers
4 of 6 people
found this instruction helpful.
Was this instruction helpful to you?
Thank you for voting!
blower wheel broke
Lifted hood ,and took two screws and tilted the front back and remove the door switch , and took front off ,use little socket set, took cover off fan housing took pliers removed clamp on fan , remove key way on end ,slid fan off and put new one on and reverse the way if came off.
Parts Used:

-
Donna from McCloud, CA
-
Difficulty Level:Really Easy
-
Total Repair Time:15 - 30 mins
-
Tools:Pliers, Socket set
3 of 3 people
found this instruction helpful.
Was this instruction helpful to you?
Thank you for voting!
loud bumping on start up, noisy running
Unplugged, loosened front cover, disconnected two wires from door open indicator, removed front cover with screw driver. Removed air flow cover with screw driver. Used pliers and retaining ring pliers to remove old blower wheel, my husband calls it a "squirrel cage". Installed new blower wheel and reassembled. It was all easy to see and get to. Thanks for having the right part. Sue.
Parts Used:
-
Sue from Hardeeville, SC
-
Difficulty Level:Really Easy
-
Total Repair Time:15 - 30 mins
-
Tools:Screw drivers, Socket set
3 of 3 people
found this instruction helpful.
Was this instruction helpful to you?
Thank you for voting!