















CALR17LW2 Crosley Freezer - Instructions
Keep searches simple. Use keywords, e.g. "leaking", "pump", "broken" or "fit".
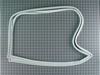
replace a bad door seal
Loosened the screws all around the door. easier if you take the door off the unit and lay it on a table. Cover the table with a blanket to protect the door finish. Old gasket just pulls loose. Press the raised bead on the new gasket under the plastic strip. Corners were the most difficult. Retighten the the screws and rehang the door. It took some practice to get the bead under the plastic strip.
Parts Used:
-
Richard from Fairborn, OH
-
Difficulty Level:A Bit Difficult
-
Total Repair Time:1- 2 hours
-
Tools:Screw drivers, Wrench set
1 person
found this instruction helpful.
Was this instruction helpful to you?
Thank you for voting!
Broken handle
-
Dennis from HIXSON, TN
-
Difficulty Level:Really Easy
-
Total Repair Time:Less than 15 mins
1 person
found this instruction helpful.
Was this instruction helpful to you?
Thank you for voting!
Replace air filter light was on not on know

-
Richard from Paulden, AZ
-
Difficulty Level:Very Easy
-
Total Repair Time:Less than 15 mins
-
Tools:Nutdriver
2 of 4 people
found this instruction helpful.
Was this instruction helpful to you?
Thank you for voting!
broken door handle
remove cover plates slide off , exposes screws holding handle on to the door remove screws ( 4) 2on top 2 on bottom replace with new handle in reverse order of disassembly slide cover plates back on , job complete .
Parts Used:
-
Rick from MENDON, MI
-
Difficulty Level:Really Easy
-
Total Repair Time:Less than 15 mins
-
Tools:Screw drivers
1 person
found this instruction helpful.
Was this instruction helpful to you?
Thank you for voting!
Handle broke loose
Just screwed in the new handle. Must keep the original trim pieces that slide on the top and bottom, or order new ones if needed.
Parts Used:
-
Richard from SWAMPSCOTT, MA
-
Difficulty Level:Very Easy
-
Total Repair Time:Less than 15 mins
-
Tools:Screw drivers
1 person
found this instruction helpful.
Was this instruction helpful to you?
Thank you for voting!
door handle broke (3rd one) poor design
-
Edward from GRAND FORKS, ND
-
Difficulty Level:Really Easy
-
Total Repair Time:Less than 15 mins
-
Tools:Screw drivers
1 person
found this instruction helpful.
Was this instruction helpful to you?
Thank you for voting!
loud noise fan blade broke,off balance
take 1/4 hex screws out clean out dust ,remove old fan blade replace with new install bolts .
Parts Used:

-
EDWIN from ELWOOD, IN
-
Difficulty Level:Really Easy
-
Total Repair Time:15 - 30 mins
-
Tools:Nutdriver
0 of 1 people
found this instruction helpful.
Was this instruction helpful to you?
Thank you for voting!
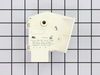
Evaporator freezing up. Noticed Ice cream not frozen solid
Notice ice build up on the panel in front of the evaporator coil. Unplugged freezer and removed evaporator panel. Plugged unit back in and checked fan, coil "snap switch" and heater element, all seemed to check out good. Found defrost timer stuck in the freeze position, causing frost to accumulate over the evaporator. Manually rotated defrost timer to the 30min defrost cycle and system went into defrost. Ordered defrost timer and installed (part arrived in 3 days). Freezer works great again. Too bad I ended up throwing 400 dollars worth of meat away. the fix was very simple. Will definitely use PartSelect again. Thank you.
Parts Used:
-
Paul from Buffalo, MN
-
Difficulty Level:Really Easy
-
Total Repair Time:30 - 60 mins
-
Tools:Screw drivers
0 of 1 people
found this instruction helpful.
Was this instruction helpful to you?
Thank you for voting!
Old Door Handle broke
Slipped off the top and bottom screw cover plates unscrewed the 4 retaining Phillips screws, removed the old handle and replaced it by reverse the procedure. The best part of the process was the amazing quick delivery and efficiency of Parts Select.
Parts Used:
-
johan from redlands, CA
-
Difficulty Level:Really Easy
-
Total Repair Time:Less than 15 mins
-
Tools:Screw drivers
0 of 2 people
found this instruction helpful.
Was this instruction helpful to you?
Thank you for voting!
When I was ready to instal fan motor, I noticed that there was no thread where I was supposed to screw in the bolts
When i found out there was no thread in brace where bolts were supposed to screw in, I panicked. I thought I would have to send part back or go to a machine shop to make a thread. I called a friend for help and he told me the bolts would make the thread if I just screwed them in. Sure enough, the bolts made the thread and then I just proceeded to instal motor and put refrigerator back together. It was simple.
Parts Used:

-
hector from los fresnos, TX
-
Difficulty Level:Really Easy
-
Total Repair Time:15 - 30 mins
-
Tools:Screw drivers, Wrench set
Was this instruction helpful to you?
Thank you for voting!
condenser fan stop working
Replaced fan. I ordered the fan and received it the following.(-:
Parts Used:
-
George from Gilroy, CA
-
Difficulty Level:Really Easy
-
Total Repair Time:30 - 60 mins
-
Tools:Nutdriver, Screw drivers, Socket set
Was this instruction helpful to you?
Thank you for voting!
Replaced broken door handle
Removed upper and lower screw covers. Removed 4 screws , Removed broken handle. Installed new handle with th 4 screws provided. Replaced screw covers. Done!
Parts Used:
-
Ray from Green River, WY
-
Difficulty Level:Really Easy
-
Total Repair Time:Less than 15 mins
-
Tools:Screw drivers
Was this instruction helpful to you?
Thank you for voting!
Refrigerator was in 3 feet of salt water.
I am replacing rhe electrical parts that were wet. The motor and freon piping are sealed and uneffected by the flood.
Parts Used:
-
Frank from Chalfont, PA
-
Difficulty Level:Really Easy
-
Total Repair Time:Less than 15 mins
-
Tools:Nutdriver, Screw drivers
Was this instruction helpful to you?
Thank you for voting!
broken handle
Removed decorative end caps on each end of the handle just by sliding them off. Unscrewed the broken handle and used the same screws to install the new handle. Replaced the decorative end caps by sliding back in place. Entire process took less than 2 minutes.
Parts Used:
-
Susan from Columbia, MO
-
Difficulty Level:Really Easy
-
Total Repair Time:Less than 15 mins
-
Tools:Screw drivers
Was this instruction helpful to you?
Thank you for voting!
Fan would not start occasionally
I unscrewed the screws that held the old fan on, disconnected the wiring harness and removed the old fan. I pulled the blades off the motor and put it on the new fan. One thing of note, the screw holes on the new fan weren't threaded. I assume this is by design, so I used the screws to thread the holes before installing it in the freezer. Once I did this, the rest of the installation was easy, just screw it back in and connect the wiring harness.
Parts Used:
-
Mike from Satellite Beach, FL
-
Difficulty Level:Easy
-
Total Repair Time:15 - 30 mins
-
Tools:Screw drivers
Was this instruction helpful to you?
Thank you for voting!