















CALR17LW2 Crosley Freezer - Instructions
Keep searches simple. Use keywords, e.g. "leaking", "pump", "broken" or "fit".
Freezer not cooling due to icing up of coil.
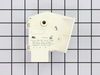
The timer in this older unit is clearly exposed at the back of the freezer underneath the freezer compartment. It is attached with two Phillips head screws. After the screws are removed, the timer can be unplugged and the new one plugged in. The new timer has an extra flange to allow it to be used on more than one model of freezer. In order to mount the timer in this unit, you have to remove the extra flange by carefully cutting it away from the timer body, in similar fashion to what's depicted in the online video. This will allow you to mount the new timer to the mounting plate using the two screws from the old timer.
Parts Used:
-
Thomas from GRANBURY, TX
-
Difficulty Level:Really Easy
-
Total Repair Time:15 - 30 mins
-
Tools:Screw drivers
2 of 2 people
found this instruction helpful.
Was this instruction helpful to you?
Thank you for voting!
Needed a left hand hinge
The left swing hinge (297283901) that i needed is not available anywhere so I bought the right swing hinge (297283900), used a hydraulic press to pop out the pin and move it to the other hole. After that it was real quick to remove the screws and change out the hinge, changing the swing of the door. It is easiest to remove the top hinge and door first when doing this.
Parts Used:
-
Benjamin from Roseburg, OR
-
Difficulty Level:A Bit Difficult
-
Total Repair Time:30 - 60 mins
-
Tools:Nutdriver, Screw drivers
2 of 2 people
found this instruction helpful.
Was this instruction helpful to you?
Thank you for voting!
Door alarm going off indicating door ajar
This did not fix the problem. Call a repairman and he cannot come until 9/11. Food is staying frozen. Alarm sounds for awhile and then shuts off for a bit.
Parts Used:
-
CONSTANCE from NEW COLUMBIA, PA
-
Difficulty Level:Really Easy
-
Total Repair Time:30 - 60 mins
-
Tools:Screw drivers
2 of 2 people
found this instruction helpful.
Was this instruction helpful to you?
Thank you for voting!
broken drawer slide
removed old broken part, 3 screws, then installed new part.....done
Parts Used:
-
warren from Farmdale, OH
-
Difficulty Level:Really Easy
-
Total Repair Time:Less than 15 mins
-
Tools:Screw drivers
3 of 5 people
found this instruction helpful.
Was this instruction helpful to you?
Thank you for voting!
Fan motor died.
Remove shelves. Unplug unit. Unscrew back panel. Remove wire harness. Remove old fan. Insert new fan. Screw it in. Reattach wires harness. Plug unit in and make sure fan is on.
Reattach back panel. Put shelves back in.
Reattach back panel. Put shelves back in.
Parts Used:


-
Yvonne from CORP CHRISTI, TX
-
Difficulty Level:Really Easy
-
Total Repair Time:Less than 15 mins
-
Tools:Screw drivers
2 of 2 people
found this instruction helpful.
Was this instruction helpful to you?
Thank you for voting!
handle broke at the attachment point on the door
removed two pieces of trim.....removed four screws of old handle.....replaced with new handle....replaced screws.....replaced trim pieces
Parts Used:
-
Dylan from Celina, OH
-
Difficulty Level:Really Easy
-
Total Repair Time:Less than 15 mins
-
Tools:Screw drivers
3 of 5 people
found this instruction helpful.
Was this instruction helpful to you?
Thank you for voting!
door handle broken at screws
-
SALLY from DICKINSON, TX
-
Difficulty Level:Really Easy
-
Total Repair Time:Less than 15 mins
-
Tools:Screw drivers
3 of 5 people
found this instruction helpful.
Was this instruction helpful to you?
Thank you for voting!
Fridge door handle broke off, replaced it.
Very simple - removed the plates that cover the end of the handel, then removed the screws and the broken handle. There were four screws - did a top one, then a bottom one, then the other top and bottom one. Made sure they were on tight and put the covers back on. Really proud of myself!
Parts Used:
-
Julie from Salt Lake City, UT
-
Difficulty Level:Easy
-
Total Repair Time:Less than 15 mins
-
Tools:Screw drivers
4 of 9 people
found this instruction helpful.
Was this instruction helpful to you?
Thank you for voting!
Brackets for the food basket were broken and the basket alwaws fell off the track.
Removed the basket. Removed the two broken brackets (6 screws). Installed the two new brackets. Put the basket on the track. Done.
Parts Used:
-
James from Bowie, MD
-
Difficulty Level:Really Easy
-
Total Repair Time:15 - 30 mins
-
Tools:Screw drivers
2 of 3 people
found this instruction helpful.
Was this instruction helpful to you?
Thank you for voting!
Coils were freezing up. Defrost cycle not working
First unplug freezer, then disconnected wires from timer.
Removed 2 screws from bracket holding time to freezer.
Attached New part with screws. .The mounting bracket is now part of New time. Reattach wires.
I let coils defrost and then plugged it.
Removed 2 screws from bracket holding time to freezer.
Attached New part with screws. .The mounting bracket is now part of New time. Reattach wires.
I let coils defrost and then plugged it.
Parts Used:
-
Stirling from FORT WORTH, TX
-
Difficulty Level:Easy
-
Total Repair Time:15 - 30 mins
-
Tools:Screw drivers
2 of 3 people
found this instruction helpful.
Was this instruction helpful to you?
Thank you for voting!
Door handle broke off of the refrigerator
Was able to order the handle and screw it on the refrigerator using the screws from the original handle in about 10 to 15 minutes.
Parts Used:
-
Edith from FORT WAYNE, IN
-
Difficulty Level:Really Easy
-
Total Repair Time:Less than 15 mins
-
Tools:Screw drivers
2 of 3 people
found this instruction helpful.
Was this instruction helpful to you?
Thank you for voting!
Oven not reaching temperature
Using the socket wrench, I removed the old element from the oven wall attached by two hexagonal screws. I then removed the electrical attachment to the oven using a Philips head screw driver. Replaced the element with the new one and reversed the process. The oven works like new!
Parts Used:
-
Andrea from MANLIUS, NY
-
Difficulty Level:Really Easy
-
Total Repair Time:Less than 15 mins
-
Tools:Screw drivers, Socket set
1 person
found this instruction helpful.
Was this instruction helpful to you?
Thank you for voting!
Door handle broke off
-
Rosemary from LEXINGTON, KY
-
Difficulty Level:Very Easy
-
Total Repair Time:Less than 15 mins
-
Tools:Screw drivers
1 person
found this instruction helpful.
Was this instruction helpful to you?
Thank you for voting!
Evaporator fan not working
Took off cover, unplugged wires, removed old motor, mounted new motor, remounted new motor and replaced cover.
Now need a new control board for same model.
Now need a new control board for same model.
Parts Used:
-
Randolph from Edwards, MS
-
Difficulty Level:Really Easy
-
Total Repair Time:30 - 60 mins
-
Tools:Screw drivers, Socket set
1 person
found this instruction helpful.
Was this instruction helpful to you?
Thank you for voting!
Old gasket lost the magnetic seal,
We are not handy, we had an appliance repair person install the gasket.
Parts Used:
-
Karen from W LAFAYETTE, IN
-
Difficulty Level:Really Easy
-
Total Repair Time:30 - 60 mins
-
Tools:Screw drivers
1 person
found this instruction helpful.
Was this instruction helpful to you?
Thank you for voting!