















C238B-C Jenn-Air Cooktop - Instructions
Keep searches simple. Use keywords, e.g. "leaking", "pump", "broken" or "fit".
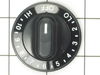
Element switch failed to full-on
Went to U-Tube and watched video. New switch has different wire connection pattern from old and requires some scrutiny as to where the connections are on the new sw.
You need a good flashlight!!
You need a good flashlight!!
Parts Used:
-
Ernest from NEWBURY, NH
-
Difficulty Level:Very Easy
-
Total Repair Time:Less than 15 mins
-
Tools:Pliers, Screw drivers, Wrench (Adjustable)
1 person
found this instruction helpful.
Was this instruction helpful to you?
Thank you for voting!
Door hinge
My wife help take the door off. It was a little heavy . The door came apart very easy and went back the same way.We save over $300 by doing it our selfs.
Parts Used:
-
Mr. Mike F from SAN ANTONIO, TX
-
Difficulty Level:Really Easy
-
Total Repair Time:30 - 60 mins
-
Tools:Screw drivers
1 person
found this instruction helpful.
Was this instruction helpful to you?
Thank you for voting!
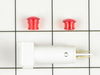
Replace burnt out indicator light
I feel that the design of the indicator light, with the base attached to the bottom of the lens, is ingenious in that it eliminates the need for fasteners in that confined space, However, the plastic used for the base needs to be more flexible. Part of the base broke off in trying to force the base over the bottom of the lens. Fortunately, there was enough left on the base that I could slip it over the bottom of the lens and complete the installation.
Parts Used:
-
Melanie from SALIDA, CO
-
Difficulty Level:A Bit Difficult
-
Total Repair Time:15 - 30 mins
-
Tools:Pliers
1 person
found this instruction helpful.
Was this instruction helpful to you?
Thank you for voting!
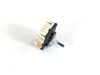
Right front burner switch burnt out
Shut off power. Removed screws holding panel.Removed wires from old switch.Installed wires on new switch and reinstalled panel.EASY
Parts Used:
-
FRANCIS from MILLBURY, MA
-
Difficulty Level:Very Easy
-
Total Repair Time:15 - 30 mins
-
Tools:Nutdriver, Screw drivers
1 person
found this instruction helpful.
Was this instruction helpful to you?
Thank you for voting!
Burn was full on or "high" at any switch position other than off.
Followed other's instructions from the web site: First - turned off the power at circuit breaker; removed two screws from downdraft vent area; pushed the switch housing back towards vent and lifted; held replacement switch next to defective switch and removed and replaced one wire at a time; loosed switch collar-nut and swapped defective switch for new one. Only issue was the "rat's nest" of wires gave very little room to work, especially if you have average sized hands.
Parts Used:
-
Owen B Douglass from BROOMALL, PA
-
Difficulty Level:Easy
-
Total Repair Time:15 - 30 mins
-
Tools:Pliers, Screw drivers
1 person
found this instruction helpful.
Was this instruction helpful to you?
Thank you for voting!
Broken oven door hinge
My daughter & I followed the instructions in your video and had fun repairing the door. The video showed exactly how to do the repair. I hope I don't need any appliance parts very soon but I will certainly pull up your web site if I do. Thanks for an excellent instruction video.
John - Hot Springs Village, AR
John - Hot Springs Village, AR
Parts Used:
-
John from HOT SPRINGS, AR
-
Difficulty Level:Very Easy
-
Total Repair Time:15 - 30 mins
-
Tools:Screw drivers
1 person
found this instruction helpful.
Was this instruction helpful to you?
Thank you for voting!
blower motor was making loud noise
removed motor, saw that stablizers were broke and went to a local parts supply shop called SUNDBERG and was given a price of about 49.00 for three stablizers. at that point i went to the internet and found PARTSELECT.COM were i found the same parts for a fraction of the price,17.00, i could not believe it! SUNDBERG customer service was horrible.PARTSELECT custormer service is great and was just over the internet,any how the repair is done no more loud noise and wife is happy again ,for awhile.thanks keep up the good work.i tell everybody about you guys.
Parts Used:

-
alphonso from plainfield, IL
-
Difficulty Level:Easy
-
Total Repair Time:15 - 30 mins
-
Tools:Pliers, Screw drivers, Socket set, Wrench set
1 of 2 people
found this instruction helpful.
Was this instruction helpful to you?
Thank you for voting!
The original grease filter was damaged in our dishwasher (it is quite fragile) and needed to be replaced.
1. Remove the exhaust vent cover, located in the center of the top of the range. It just lifts off.
2. Swivel the clamp 90 degrees to release the filter.
3. Remove the filter and throw it away
4. Place new filter in place and lock in place by rotating the swivel clamp back 90 degress.
5. Replace the exhaust vent cover
2. Swivel the clamp 90 degrees to release the filter.
3. Remove the filter and throw it away
4. Place new filter in place and lock in place by rotating the swivel clamp back 90 degress.
5. Replace the exhaust vent cover
Parts Used:

-
Martyn from Middletown, OH
-
Difficulty Level:Really Easy
-
Total Repair Time:Less than 15 mins
1 of 2 people
found this instruction helpful.
Was this instruction helpful to you?
Thank you for voting!
Very Easy Repair
The door came off easily after I removed the two hinge covers that are attached to the oven. Taking the door off can be done with one person but ideally two.
The new parts fit in perfectly and the hinge pin used for shipping comes out easiest with a pair or wire cutters (you do not cut it just grab it and pull).
After that, re-assemble the door and drop in place. It was a snap.
FYI...the shipping was ultra fast and the price was great.
No issues whatsover with the entire process.
The new parts fit in perfectly and the hinge pin used for shipping comes out easiest with a pair or wire cutters (you do not cut it just grab it and pull).
After that, re-assemble the door and drop in place. It was a snap.
FYI...the shipping was ultra fast and the price was great.
No issues whatsover with the entire process.
Parts Used:
-
Donald from Edmond, OK
-
Difficulty Level:Really Easy
-
Total Repair Time:15 - 30 mins
-
Tools:Screw drivers
2 of 6 people
found this instruction helpful.
Was this instruction helpful to you?
Thank you for voting!
Old grease filter had hole wore through
Pulled the old one out & inserted the new one. Less than five minutes.
Parts Used:
-
Michael from Mountain Iron, MN
-
Difficulty Level:Really Easy
-
Total Repair Time:Less than 15 mins
0 of 1 people
found this instruction helpful.
Was this instruction helpful to you?
Thank you for voting!
Burner won't get hot
It was very simple. detached front switch panel by removing 4 screws inside top of oven door. Removed knob from old switch and removed nut holding switch to panel. Rotated switch panel to expose guts. replaced wires from old switch to new switch, screwed new switch to panel, replaced old knob. idea came from previous story at this website. Works great.
Parts Used:
-
Robert from Golden, CO
-
Difficulty Level:Really Easy
-
Total Repair Time:Less than 15 mins
-
Tools:Pliers, Screw drivers
0 of 1 people
found this instruction helpful.
Was this instruction helpful to you?
Thank you for voting!
Worn out stove top
We replaced the burner grates, knobs, air filter and burner pan. Looks as good as new!
Parts Used:
-
Redona from Roseville, CA
-
Difficulty Level:Really Easy
-
Total Repair Time:Less than 15 mins
0 of 1 people
found this instruction helpful.
Was this instruction helpful to you?
Thank you for voting!
Filter needed replacement. Old one was falling apart.
Removed old filter, dropped in the new one.
(This really was not a "repair")
(This really was not a "repair")
Parts Used:
-
Sophie from Warrenton, VA
-
Difficulty Level:Really Easy
-
Total Repair Time:Less than 15 mins
0 of 1 people
found this instruction helpful.
Was this instruction helpful to you?
Thank you for voting!
vent fan cloging up
old filter fell into from removing and cleaning,
removed cover pulled out filter ,replaced it with new one.
removed cover pulled out filter ,replaced it with new one.
Parts Used:
-
JAMES from McALESTER, OK
-
Difficulty Level:Really Easy
-
Total Repair Time:Less than 15 mins
0 of 1 people
found this instruction helpful.
Was this instruction helpful to you?
Thank you for voting!
switch body that supports mounting nut broke
removed cover, pulled out old switch, moved each wire from old to new switch, mounted switch, replaced cover.
Parts Used:
-
Jon from GREENFIELD, AL
-
Difficulty Level:Really Easy
-
Total Repair Time:Less than 15 mins
-
Tools:Screw drivers
0 of 1 people
found this instruction helpful.
Was this instruction helpful to you?
Thank you for voting!