















C203-C Jenn-Air Cooktop - Instructions
Keep searches simple. Use keywords, e.g. "leaking", "pump", "broken" or "fit".
Burner won't get hot
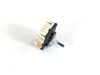
It was very simple. detached front switch panel by removing 4 screws inside top of oven door. Removed knob from old switch and removed nut holding switch to panel. Rotated switch panel to expose guts. replaced wires from old switch to new switch, screwed new switch to panel, replaced old knob. idea came from previous story at this website. Works great.
Parts Used:
-
Robert from Golden, CO
-
Difficulty Level:Really Easy
-
Total Repair Time:Less than 15 mins
-
Tools:Pliers, Screw drivers
0 of 1 people
found this instruction helpful.
Was this instruction helpful to you?
Thank you for voting!
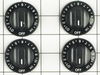
Numbers worn on old knobs
replaced old worn silver and white control knobs with new black ones.
Parts Used:
-
Bruce from Boca Raton, FL
-
Difficulty Level:Really Easy
-
Total Repair Time:Less than 15 mins
0 of 1 people
found this instruction helpful.
Was this instruction helpful to you?
Thank you for voting!
easy as pie
Just remove the old ones and replace them with the new ones. no tools necessary.
Parts Used:



-
Michelle from College Station, TX
-
Difficulty Level:Really Easy
-
Total Repair Time:Less than 15 mins
0 of 1 people
found this instruction helpful.
Was this instruction helpful to you?
Thank you for voting!
rusty existing parts
Unplugged the burner units and replaced the drip pans. Five seconds time per burner.
Parts Used:
-
Michael from Walpole, NH
-
Difficulty Level:Easy
-
Total Repair Time:Less than 15 mins
0 of 1 people
found this instruction helpful.
Was this instruction helpful to you?
Thank you for voting!
Filter replacement.
-
Gerald from Maplefalls, WA
-
Difficulty Level:Really Easy
-
Total Repair Time:Less than 15 mins
0 of 1 people
found this instruction helpful.
Was this instruction helpful to you?
Thank you for voting!
old coil burners with one burned out
Our old Jenn-air cooktop was at least 28 years old.They looked bad.We didn't see the need to buy a whole cooktop when the rest of the stove, fan,etc. still worked great. So I got on the Partselect web site and found a black radiant cartridge. It came exactly the day the said it would. I took out the old coil cartridge and plugged the new one. Lo, my stove now looks modern. We also ordered a terminal block. With this my husband repaired the old burned out coil burner and in about 20 minutes I had a spare to use with my canner. I really like the new cartridge and plan to buy another one. It was a pleasure to do business with Partselect.
Parts Used:
-
Kenneth L. from Rush, KY
-
Difficulty Level:Really Easy
-
Total Repair Time:Less than 15 mins
0 of 1 people
found this instruction helpful.
Was this instruction helpful to you?
Thank you for voting!
burned drip pans
replaced drip pans--they fit perfectly and look great!
Parts Used:
-
Julie from Bloomfield Hills, MI
-
Difficulty Level:Really Easy
-
Total Repair Time:Less than 15 mins
0 of 1 people
found this instruction helpful.
Was this instruction helpful to you?
Thank you for voting!
Old grease filter had hole wore through
Pulled the old one out & inserted the new one. Less than five minutes.
Parts Used:
-
Michael from Mountain Iron, MN
-
Difficulty Level:Really Easy
-
Total Repair Time:Less than 15 mins
0 of 1 people
found this instruction helpful.
Was this instruction helpful to you?
Thank you for voting!
Worn out stove top
We replaced the burner grates, knobs, air filter and burner pan. Looks as good as new!
Parts Used:
-
Redona from Roseville, CA
-
Difficulty Level:Really Easy
-
Total Repair Time:Less than 15 mins
0 of 1 people
found this instruction helpful.
Was this instruction helpful to you?
Thank you for voting!
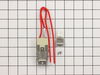
Burner was not heating
Took everything apart and replace the new parts but what I really want to share is the prompt shipment of my parts, I'm very satisfied and I will recommend the web site (THANK YOU)
Parts Used:
-
Victor from San Jose, CA
-
Difficulty Level:A Bit Difficult
-
Total Repair Time:30 - 60 mins
-
Tools:Nutdriver, Pliers, Screw drivers, Wrench set
1 of 4 people
found this instruction helpful.
Was this instruction helpful to you?
Thank you for voting!
Electrical receptacle for burner was defective.
After buying a 'universal' part at Lowe's and it not fitting correctly and shorting out the burner, I went online and found this source for an exact replacement part. Beside having to disassemble the drop in stove burner two or three times it went well when I had the correct part. I lost one screw somewhere and that delayed me a short time to find a replacement. Thus the 1 to 2 hours. It would have been about a 30 minute job if I had been smarter.
Parts Used:
-
gerald from Hillsboro, TN
-
Difficulty Level:Easy
-
Total Repair Time:1- 2 hours
-
Tools:Pliers, Screw drivers, Socket set
0 of 1 people
found this instruction helpful.
Was this instruction helpful to you?
Thank you for voting!
Screws holding recepticles in place had to be drilled out.
Removed screws by drilling one and using a pliers to remove 2nd one. At first did not have enough wire to pull recepticles out until I relized wires were clipped to back of range to hold in place. Unclipped wires, pulled recepticles out, cut wires and attached new recepticles by connecting wires with wire nuts (I think wire nuts were to small so I used my own a size larger). Another problem that I found was that the recepticles on my range were held in place only by the screws that attached the recepticles to the drip pan flang. I had to bend an L bracket to prop under each recepticle to hold the back of it up so the burner element would sit level over the drip pan.
Parts Used:
-
Dennis from Bacliff, TX
-
Difficulty Level:A Bit Difficult
-
Total Repair Time:1- 2 hours
-
Tools:Pliers, Screw drivers
0 of 1 people
found this instruction helpful.
Was this instruction helpful to you?
Thank you for voting!
burner connecters lost contact
pulled he cooktop, replaced the recepticles, reassembled.
Parts Used:
-
tim from manchester, OH
-
Difficulty Level:Easy
-
Total Repair Time:1- 2 hours
-
Tools:Nutdriver, Screw drivers
0 of 2 people
found this instruction helpful.
Was this instruction helpful to you?
Thank you for voting!
old yucky filter
Thanks, have been looking for a replacement for this dinosaur filter forever. It is great!
Parts Used:
-
Diane from Flower Mound, TX
-
Difficulty Level:Really Easy
-
Total Repair Time:Less than 15 mins
0 of 2 people
found this instruction helpful.
Was this instruction helpful to you?
Thank you for voting!
rotten filter for down draft vent
How I did the repair is no consequence. The service of easily finding the part on your site is GREAT! and the shipping time more than reasonable! Thanks!
Parts Used:
-
Craig from Ashburn, GA
-
Difficulty Level:Really Easy
-
Total Repair Time:Less than 15 mins
0 of 2 people
found this instruction helpful.
Was this instruction helpful to you?
Thank you for voting!