















C203-C Jenn-Air Cooktop - Instructions
Keep searches simple. Use keywords, e.g. "leaking", "pump", "broken" or "fit".
broken terminal
Simply removed the old heating element and plug the new element terminals into socket.
Parts Used:
-
Gary from Shirley, IN
-
Difficulty Level:Really Easy
-
Total Repair Time:Less than 15 mins
3 of 3 people
found this instruction helpful.
Was this instruction helpful to you?
Thank you for voting!
Old coil broke.
After I removed the piece of metal separating the two wires, I inserted the unit with no problem.
Parts Used:
-
Paula Collins from Needham, MA
-
Difficulty Level:Really Easy
-
Total Repair Time:Less than 15 mins
6 of 12 people
found this instruction helpful.
Was this instruction helpful to you?
Thank you for voting!
no problem...just wanted a fresh look
our cook top is so old, but no need to replace just yet. so I ordered new knobs to get a new look
thank you!
thank you!
Parts Used:
-
JANE from BALTIMORE, MD
-
Difficulty Level:Really Easy
-
Total Repair Time:Less than 15 mins
3 of 4 people
found this instruction helpful.
Was this instruction helpful to you?
Thank you for voting!
Burner on 'high' only, no other settings other than 'off'.
SHUT OFF BREAKER! Remove exhaust grill and switch knob. Remove cooktop switch panel by removing two screws and sliding panel toward exhaust grill. Remove switch retainer nut with deep socket. Transfer wires one by one to new switch. Install new switch tightening retainer nut. Reinstall switch panel with two screws, push knob onto shaft. Turn on breaker.
Parts Used:
-
Janes from Marquette, MI
-
Difficulty Level:Really Easy
-
Total Repair Time:Less than 15 mins
-
Tools:Pliers, Screw drivers, Socket set
3 of 4 people
found this instruction helpful.
Was this instruction helpful to you?
Thank you for voting!
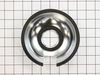
small burner only heated intermittently.
Unplugged old burner element, plugged in new element.
Parts Used:

-
Margaret from Kingwood, TX
-
Difficulty Level:Really Easy
-
Total Repair Time:Less than 15 mins
3 of 4 people
found this instruction helpful.
Was this instruction helpful to you?
Thank you for voting!
smell of a dead animal
The 15-year-old Jen-Air stove started smelling really bad. I thought it was a dead animal stuck in the exhaust tube which runs under the floor to the outside. I flushed it out with clorine bleach, but it was still bad. It turned out to the be the grease filter. I washed it every week in the diswasher, but it just was not enough to get it clean enough. Finally, the grease went rancid and smelled really bad. This "repair" took about 30 seconds.
Parts Used:

-
Duane from Niceville, FL
-
Difficulty Level:Really Easy
-
Total Repair Time:Less than 15 mins
3 of 4 people
found this instruction helpful.
Was this instruction helpful to you?
Thank you for voting!
Cleaners lost knob.
I pulled off the other 3 old knobs. Pushed on the new ones, which pushed on hard, but work. They stick out farther than the originals. They look a little different, but only to me. No one else would notice.
The main part is, it works. A little spenty for my taste, but did not know where else to go and they arrived very quick.
The main part is, it works. A little spenty for my taste, but did not know where else to go and they arrived very quick.
Parts Used:
-
Virginia from Bothell, WA
-
Difficulty Level:Easy
-
Total Repair Time:Less than 15 mins
3 of 4 people
found this instruction helpful.
Was this instruction helpful to you?
Thank you for voting!
Broken burner knob
-
Shirlely from Citrus Heights, CA
-
Difficulty Level:Really Easy
-
Total Repair Time:Less than 15 mins
-
Tools:Pliers
3 of 4 people
found this instruction helpful.
Was this instruction helpful to you?
Thank you for voting!
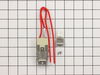
Burner wouldn't heat (wiring failure)
1. Shut the breaker off; Jenn-Air's design will have you working around hot leads if you don't.
2. Raise the control panel
3. Remove burner and unscrew the burner connector; trace the wires back to the control panel bottom and remove them
4. On the replacement connector, add the electrical for the control panel. These are not included and can be found at any hardware store; they are a standard size.
5. Connect the new wires and put everything back together.
6. Reset the break and test.
2. Raise the control panel
3. Remove burner and unscrew the burner connector; trace the wires back to the control panel bottom and remove them
4. On the replacement connector, add the electrical for the control panel. These are not included and can be found at any hardware store; they are a standard size.
5. Connect the new wires and put everything back together.
6. Reset the break and test.
Parts Used:
-
Eugene from San Antonio, TX
-
Difficulty Level:A Bit Difficult
-
Total Repair Time:15 - 30 mins
-
Tools:Pliers, Screw drivers, Wrench set
3 of 4 people
found this instruction helpful.
Was this instruction helpful to you?
Thank you for voting!
Burners were not regulating and they were just going on high
I am not really handy. When the repair man came and gave me a price of $220 to repair two infinite switches, I looked up the cost of the switch and saw that it was easy to do...and it was! I saved $140 for doing it myself (no help from my husband).
First I turned off the power, unscrewed two screws and took the knob panel off. Wrote down the colored wires and then pulled them off the infinite switch (some needed pliers) and then i just put the wires back on the new switch...done...it works!
First I turned off the power, unscrewed two screws and took the knob panel off. Wrote down the colored wires and then pulled them off the infinite switch (some needed pliers) and then i just put the wires back on the new switch...done...it works!
Parts Used:
-
Debra from Syosset, NY
-
Difficulty Level:Really Easy
-
Total Repair Time:15 - 30 mins
-
Tools:Nutdriver, Pliers, Screw drivers
3 of 5 people
found this instruction helpful.
Was this instruction helpful to you?
Thank you for voting!
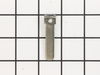
A local repair shop informed the individual that the burner unit could not be repaired and she would have to replace the cooktop..
After examining the burner unit I noticed that one of the male contact spades was burned and look deformed. After removing the spade I discovered that it had been originally manufactured incorrectly. I went on line to try and find the part. I found it at this site . I ordered 2 of the spades and replaced the deformed spade and another one that looked like it had gotten a little hot. She tried the unit and it worked perfectly. She had not used that burner unit for a very lengthy time. The investigation of the problem took a little time, but the repair went very fast. Moral is :" If a spade doesn't look right, it probably isn't", but either the individual spade or plug can be replaced. This site is now my "GO TO" place for parts.
Parts Used:
-
Sonny from MOUNT VERNON, GA
-
Difficulty Level:Very Easy
-
Total Repair Time:Less than 15 mins
-
Tools:Screw drivers, Socket set
2 of 2 people
found this instruction helpful.
Was this instruction helpful to you?
Thank you for voting!
Origin knobs cracked
-
Lora from SEBASTIAN, FL
-
Difficulty Level:Very Easy
-
Total Repair Time:Less than 15 mins
2 of 2 people
found this instruction helpful.
Was this instruction helpful to you?
Thank you for voting!
Half of elements didn’t heat
Your staff helped me find the updated replacement that worked and when I was having some connection issues helped me get it right!
Parts Used:
-
Ray from NESCONSET, NY
-
Difficulty Level:Easy
-
Total Repair Time:15 - 30 mins
-
Tools:Wrench (Adjustable)
2 of 2 people
found this instruction helpful.
Was this instruction helpful to you?
Thank you for voting!
old filter to replace
:-) - Just removed the old one and replace with the new one. Nothing to it. Takes 30 seconds.
Parts Used:
-
Colette from Baton Rouge, LA
-
Difficulty Level:Really Easy
-
Total Repair Time:Less than 15 mins
2 of 2 people
found this instruction helpful.
Was this instruction helpful to you?
Thank you for voting!
old, crusty drip pans
This was so easy. I've looked for years in stores for these pans. I finally tried the Internet, found PartSelects and, holding my breath at what i'd find, voila'...perfect fit, perfect replacements. And it took just a couple days to arrive. I'll definately be back!
/John
/John
Parts Used:
-
John from Richardson, TX
-
Difficulty Level:Really Easy
-
Total Repair Time:Less than 15 mins
3 of 5 people
found this instruction helpful.
Was this instruction helpful to you?
Thank you for voting!