















7GS2SHEXPQ04 Whirlpool Refrigerator - Instructions
Keep searches simple. Use keywords, e.g. "leaking", "pump", "broken" or "fit".
Unable to set the cold-control to a sufficiently cold setting.
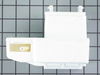
Linkage on the cold-control mechanism in the air diffuser assembly was broken. It was necessary to access the diffuser assembly from both the refrigerator and freezer sides of the unit.
Re-connected the linkage between the diffuser and cold-control assembly; remounted the two combined assemblies . . . refrigerator working nicely now.
Re-connected the linkage between the diffuser and cold-control assembly; remounted the two combined assemblies . . . refrigerator working nicely now.
Parts Used:
-
Leo from Lewisport, KY
-
Difficulty Level:Really Easy
-
Total Repair Time:30 - 60 mins
-
Tools:Nutdriver, Screw drivers
36 of 75 people
found this instruction helpful.
Was this instruction helpful to you?
Thank you for voting!
Water leaking from under refrigerator.
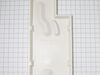
Water leaking from under refrigerator. Initially believed leak was from filter assembly. Removed filter and shut off water supply but leak appeared at different intervals again. Large puddle of water coming out from under refrigerator. Removed back lower panel and checked for leak, but didn't find any. My wife was also checking for leak and found a crack in drip tray. Only way we could get the drip tray out was to first remove front lower panel, disconnect and remove wiring harness in front of drip tray, unbolt water filter assembly, and unbolt water solenoid unit at rear of refrigerator. Their water lines connect to filter assembly. My wife controlled the water solenoid unit to give me play as I pulled the filter assembly out as much as I could from the front. I could now wiggle the cracked drip tray out from under the filter unit. Replaced drip tray and reinstalled wiring harness, water filter unit w/new filter, and re-bolted water solenoid unit at back of refrigerator. Replaced back lower panel after turning water back on and checking for leaks. Replaced front lower panel.
The reason still had leak after initially turning off water supply was because the drip tray is used to catch the water when refrigerator goes into the defrost cycle. Since the original drip tray had cracked, water only appeared on floor after defrost cycle.
The reason still had leak after initially turning off water supply was because the drip tray is used to catch the water when refrigerator goes into the defrost cycle. Since the original drip tray had cracked, water only appeared on floor after defrost cycle.
Parts Used:
-
Ronald from DELRAN, NJ
-
Difficulty Level:Difficult
-
Total Repair Time:1- 2 hours
-
Tools:Nutdriver, Screw drivers, Socket set
17 of 18 people
found this instruction helpful.
Was this instruction helpful to you?
Thank you for voting!
Ice maker not working
Well I changed out the optical boards which I thought were the problem and the ice maker is still not making any ice. I can see the ice makers fingers rotating but there is no water entering through the tube. I jumped the water manifold in the back and water comes out but I cant figure out what is not telling it to run water and fill the ice tray. Any ideas would be appreciated I guess i'll replace the ice maker next. Thanks in advance.
Parts Used:

-
Lisa from Stuart, FL
-
Difficulty Level:Really Easy
-
Total Repair Time:Less than 15 mins
-
Tools:Screw drivers
20 of 28 people
found this instruction helpful.
Was this instruction helpful to you?
Thank you for voting!
water leak
It was easy, I followed the instructions on the paper and it went well.
Parts Used:
-
Dean from Clermont, FL
-
Difficulty Level:Easy
-
Total Repair Time:30 - 60 mins
-
Tools:Screw drivers, Socket set
23 of 37 people
found this instruction helpful.
Was this instruction helpful to you?
Thank you for voting!
compressor didnt turn on

-
gerardo from el monte, CA
-
Difficulty Level:Really Easy
-
Total Repair Time:Less than 15 mins
-
Tools:Screw drivers
24 of 41 people
found this instruction helpful.
Was this instruction helpful to you?
Thank you for voting!
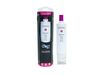
Change water filter
-
David from Okeechobee, FL
-
Difficulty Level:Really Easy
-
Total Repair Time:Less than 15 mins
16 of 18 people
found this instruction helpful.
Was this instruction helpful to you?
Thank you for voting!
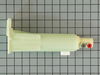
Water leaking from inflow water tube at the water filter housing.
The CAUSE of the LEAK were the O-rings on the water filter itself. My son followed others suggestions on how to detach the water hose from the filter housing, advise was helpful. After replacing the water filter housing, helpful, and inflow water tube the leak was still there. So my son then inspected the water filter and replaced. Water filter light was still green so we did not think it needed attention.
Parts Used:
-
Brian from North Augusta, SC
-
Difficulty Level:Easy
-
Total Repair Time:15 - 30 mins
-
Tools:Socket set
18 of 24 people
found this instruction helpful.
Was this instruction helpful to you?
Thank you for voting!
It was not coming out of defrost cycle
First I installed a defrost timer, (the old timer had burnt out contacts in it) It seemed to work for a few days, then went back to not comng out of defrost cycle, I then installed a defrost thermostat. It seems to be working better than before. I found out that maybe I wasn't running it cold enough. So I turned it up colder. Now it works ok for 2 - 3 days, then I check the Temp in the freezer and its up to 6o. So I manually reset the timer and it works for 2 - 3 days. Don't know what to do now to fix it.
Parts Used:

-
Dale from Flemingsburg, KY
-
Difficulty Level:Easy
-
Total Repair Time:30 - 60 mins
-
Tools:Nutdriver, Screw drivers
25 of 45 people
found this instruction helpful.
Was this instruction helpful to you?
Thank you for voting!
Door would not auto close
I removed the screws on the upper hinge and removed the door. I removed the lower cam in about 2 minutes and had it replaced. The upper cam was a tight fit in the door and I resorted to vise-grips to remove it. Total time to replace cams and put the door back on was 30 minutes. This saved me $100.
Thanks
Thanks
Parts Used:


-
James from Hampton, NH
-
Difficulty Level:Really Easy
-
Total Repair Time:15 - 30 mins
-
Tools:Pliers, Screw drivers, Socket set
18 of 25 people
found this instruction helpful.
Was this instruction helpful to you?
Thank you for voting!
plastic ice cube guide installed
Mine is a simple tale of the missing ice cube dispensor guide. When we moved, the guide was missing so when I built our new home with a kitchen in the basement I wanted to hook up the ice dispensor but when I did, the ice cubes always fell off to one side. I decided to order the misssing part on-line. I ordered it paid for it and then received it the next day-wonderful. Within ten minutes, I was ready to go. Thanks for great service. Rick Davis, Bloomington, IL.
Parts Used:

-
Richard from Bloomington, IL
-
Difficulty Level:Easy
-
Total Repair Time:Less than 15 mins
15 of 18 people
found this instruction helpful.
Was this instruction helpful to you?
Thank you for voting!
I broke the old cap trying to turn the filter cc wise.
I installed the new cap on a new filter, which I will install when the old filter needs replacing. No tools required, but it is sometimes difficult to turn the filter cc wise, when replacing.
Parts Used:

-
Victor from San Mateo, CA
-
Difficulty Level:Really Easy
-
Total Repair Time:Less than 15 mins
16 of 21 people
found this instruction helpful.
Was this instruction helpful to you?
Thank you for voting!
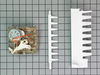
Old motor was not resetting back to proper position halting ice production.
Removed the three motor screws pulled off old motor put new motor in place replaced screws and re-installed. It was producing ice three hours later. I originally tried to obtian these parts directly from Whirlpool in which twice they shipped me the wrong parts. Finally gave up on them and entered the whilrpool part number which crossreferenced to new part number which was correct the first try. Thank you!
Parts Used:
-
Kevin from Spring, TX
-
Difficulty Level:Really Easy
-
Total Repair Time:Less than 15 mins
-
Tools:Nutdriver, Screw drivers
13 of 14 people
found this instruction helpful.
Was this instruction helpful to you?
Thank you for voting!
light inside fridge was flickering and clicking
tested bulb good ,replaced door switch first(least expensive)then ordered light socket and circuitboard.If clicking sound is heard replace circuitboard first to save on return shipping because the switch and socket where ok
Parts Used:

-
bill from escondido, CA
-
Difficulty Level:Easy
-
Total Repair Time:15 - 30 mins
-
Tools:Nutdriver
20 of 35 people
found this instruction helpful.
Was this instruction helpful to you?
Thank you for voting!
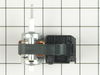
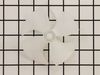
burned out Evaporator Fan Motor
simply removed wires from the old motor and gently lifted it out by by the metal clips - put the old bracket on the new motor, snapped on the new fan, replaced the wires, reinstalled the shield. All done in about 15 min.
Parts Used:
-
Robert from Surprise, AZ
-
Difficulty Level:Really Easy
-
Total Repair Time:15 - 30 mins
-
Tools:Screw drivers
16 of 23 people
found this instruction helpful.
Was this instruction helpful to you?
Thank you for voting!
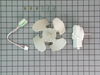
Motor was noisy
I removed 4 screws holding the motor mounting bracket and removed the assy from the unit. I then removed 3 screws holding the motor to the bracket. I put the fan blade on the new motor and reattached the motor to the bracket. I plugged in the wiring adapter to the motor and reinstalled the bracket in the unit with the 4 screws. Finally I attached the unit wiring connector to the motor.
It was relatively easy.
It was relatively easy.
Parts Used:
-
Rick from Florence, SC
-
Difficulty Level:Easy
-
Total Repair Time:15 - 30 mins
-
Tools:Nutdriver
13 of 14 people
found this instruction helpful.
Was this instruction helpful to you?
Thank you for voting!