















79090043601 Frigidaire Range - Instructions
Keep searches simple. Use keywords, e.g. "leaking", "pump", "broken" or "fit".
Burners constantly overheating, and inconsistent heating.
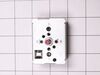
With the stove pulled out and unplugged, There are 4 square head screws to pull a metal plate off the back of the range. Once that is off, the infinite switches are in line and can be removed with a philips head screw driver/bit. I placed each wire onto the new switch as I removed them from the old, to avoid any confusion. The entire repair took less than 10 minutes. Incredibly easy.
Parts Used:
-
David from MOUNT VERNON, ME
-
Difficulty Level:Very Easy
-
Total Repair Time:Less than 15 mins
-
Tools:Pliers
1 person
found this instruction helpful.
Was this instruction helpful to you?
Thank you for voting!
Large front burner would not come on under setting of "3"
-
Steven from Edina, MN
-
Difficulty Level:Really Easy
-
Total Repair Time:Less than 15 mins
-
Tools:Nutdriver, Screw drivers
3 of 7 people
found this instruction helpful.
Was this instruction helpful to you?
Thank you for voting!
Electric element would intermitantly go on high, even on low settings.
Slid stove out, disconnect power plug, removed top control panel with 4 screws. Unplugged two electrical connectors. removed knob and nut removing switch. Re-assembled in reverse order and test all functions.
Parts Used:
-
Sean from ASTORIA, OR
-
Difficulty Level:Really Easy
-
Total Repair Time:15 - 30 mins
-
Tools:Screw drivers
1 person
found this instruction helpful.
Was this instruction helpful to you?
Thank you for voting!
The element gets very even the control is at minimum
Removed the defective part. Install the new part, insert the connectors. Now its working
Parts Used:
-
adolfo from new york, NY
-
Difficulty Level:Really Easy
-
Total Repair Time:30 - 60 mins
-
Tools:Screw drivers
1 person
found this instruction helpful.
Was this instruction helpful to you?
Thank you for voting!
Switch quit working and wouldn't turn
Take handle off, then back cover. Of course unplug power. Switch wasn't built exactly like the original but all you have to do is connect each wire to the same letter, number code as on the old one . Works like brand new!
Parts Used:
-
Jim from UNIONTOWN, PA
-
Difficulty Level:Easy
-
Total Repair Time:30 - 60 mins
-
Tools:Nutdriver, Pliers
1 person
found this instruction helpful.
Was this instruction helpful to you?
Thank you for voting!
Burner was inconsistent the heating with red hot one minute and not the next minute
-
Richard from Florence, OR
-
Difficulty Level:Very Easy
-
Total Repair Time:15 - 30 mins
-
Tools:Nutdriver
1 person
found this instruction helpful.
Was this instruction helpful to you?
Thank you for voting!
Arcing could be heard (and later seen) inside the switch
Switch was easy to replace. Some hex head screws to remove the panel and two screws to remove the switch. Though the plug in positions were totally different, all the quick connect terminals were marked on both switches.
Parts Used:
-
Joel from North Mankato, MN
-
Difficulty Level:Easy
-
Total Repair Time:Less than 15 mins
-
Tools:Nutdriver, Screw drivers
3 of 8 people
found this instruction helpful.
Was this instruction helpful to you?
Thank you for voting!
sparking element
removed back and transferred four wires to new part and replaced back
Parts Used:
-
Phil from KERSEY, PA
-
Difficulty Level:Very Easy
-
Total Repair Time:Less than 15 mins
-
Tools:Screw drivers, Socket set
1 of 2 people
found this instruction helpful.
Was this instruction helpful to you?
Thank you for voting!
light bilb went out

-
Denise from Landover, MD
-
Difficulty Level:Really Easy
-
Total Repair Time:Less than 15 mins
2 of 6 people
found this instruction helpful.
Was this instruction helpful to you?
Thank you for voting!
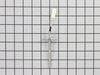
Oven would not get up or stay up to selected temperature
Pull stove out to get behind it,unplug temperature probe plug. Remove temp probe from oven by removing the screw holding it in place on back of oven. Cut plug off temp probe unit leaving as much lead wire as possible on plug end. Strip wires on new probe and end of plug wires(one quarter inch). Then I used two small butt connectors to join the stripped wires,one for each pair of wires. Two small wire 'nuts' may also be used as the connections are outside the oven and not exposed to the heat of the oven while it is in operation. Hope this helps the inexperienced 'do it yourselfers'--:)
Parts Used:
-
wondell from Winnemucca, NV
-
Difficulty Level:Easy
-
Total Repair Time:Less than 15 mins
-
Tools:Nutdriver
0 of 1 people
found this instruction helpful.
Was this instruction helpful to you?
Thank you for voting!
Control Rod On Switch Was Broken Off
I looked at video and followed the instructions from the man in the video. I pulled out range and then unplugged range from electrical outlet. I removed screws from back and took back off. I then took the two screws out from front of switch. I pulled switch out and then removed one of the wires off and placed it in the same place on the new switch. I did same on the other two wires. I then put switch back in place and tighten the two screws on front. I replaced the back on the range. I plugged range back into the receptacle, pushed range back in place. I put control knob on and then turned it on. The eye worked fine. Very easy!
Parts Used:
-
Richard from Williston, SC
-
Difficulty Level:Really Easy
-
Total Repair Time:Less than 15 mins
-
Tools:Pliers, Screw drivers
Was this instruction helpful to you?
Thank you for voting!
Infiniti switch needed to be changed.
Quit after getting shocked. New part had different configuration. Hard to see marking for pull and plug from old switch to new switch. New switch had different configuration. After all that and making sure switch worked, got shocked as stove was pushed back to wall. Some other issues with wiring has a shorting out problem. Maybe time to call a pro or get rid of the stove and get the gas stove we have been longing for. Be sure to match points on pulling and plugging as the configuration may be different.
Parts Used:
-
Ralph from Peoria, IL
-
Difficulty Level:A Bit Difficult
-
Total Repair Time:Less than 15 mins
-
Tools:Screw drivers
Was this instruction helpful to you?
Thank you for voting!
bad burner switch
removed six screws on back panel and two holding switch on front panel. pulled wire from switch and placed it on new switch,did same with next four wires. put back panel on .DONE works fine
Parts Used:
-
ALBERT from LITCHFIELD, CT
-
Difficulty Level:Really Easy
-
Total Repair Time:Less than 15 mins
-
Tools:Screw drivers
Was this instruction helpful to you?
Thank you for voting!
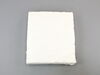
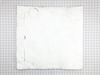
Oven insulation ruined by rodent urine; horrible smell every time oven used
My brother is a licensed electrician, so the job was relatively easy for him. The pieces of insulation were pre-cut to fit, so there was no trimming involved. He tilted the oven over on its back to replace the piece of insulation under the oven. Removed the metal panel between the storage drawer and oven bottom, removed the soiled insulation and wiped everything down with vinegar. Placed the new insulation and reinstalled the metal panel and drawer. Removed the oven/range top and again removed the soiled insulation, wiped everything down and installed the new insulation (this piece of insulation was the wrap around one that goes under the range top - across the top of the oven and down both sides). Replaced the oven top, then did the back panel - this one was the most time consuming, due to the need to disconnect some of the wiring and sensors, as well as having to loosen the panel where the control knobs are located in order to remove the inner panel to get to the insulation. The insulation was precut to fit around the oven light bulb, so just had to make sure we installed it right side up :). Have used the oven several times since and no more smell!!
Parts Used:
-
Lori from Alexander, AR
-
Difficulty Level:Easy
-
Total Repair Time:30 - 60 mins
Was this instruction helpful to you?
Thank you for voting!
Replaced large burner switch on tappan range
I am an electrician so I had no problem identifying wire and connecting them properly. However there were no instructions provided with the part and the configuration of the new switch was different than the the old one. I doubt if a DIY individual would have been capable of handling this task. Also there were no safety warning with respect to electrical repairs, which is a must today.
Parts Used:
-
thomas from Huntington Station, NY
-
Difficulty Level:Difficult
-
Total Repair Time:15 - 30 mins
-
Tools:Nutdriver, Pliers, Screw drivers
Was this instruction helpful to you?
Thank you for voting!