















79090043601 Frigidaire Range - Instructions
Keep searches simple. Use keywords, e.g. "leaking", "pump", "broken" or "fit".
Burners on high all the time.
-
Randy from Van, TX
-
Difficulty Level:Really Easy
-
Total Repair Time:Less than 15 mins
-
Tools:Pliers, Screw drivers
Was this instruction helpful to you?
Thank you for voting!
Burner would stay on high when switch was on simmer
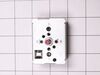
Disconnected power first. Removed 4 screws on the back of the range, pulled the knob off of the switch, removed 2 small screws on the switch(on the front , under the knob) pulled off the 4 wires with spade connections on the switch. Put wires on the new switch, put in 2 screws on new switch, pushed knob on switch, replaced back cover and tested the new switch. Works great. Took less than 10 mins.
Parts Used:
-
Dennis from Corpus Christi, TX
-
Difficulty Level:Really Easy
-
Total Repair Time:Less than 15 mins
-
Tools:Screw drivers
Was this instruction helpful to you?
Thank you for voting!
Burner Switch Shorted Out
Pulled the stove away from the wall, disconnected the power cable, removed the top part of the back where the switch was. In front there are two screws that are philip heads that hold the the switch in place. Be careful when replacing the wires. When you take one wire off, place it on the new switch in the the same position. The switch can be put back, but be careful of the angle, because it has four screw holes. Replace the switch, replace the back, plug the power cable in, and push the stove back to it's original position. Make sure there isn't anything on the burner when you test the switch.
Parts Used:
-
Stan from Sun City, AZ
-
Difficulty Level:Really Easy
-
Total Repair Time:Less than 15 mins
-
Tools:Pliers, Screw drivers
Was this instruction helpful to you?
Thank you for voting!
8" burner would get red hot (High) with knob set on 4 or 5, them cool back down to the correct setting. In a few minutes it would be red hot again.
Removed bottom drawer. Pulled Range out away from the wall. Unplugged Range. Removed 6 screws from top back cover. Removed top back cover to reveal the Infinite Switches behind the knobs. Pulled the knobs off of the Switches I wanted to change. Removed the 2 Phillips Head screws holding each switch. Pulled the wires off of the old Infinite Switch and put them on the new Infinite Switch. I was careful to put each wire on the correct terminal from old to new switch. I then reassembled the Range in reverse order. I changed both 8" Burner Infinite Switches. I was only having trouble with 1 switch. But, upon inspection. Both Switches had burn marks on the top left of the switch.
Parts Used:
-
Daniel from floyd, VA
-
Difficulty Level:Really Easy
-
Total Repair Time:Less than 15 mins
-
Tools:Nutdriver, Screw drivers
Was this instruction helpful to you?
Thank you for voting!
Temp did not match readout.
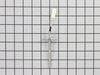
Replaced temp probe and checked OK. This model did not have a full back as the instructional video showed. No cover to remove at all. Only suggestion might be to include two wire nuts of proper size. Average wire nut would be too big. Fortunately, I happened to have a couple.
Parts Used:
-
John from Columbiana, OH
-
Difficulty Level:Really Easy
-
Total Repair Time:Less than 15 mins
-
Tools:Nutdriver
Was this instruction helpful to you?
Thank you for voting!
RF burner only had High Heat.
Unplug the range, pull the knob off the front. Remove the screws from the cover plate behind the switch and remove the cover plate. Carefully pull one wire at a time off of the old switch noting the markings: "L1," "L2," "H1," etc., as the wire position may be different on the new switch. Put each wire onto the new switch as they are removed from the old one. Let the new switch hang from the wires while removing the 2 Phillips head screws from the front of the old switch and remove the switch. Hold the new one in place, start both screws, & then tighten them. Push the knob on the new switch. Plug the range in and try it. If everything works, install the rear panel and screws. I think that it took me longer to type this than it did to actually do the job.
Parts Used:
-
Garner from Sykesville, PA
-
Difficulty Level:Easy
-
Total Repair Time:Less than 15 mins
-
Tools:Nutdriver, Screw drivers
Was this instruction helpful to you?
Thank you for voting!