















79079384405 Kenmore Range - Instructions
Keep searches simple. Use keywords, e.g. "leaking", "pump", "broken" or "fit".
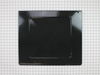
Bottom panel burned through
Remove two back knurled screws, lift out old bottom, screw in new bottom panel. Removal of oven door (two flip out handles at hinge( makes this a little easier. Our oven did not need any other dis-assembly.
Parts Used:
-
Barry from MENDON, NY
-
Difficulty Level:Really Easy
-
Total Repair Time:Less than 15 mins
-
Tools:Screw drivers
2 of 3 people
found this instruction helpful.
Was this instruction helpful to you?
Thank you for voting!
wrong part received and returned
I wanted the bracket for the oven heating element and received the bracket for the broiler.... part returned and now I am stumped about what my next move will be
Parts Used:

-
Rhonda from PACHECO, CA
-
Difficulty Level:Very Difficult
-
Total Repair Time:More than 2 hours
1 person
found this instruction helpful.
Was this instruction helpful to you?
Thank you for voting!
Bottom oven pan was warped and discolored
Unscrew the 2 screws at the back of the oven bottom pan in the range. Place new oven pan in and rescrew the 2 screws. I could not get the two screws screwed back in. Since the bottom pan cannot move from its position, I felt like the two screws were not necessary.
Parts Used:
-
Kathryn from LAKELAND, FL
-
Difficulty Level:Very Easy
-
Total Repair Time:Less than 15 mins
-
Tools:Screw drivers
2 of 4 people
found this instruction helpful.
Was this instruction helpful to you?
Thank you for voting!
light bilb went out

-
Denise from Landover, MD
-
Difficulty Level:Really Easy
-
Total Repair Time:Less than 15 mins
2 of 6 people
found this instruction helpful.
Was this instruction helpful to you?
Thank you for voting!
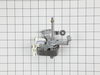
Convection fan making noise
Removed old fan and replaced with new fan. To replace fan, the over interior fan blade was removed, then the two slip on wires were removed from the old fan motor, then the three screws securing the old fan motor were removed. The process was reversed to install replacement fan
Parts Used:
-
Willis from Friendsville, TN
-
Difficulty Level:Easy
-
Total Repair Time:15 - 30 mins
-
Tools:Screw drivers, Wrench (Adjustable)
0 of 1 people
found this instruction helpful.
Was this instruction helpful to you?
Thank you for voting!
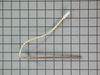
temp was not reading right
-
santa from glassboro, NJ
-
Difficulty Level:Really Easy
-
Total Repair Time:Less than 15 mins
-
Tools:Nutdriver
3 of 10 people
found this instruction helpful.
Was this instruction helpful to you?
Thank you for voting!
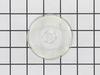
Lens cover for oven light broke.
Really a no brainer, but I do have to say that PartSelect customer service is excellent. My part was located and on it's way within a day and arrived a couple of days later.
Parts Used:
-
Amy from Corona, CA
-
Difficulty Level:Really Easy
-
Total Repair Time:Less than 15 mins
0 of 1 people
found this instruction helpful.
Was this instruction helpful to you?
Thank you for voting!
Broken globe in oven and burnt out light bulb
-
Sharon from Foley, AL
-
Difficulty Level:Really Easy
-
Total Repair Time:Less than 15 mins
0 of 5 people
found this instruction helpful.
Was this instruction helpful to you?
Thank you for voting!
Purchased home where previous owner melted Aluminum Foil to bottom panel of oven.
Removed 2 screws from rear of panel and dropped new panel in. Re-installed screws. Oven like new again. Aluminum foil was burning and emitting foul odor when oven was on.
Parts Used:
-
Michael from Wimauma, FL
-
Difficulty Level:Really Easy
-
Total Repair Time:Less than 15 mins
-
Tools:Screw drivers
Was this instruction helpful to you?
Thank you for voting!
put aluminum foil on bottom panel of oven to catch drips. Big mistake. adhered to oven in minutes.
Removed 2 screws at rear of bottom panel. Removed old panel, replaced with new and screwed back in.Piece of cake. Plus this company was great to order from. received part the same day. Very happy. Would order through this company again.
Parts Used:
-
jill from new boston, NH
-
Difficulty Level:Really Easy
-
Total Repair Time:Less than 15 mins
-
Tools:Screw drivers
Was this instruction helpful to you?
Thank you for voting!
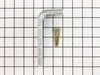
Needed to install an anti-tip bracket on my stove.
Moved the stove. Used the template to position the bracket. Put the supplied screws to attach bracket to the floor. Slid stove back into place. DONE!
Parts Used:
-
Daniel from Provo, UT
-
Difficulty Level:Really Easy
-
Total Repair Time:Less than 15 mins
-
Tools:Socket set
Was this instruction helpful to you?
Thank you for voting!
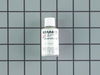
bottle fell and clipped edge of range
Touch up paint was easy to apply. I gave it a few coats and you cannot tell where to chip was. I wish you had a standard mail delivery option. I paid twice the price of the paint for fed ex delivery. I didn, t need the paint next day but it did get here before the estimated deliverydatee.
Parts Used:
-
Mary Ann from Hawley, PA
-
Difficulty Level:Really Easy
-
Total Repair Time:Less than 15 mins
Was this instruction helpful to you?
Thank you for voting!
Oven turning off ater Pre- Heating
Talked to someone who knows , DX'd the potential problem,looked for the part on your very user friendly website and your DX was exactly what my oven was doing, when the Thermo-Sensor arrived, I unplugged the oven, removed the metal back, took out the faulty Sensor, replaced it very easy then realized the plug was different, so called a friend who knows how to Solder and 2 hrs, later, my oven was repaired and I began baking an Apple pie to repay a friends kindness The pie was perfectly baked , my friend was happy and so am I ,the baker, just before the holidays Thank you Parts Select for helpful DX and speedy delivery - seems you saved Christmas for me.
Parts Used:
-
Catherine from Bowie, AZ
-
Difficulty Level:A Bit Difficult
-
Total Repair Time:More than 2 hours
-
Tools:Nutdriver
Was this instruction helpful to you?
Thank you for voting!
Cracked inner oven door

-
Steve from Hollypond, AL
-
Difficulty Level:Easy
-
Total Repair Time:More than 2 hours
-
Tools:Pliers, Screw drivers
Was this instruction helpful to you?
Thank you for voting!
Cracked inside glass
I actually watched Youtube while I was changing it. This video was not actually the same make up of my oven, even though the I typed in the model number. I manage to figure it any with the steps anyway. It was harder then I expected but not horrible. I think I did pretty well for a women. Patti
Parts Used:
-
patti from Greer, SC
-
Difficulty Level:A Bit Difficult
-
Total Repair Time:1- 2 hours
-
Tools:Screw drivers
Was this instruction helpful to you?
Thank you for voting!