















6651590840 Kenmore Dishwasher - Instructions
Keep searches simple. Use keywords, e.g. "leaking", "pump", "broken" or "fit".
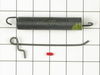
Door comes down to fast, Broken Door Assist Spring
Turn off power at breaker
Turn off water supply
Remove 2 screws at baseboard plate
Remove 2 mounting screws attaching machine to floor
Open door, remove 2 mounting screws attaching machine to bottom of counter
Disconnected water line
Carefully pulled machine out about 8 inches to expose broken spring
Attached new spring using directions included with package from PartSelect
Reassembled in reverse order
Check for water leak before attaching baseboard plate
Turn off water supply
Remove 2 screws at baseboard plate
Remove 2 mounting screws attaching machine to floor
Open door, remove 2 mounting screws attaching machine to bottom of counter
Disconnected water line
Carefully pulled machine out about 8 inches to expose broken spring
Attached new spring using directions included with package from PartSelect
Reassembled in reverse order
Check for water leak before attaching baseboard plate
Parts Used:
-
Gary from Erving, MA
-
Difficulty Level:Easy
-
Total Repair Time:30 - 60 mins
-
Tools:Nutdriver, Screw drivers, Wrench (Adjustable)
2 of 8 people
found this instruction helpful.
Was this instruction helpful to you?
Thank you for voting!
6 wheels missing
easy - removed old wheel holders & pushed new
ones in place. parts came in two days !!!!
ones in place. parts came in two days !!!!
Parts Used:

-
Tom from Wappingers Falls, NY
-
Difficulty Level:Really Easy
-
Total Repair Time:15 - 30 mins
0 of 2 people
found this instruction helpful.
Was this instruction helpful to you?
Thank you for voting!
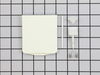
soap door hinge broke
I took the pin and i slide it through the first hole attached the spring then sldie it through the second hole and snap the cover on
Parts Used:
-
Michael from Las Vegas, NY
-
Difficulty Level:Really Easy
-
Total Repair Time:15 - 30 mins
-
Tools:Screw drivers
4 of 16 people
found this instruction helpful.
Was this instruction helpful to you?
Thank you for voting!
The previous rod holding the cup in place broke
Remove completely the old one and installed the new entire kit.
Parts Used:
-
Nicole from Newnan, GA
-
Difficulty Level:Easy
-
Total Repair Time:Less than 15 mins
-
Tools:Screw drivers
2 of 12 people
found this instruction helpful.
Was this instruction helpful to you?
Thank you for voting!
was just missing the door and spring
You slide the pin that holds the door in the first hole. then you slide the spring in next. The you slide the pin through the last hole. After that you gently push the door onto the pin till it snaps into place. And your done.
Parts Used:
-
craig from Columbia, TN
-
Difficulty Level:Easy
-
Total Repair Time:Less than 15 mins
4 of 21 people
found this instruction helpful.
Was this instruction helpful to you?
Thank you for voting!
Super Fast Shipping
The part arrived the next day with regular postage, outstanding service.
Parts Used:
-
Karolyn from Wellington, FL
-
Difficulty Level:Really Easy
-
Total Repair Time:Less than 15 mins
7 of 64 people
found this instruction helpful.
Was this instruction helpful to you?
Thank you for voting!
missing part
-
Ruby from Saint Marys, GA
-
Difficulty Level:Really Easy
-
Total Repair Time:Less than 15 mins
-
Tools:Screw drivers
Was this instruction helpful to you?
Thank you for voting!
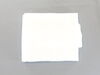
Unfortunately, a mouse had made its home on top of our surround insulation. For hygienic reasons, I replaced the surround.
1. Turn off the electrical switch that powers the dishwasher. 2. Open the door of the dishwasher and find the two phillips head screws that secure the top of the dishwasher to the kitchen counter. 3. Remove the screws. 4. Gently move the machine side-by-side a bit while pulling it out onto the kitchen tile (be careful, the water-supply hose, electric cord, and dishwasher drain hose may not be long enough to allow you to pull it out very far - don't break or kink the hoses). 5. Remove (pull off) the black plastic fastener located on the bottom/rear of each side of the dishwasher. 6. Remove the old surround. 7. Lay the new wrap in place and secure with the two plastic fasteners. 8. Push back into place, secure the two screws, check your hoses.
Parts Used:
-
John from Taylor, TX
-
Difficulty Level:A Bit Difficult
-
Total Repair Time:15 - 30 mins
-
Tools:Screw drivers
Was this instruction helpful to you?
Thank you for voting!
Dishwasher making a noise (lower area)
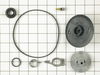
I reviewed your video and followed the steps, I appreciate the video. I used the tools described in the video; it was a simple process. Thank you Parts Select. .
Parts Used:
-
Fernando from El Paso, TX
-
Difficulty Level:Easy
-
Total Repair Time:15 - 30 mins
-
Tools:Nutdriver, Screw drivers, Wrench (Adjustable)
Was this instruction helpful to you?
Thank you for voting!
Rollers had broken on old rack
Received new rollers promptly as ordered. Removed the old ones by snapping them off and simply snapped the new ones on. Took less than 5 minutes and job was a complete success. Wife happy and I am safe for now
Parts Used:
-
joel from jena, LA
-
Difficulty Level:Really Easy
-
Total Repair Time:Less than 15 mins
Was this instruction helpful to you?
Thank you for voting!
Unit would not drain upon completion of the wash and rinse cycles
Replaced the lower seal, drain impeller,chopper blade, and wash impeller. Problem is still not solved but the inner parts have been replaced. Only thing logical next is the check valve. Unit cycles well and if I turn the dial to just before the rinse cycle and watch, I do see water draining from the unit...Of course while replacing these parts, I checked other things and found a loose spring behind the front cover. It can be seen on the diagram as it is part of the detergent door mechanism (or so I believe), but it is not clear on where the spring actually connects to.
Parts Used:
-
James from West Palm Beach, FL
-
Difficulty Level:Really Easy
-
Total Repair Time:30 - 60 mins
-
Tools:Nutdriver, Wrench (Adjustable)
Was this instruction helpful to you?
Thank you for voting!
Detergent dispenser didn't open consistently
My soap dispenser latch was coated in grit, the gasket was deteriorated, and the spring was barely strong enough to open the door, so the door didn't always latch closed or open when it should. I followed the video and everything went exactly as shown. Once the liner was removed, I discovered the back (including the latch mechanism) was covered in soap residue and other gunk. I hosed it off on the backyard and resumed the repair. The dispenser now latches easily and opens with a convincing SNAP. I wouldn't have known how to replace the latch without the video. Great website!
Parts Used:
-
Evan from Columbus, MS
-
Difficulty Level:Easy
-
Total Repair Time:30 - 60 mins
-
Tools:Pliers, Screw drivers
Was this instruction helpful to you?
Thank you for voting!
Pump flow rate insufficient to drain tub completely
I watched the video then followed the procedure accessing the impeller/grinder from inside the tub. Had I not watched it, I would have torn into it from the bottom by removing the motor, etc. with disastrous results. I was quite depressed when installation of the impeller kit did not resolve the problem. I remembered from the survey that 56% of problems were solved with this kit; BUT, another 24% found that the check valve on the discharge line was the problem. So I removed it and lo and behold, it was partially plugged with broken pieces from the old impeller. The 1 page sheet that comes with the kit is simply a diagram of the parts included, there are no instructions ---- watch the video!!! All said and done, my experience with PartSelect was first class. They are 5 Stars in every category and I would highly recommend them.
Parts Used:
-
Jeffrey from Lewis, NY
-
Difficulty Level:Easy
-
Total Repair Time:30 - 60 mins
-
Tools:Nutdriver, Screw drivers
Was this instruction helpful to you?
Thank you for voting!
dishwasher wasn't draining
-
Lola from Graeagle, CA
-
Difficulty Level:Really Easy
-
Total Repair Time:More than 2 hours
-
Tools:Nutdriver, Screw drivers
Was this instruction helpful to you?
Thank you for voting!
the center screw in the impeller was too thigh, and the adjustable wrench wont hold the impeller still
I could not find a 90 degrees 1 inch car wrench and by them the impeller head wish is plastic was all run down so nothing will hold it, finally, I heat up a flat screw driver and cut the impeller near the head whit the help of a hammer , and them I could grab it with a pressure wrench and loose the screw up. finally the fix when fine and is working good. the parts are just the ones I need it. Thank you.
Parts Used:
-
Emerson from Denver, CO
-
Difficulty Level:Difficult
-
Total Repair Time:More than 2 hours
-
Tools:Wrench (Adjustable)
Was this instruction helpful to you?
Thank you for voting!