















66514729112 Kenmore Trash Compactor - Instructions
Keep searches simple. Use keywords, e.g. "leaking", "pump", "broken" or "fit".
Compactor ram was stuck in the down position and door would not open
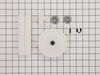
After inspecting to make sure the actuator was functional and that power to the unit was not an issue I was able to find that one the drive gears cracked in half and made the compactor inoperable. It was easy to remove the bottom casing with a nut driver. This casing covered the drive gear which operated the ram. After slightly loosening the gear mounts and I was able to replace center gear and re-attach gear chain and re-tighten. Then replace bottom casing and the compactor was back in action. Huge savings!
Parts Used:
-
Michael from South Boston, MA
-
Difficulty Level:A Bit Difficult
-
Total Repair Time:30 - 60 mins
-
Tools:Nutdriver, Pliers, Screw drivers
0 of 1 people
found this instruction helpful.
Was this instruction helpful to you?
Thank you for voting!
Ram quit moving
-
Hal from Granada Hills, CA
-
Difficulty Level:Easy
-
Total Repair Time:30 - 60 mins
-
Tools:Nutdriver
0 of 1 people
found this instruction helpful.
Was this instruction helpful to you?
Thank you for voting!
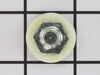
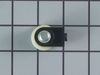
roller bearing for trash bin was damaged and would not allow canister to roll
the bearing were the perfect match and instructions helpful. sysem is rolling smoothly
Parts Used:

-
roberto from keller, TX
-
Difficulty Level:A Bit Difficult
-
Total Repair Time:30 - 60 mins
-
Tools:Nutdriver, Pliers, Screw drivers, Wrench (Adjustable)
6 of 32 people
found this instruction helpful.
Was this instruction helpful to you?
Thank you for voting!
The compactor was loaded with too many wine bottles
At best it is advisable to load just one at a time and covered with newspaper etc., In this case someone put in three bottles with out covering with heavy newspaper etc.and for some reason one rode out and to the side. Crushing the side of the metal trash container. This pinned the container against the side of the compactor body and behind the front rails. Using a lot of pulling and some nifty pry bars and two hours of prying and squeezing we got the container out( see attached photo )The replacement container was ordered on a Sunday night and arrived Tuesday morning. Removal of the existing front panel ,foot pedal and door switch was easy and installation on to the replacement container was a breeze with a little orientation required to line up the switch and pedal in the right configuration. 20 min tops and that was with five kids helping ;)
Parts Used:

-
james from Milton, MA
-
Difficulty Level:Easy
-
Total Repair Time:15 - 30 mins
-
Tools:Screw drivers
Was this instruction helpful to you?
Thank you for voting!
Ram stuck in down poaition
Replaced drive gears.They arrived in a kit from Parts Select with instructions.They fit perfectly and the compactor works like new.
Parts Used:
-
Candace from Ocala, FL
-
Difficulty Level:Really Easy
-
Total Repair Time:15 - 30 mins
-
Tools:Wrench set
Was this instruction helpful to you?
Thank you for voting!
Ram was stuck in the down position
-
Joseph N from Wheaton, IL
-
Difficulty Level:Really Easy
-
Total Repair Time:15 - 30 mins
-
Tools:Nutdriver
Was this instruction helpful to you?
Thank you for voting!
Directional Switch lever broke
The part was suppose to come with instructions, but did not. However, it was easy after reading the comments on-line, and discovering that the front cover had to be removed in order to expose the whole switch and wires. I did drop one of the mounting screws down the front of the compactor and was not able to recover it. So, I had to make a trip to the hardware store for a replacement. They couldn't match the remaining screw but I found 2 similar ones with lock washers and nuts that worked just fine. I saved a $90 service charge and probably double the cost of the switch by doing it myself.
Parts Used:

-
Dick from Penn Valley, CA
-
Difficulty Level:Easy
-
Total Repair Time:15 - 30 mins
-
Tools:Nutdriver, Screw drivers
Was this instruction helpful to you?
Thank you for voting!
the compactor was stuck in the down position
Had to first raise the screw plate that compacts the garbage. Then had to turn the compactor over and remove screws holding the bottom plate on in order to get to the gears. Once that was done I removed the worn gears and the chain drive and replaced with the new gears and the chain. Put the unit back together and works like a new one. A $35 dollar fix for a unit that sells for around $900 today. Thanks to partslect for being able to help me with the parts needed. Not only did I save on a new unit but by doing this myself I saved around $100 in labor charges.
Parts Used:
-
Rod from Quincy, IL
-
Difficulty Level:Easy
-
Total Repair Time:15 - 30 mins
-
Tools:Screw drivers, Socket set
Was this instruction helpful to you?
Thank you for voting!
Trash compactor would not turn off at end of cycle and made a grinding noise and some vibration
I removed the unit from under the kitchen counter by first pulling the trash drawer all the way out and lifting it out of the track and setting it out on the floor. I then slowly pulled the compacting unit out and unplugged the cord from the electrical outlet. With the entire unit out in the floor I took a nut driver and removed the screws from the top plate and the screws from both sides at the bottom of the front housing. This allowed access to the directional switch. Two screws on the right side of the switch have to be removed to remove the switch along with two holding plates on the left side of the switch. The switch can then be accesses for removal. Several wires are attached to the switch and should be removed one at a time and installed to the identical identical location on the new switch. The new switch can then be installed by aligning the holes and reinstalling the holding plates. When this is done the front frame and top plate can be replaced with the nut screws. Plug back into the electrical outlet and see if it works. In this case it did exactly what it was doing before I started. So either I did not reinstall the directional switch properly or I am in the one percent rather than the 99 percent that should successfully solve the problem as suggested in the trouble shooting guide. I will now recheck the installation of the directional switch nd then check the bottom of the unit to see if the gears or chain drive are broken .
Parts Used:
-
Ronald from Brentwood, TN
-
Difficulty Level:A Bit Difficult
-
Total Repair Time:1- 2 hours
-
Tools:Nutdriver, Screw drivers
Was this instruction helpful to you?
Thank you for voting!
Drive motor would not turn off after completing cycle
Pull unit from under counter (Held in place with 2 screws) Use nut driver to remove top and front panel. (I didn't remove the control panel from the front panel which probably made access more difficult) Locate the directional switch near the top of the unit and remove two screws, being careful not to lose a small metal plate into which the screws thread (similar to a Tinneman nut). I moved the wires one at a time from the old switch to the new as I am color blind and have trouble with wire colors. Fit the new switch in place, being sure the switch lever is positioned against the metal tab that operates it. Screw the switch in place and then reassemble the compactor.
Parts Used:
-
William from Jacksonville, FL
-
Difficulty Level:Easy
-
Total Repair Time:30 - 60 mins
-
Tools:Nutdriver, Pliers, Screw drivers
Was this instruction helpful to you?
Thank you for voting!
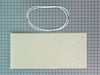
compactor was crushing the bag holder
easy ... got the new bag holder and replaced old one. the impressive part of the process is how easy it was to get the part info from partselect website. could have spun my wheels a lot without that.
Parts Used:
-
Myles from Jackson, NH
-
Difficulty Level:Really Easy
-
Total Repair Time:Less than 15 mins
Was this instruction helpful to you?
Thank you for voting!
20+ plactic gears striped them selfs who da thunk
took longer to pull it out and put it backunder the counter then to pull the panel take the chane gear & drive gear off and put it back together
Parts Used:
-
Fred from Belmont, NH
-
Difficulty Level:Really Easy
-
Total Repair Time:Less than 15 mins
-
Tools:Nutdriver
Was this instruction helpful to you?
Thank you for voting!
The machine would not shut off
A trash compactor is a very simple machine. Basically there are two parts that could cause the problem of the machine not shutting off at the end of the cycle. The limit switch which was listed as the most likely cause and the momentary contact switch, if fused would cause the same problem. I first replaced the limit switch and to my dismay, the problem continued which meant the contact switch was at fault. The switch unit is easy to get too, First remove the two screws securing the front panel to the machine. Then transfer the wires from the old switch to the new. Remove two screws which secure the switch unit to the front and discard the old switch. Reassemble the unit in the reverse order and plug the unit back into the wall. Works perfectly!
Parts Used:

-
John from Pine Bluff, AR
-
Difficulty Level:Easy
-
Total Repair Time:Less than 15 mins
-
Tools:Screw drivers, Socket set
Was this instruction helpful to you?
Thank you for voting!
compactor will not stop when compaction complete on top cycle
take 2 screws out on top cover with key switch. remove two screw holding directional switch. remove wires, one at a time, and place on the new switch. put new switch in place with two screws. put front cover on with two screws and test. works like a charm.
Parts Used:
-
BRUCE from CASPER, WY
-
Difficulty Level:Really Easy
-
Total Repair Time:Less than 15 mins
-
Tools:Pliers, Screw drivers
Was this instruction helpful to you?
Thank you for voting!
Primary Power Transfer Gear Split in Half
Compactor ram was stuck in the down position after hearing a loud bang during a compacting cycle. Removed outer compactor casing to determine cause, only to find gear housing underneath the compactor that contained drive chain and gear assembly. Primary gear had split neatly in half. Determined the appropriate part needed with partselect part finder (of course, an entire kit, and not just the gear), had part shipped and had compactor repaired in three days. The actual repair and reassembly of the compactor took less than a half-hour. Consisted of removing chain tension from gear hub by loosening four sheet metal screws holding motor assembly, removing circlip and old gear hub from chain and shaft, replacing gear hub with new part, lubricating the gear mechanism, and reinstalling in reverse order.
Parts Used:
-
Robert from Willow Creek, CA
-
Difficulty Level:Really Easy
-
Total Repair Time:15 - 30 mins
-
Tools:Nutdriver, Pliers, Screw drivers
Was this instruction helpful to you?
Thank you for voting!