















621050 Admiral Refrigerator - Instructions
Keep searches simple. Use keywords, e.g. "leaking", "pump", "broken" or "fit".
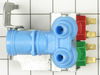
leak at water valve for ice maker
removed part., got number, went online,found part, ordered part, paid for part, replaced part.
works great. !
works great. !
Parts Used:
-
Terry from Hendricks, MN
-
Difficulty Level:Really Easy
-
Total Repair Time:Less than 15 mins
-
Tools:Nutdriver, Pliers, Screw drivers
4 of 8 people
found this instruction helpful.
Was this instruction helpful to you?
Thank you for voting!
Door light switch disintegrated
Very simple fix, remove 3 screws, two connectors to the old switch
Parts Used:

-
Thomas from Roseville, CA
-
Difficulty Level:Really Easy
-
Total Repair Time:Less than 15 mins
-
Tools:Screw drivers
2 of 2 people
found this instruction helpful.
Was this instruction helpful to you?
Thank you for voting!
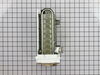
water overflow,coating on tray peeling off
remove 3 screws,rotate assembly,depress lock on wire harnass connector,un plug harnass.remove old assembly,remove and transfer side cover and steel wire at front of assembly,connect harnass to new assembly,rotate into place,aling screw holes and install 3 screws.flip front steel wire down and wait for about 1 hour,first tray of ice will fall..all done.
Parts Used:
-
Jeffery from vero beach, FL
-
Difficulty Level:Really Easy
-
Total Repair Time:Less than 15 mins
-
Tools:Nutdriver, Screw drivers
2 of 2 people
found this instruction helpful.
Was this instruction helpful to you?
Thank you for voting!
water leak and frezes ice in bin
to easy to describe, remove 3 screws and a wire plug then install new unite.
Works great
Thanks
Works great
Thanks
Parts Used:
-
Peter from Lancaster, PA
-
Difficulty Level:Really Easy
-
Total Repair Time:Less than 15 mins
-
Tools:Nutdriver
2 of 2 people
found this instruction helpful.
Was this instruction helpful to you?
Thank you for voting!
Not making ice, and water leaking in freezer
Unplugged the power, removed old icemaker by removing 3 screws and unplugging a small wire harness
Then i moved the wire harness off the old one to the new one, moved the end cover over to new one and plugged the harness back in and screwed it back in and turned it on
ALL FIXED!
Then i moved the wire harness off the old one to the new one, moved the end cover over to new one and plugged the harness back in and screwed it back in and turned it on
ALL FIXED!
Parts Used:
-
Raymond from Northglenn, CO
-
Difficulty Level:Really Easy
-
Total Repair Time:Less than 15 mins
-
Tools:Screw drivers
2 of 2 people
found this instruction helpful.
Was this instruction helpful to you?
Thank you for voting!
Light didnt go on
The light rocker switch wasnt working. I found the part on the web site. It was so easy. I used a screw driver to pop out the old one and pop the new one in. It took 5 min. Thanks!!!
Parts Used:
-
dorotea from staten island, NY
-
Difficulty Level:Really Easy
-
Total Repair Time:Less than 15 mins
-
Tools:Screw drivers
3 of 5 people
found this instruction helpful.
Was this instruction helpful to you?
Thank you for voting!
Ice tray filled up with water. Stopped making ice.
As per instructions. Removed parts from old ice maker, and installed them on new one, Then installed it in the freezer. Works good.
Parts Used:
-
robert from COLDSPRING, TX
-
Difficulty Level:Very Easy
-
Total Repair Time:15 - 30 mins
-
Tools:Screw drivers
2 of 2 people
found this instruction helpful.
Was this instruction helpful to you?
Thank you for voting!
Refrigerator and freezer compartment gradually get warmer, frost buildup on back of freezer compartment.
Remove freezer contents, shelving, baskets, shelf brackets, basket rails. Then, remove the icemaker including the ice basket, the cube freezer and the motor assembly. Remove the back liner of the freezer compartment. Remove and replace the defrost heater assembly, using the old mounting brackets and connecting the wires to the same terminals. Reassemble. Discard excess screws :).
Parts Used:
-
Bruce from Rock Rapids, IA
-
Difficulty Level:Easy
-
Total Repair Time:More than 2 hours
-
Tools:Nutdriver, Screw drivers
3 of 5 people
found this instruction helpful.
Was this instruction helpful to you?
Thank you for voting!
I went by the video but my removal and installation were different than shown.
Instead of the ice maker unclipping from the wall after one 1/4" screw being removed from the bracket, I had to remove three of the 4 Phillips head screws from the ice bucket slider below the ice maker and swivel it down to allow the ice maker bracket to clear. The two 1/4" screws holding the ice maker to the wall at the top had to be removed and then the ice maker could be pulled away from the freezer wall. The rest of the instructions went according to the video and went well.
Parts Used:
-
Gregory from GARNER, KY
-
Difficulty Level:A Bit Difficult
-
Total Repair Time:30 - 60 mins
-
Tools:Nutdriver, Screw drivers
2 of 2 people
found this instruction helpful.
Was this instruction helpful to you?
Thank you for voting!
valve froze and busted was leaking water on floor
took nut driver and removed screw holding valve to refrigerator removed valve. Swapped water lines from old valve to new valve,plugged in selonoid wire harness to new valve reattached the water valve to referigerator and turned water on and forgot it. No leaks,ice and water in 24 hrs.
Parts Used:
-
Bryan from Roberts, ID
-
Difficulty Level:Really Easy
-
Total Repair Time:30 - 60 mins
-
Tools:Nutdriver, Pliers, Wrench (Adjustable)
2 of 2 people
found this instruction helpful.
Was this instruction helpful to you?
Thank you for voting!
Icemaker made some pretty sad cubes! Hollow, unfilled, or small cubes
Replacing the icemaker is pretty simple. Three screws, an electrical connector. Hardest part is getting to the icemaker since the freezer is below the refrigerator.
Parts Used:
-
Dana from ABINGTON, PA
-
Difficulty Level:Easy
-
Total Repair Time:30 - 60 mins
-
Tools:Nutdriver, Screw drivers
2 of 2 people
found this instruction helpful.
Was this instruction helpful to you?
Thank you for voting!
Ice Maker Leaked Creating an Ice block
Merely remove the front bottom screw that attached the ice maker to the refrigerator
Lift the ice maker gently off of the 2 top screws
Unplug the icemaker wiring harness from the back of the refrigerator, and remove
Snap off the end of the maker and remove the keeper for the wire arm
Remove the wire arm and install on new maker
Unplug the wiring harness from the old maker and plug into the new one
Plug the harness into the refrigerator, slip the new maker over the top screws, with the water feed tube inserted into the maker
Install bottom screw into the bracket that holds it in place.
This took less than 5 minutes.
Lift the ice maker gently off of the 2 top screws
Unplug the icemaker wiring harness from the back of the refrigerator, and remove
Snap off the end of the maker and remove the keeper for the wire arm
Remove the wire arm and install on new maker
Unplug the wiring harness from the old maker and plug into the new one
Plug the harness into the refrigerator, slip the new maker over the top screws, with the water feed tube inserted into the maker
Install bottom screw into the bracket that holds it in place.
This took less than 5 minutes.
Parts Used:
-
Loren from Indianapolis, IN
-
Difficulty Level:Really Easy
-
Total Repair Time:Less than 15 mins
-
Tools:Screw drivers
2 of 3 people
found this instruction helpful.
Was this instruction helpful to you?
Thank you for voting!
no shut-off for ice production; shut-off arm broken/missing
Inserted the prongs of the replacement shut-off arm in the holes provided in the bracket.
Parts Used:
-
Victoria from MELBOURNE, FL
-
Difficulty Level:Really Easy
-
Total Repair Time:Less than 15 mins
2 of 3 people
found this instruction helpful.
Was this instruction helpful to you?
Thank you for voting!
Replaced leaking ice maker after minor screwup!
Old ice maker leaking water and produced ice cubes with black inclusions. First, I removed old ice maker per video instructions. Transferred electrical cable, cover, and bail to new ice maker. First installation failed because I failed to make sure water tube correctly enter back of ice maker. No ice. Initially thought electrical cable wasn't firmly in place. Then I noticed frozen water dripping down back of freezer. A clue! Removed ice maker and reinstalled making sure water tube went through the hole in back of ice maker. Now the new ice maker works beautifully!
Parts Used:
-
Jackson from Leesburg, VA
-
Difficulty Level:Easy
-
Total Repair Time:15 - 30 mins
-
Tools:Nutdriver
2 of 3 people
found this instruction helpful.
Was this instruction helpful to you?
Thank you for voting!
Replaced Ice Maker
Followed the online PartSelect video instructions and it was very helpful. The ice maker has to cycle through before it starts making ice so don't be alarmed when nothing happens when you first hook it up.
Parts Used:
-
Steven from Clinton Corners, NY
-
Difficulty Level:Easy
-
Total Repair Time:Less than 15 mins
-
Tools:Nutdriver
2 of 3 people
found this instruction helpful.
Was this instruction helpful to you?
Thank you for voting!