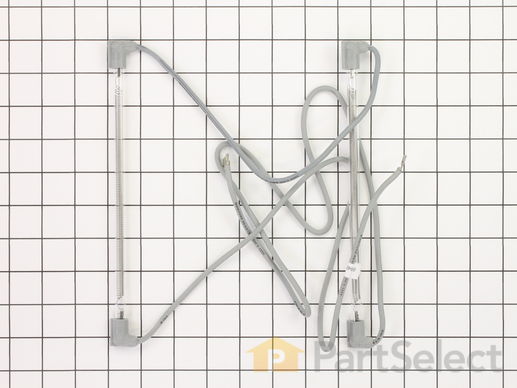
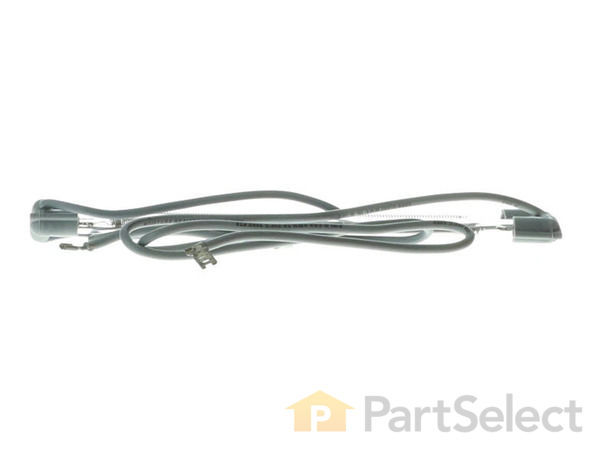
Defrost Heater - 500W 115V WP61001846
$
62.44
In Stock
Get this part fast! Average delivery time for in-stock parts via standard shipping: 1.8 days.
PartSelect Number PS11743110
Manufacturer Part Number WP61001846
Manufactured by
Whirlpool

Check if this fits your product and find model diagrams
Need help finding your model number?
Product Description
Defrost Heater - 500W 115V Specifications
This set includes two nine and a quarter inch radiant glass defrost heaters joined together with wire. Each heater carries 500 watts and 115 volts. The defrost heater heats the evaporator in the defrost mode of operation to keep the cooling coils from frosting over.

How Buying OEM Parts Can Save You Time and Money
Troubleshooting
This part fixes the following symptoms:
Fridge too warm | Freezer not defrosting | Freezer section too warm | Frost buildup
This part works with the following products:
Refrigerator.
This part works with the following products:
Admiral, Maytag, Amana, Jenn-Air.
Part# WP61001846 replaces these:
AP6009936, 29815-1, 31-264, 52530-1, 52530-6, 52764-1, 52764-14, 52764-6, 52764-8, 52764014, 61001139, 61001846, 67679-1, 69848-1, 698482-1, 833759, 833760, 833893, 833894, 836456
...
Show more
, 836457, 836663, 836664, 840869, 840870, 841602, 841603, 844614, 978288, B13-457, RA95043-1, WP61001846VP
Show less
Customer Reviews
Filter By Rating:
- < Prev
- 1
- Next >
Sort by:
Search filter:
Clear Filter
Your search term must have 3 or more characters.
Keep searches simple. Use keywords, e.g. "leaking", "pump", "broken" or "fit".
Sorry, we couldn't find any existing reviews that matched. Try using some different or simpler keywords.
William M - November 20, 2019
Verified Purchase
great part,worked well.
the part was great and a good value. i saved hundreds. my refrigerator works like new.
James L - April 27, 2019
Verified Purchase
Fast service
Back to cooling.
- < Prev
- 1
- Next >
Customer Repair Stories
Average Repair Rating: 2.6 / 5.0, 25 reviews.
What's this?
- < Prev
- 1
- 2
- 3
- Next >
Sort by:
Search filter:
Clear Filter
Your search term must have 3 or more characters.
Keep searches simple. Use keywords, e.g. "leaking", "pump", "broken" or "fit".
Sorry, we couldn't find any existing installation instruction that matched.
Defrost Heater
it went good
-
RICHARD from SPRINGFIELD, MI
-
Difficulty Level:Really Easy
-
Total Repair Time:30 - 60 mins
-
Tools:Nutdriver
1 person
found this instruction helpful.
Was this instruction helpful to you?
Thank you for voting!
Refrigerator and freezer not cooling as required, compressor running continually
Turned refrigerator and freezer controls to off, removed icemaker bin, unplugged icemaker plug and removed two screws holding icemaker in place and removed icemaker. removed screws holding auger motor and freezer compartment light plate, unplugged and set aside. Remover screws holding freezer coil cover in place and removed cover. Allowed coils to defrost completely and then removed screws that hold the two defrost heater coil mounting plates in place, unplugged the two wires that connect the defrost heater coils to the connector block that is located above the freezer coil. Remove the entire defrost heater by working the connecting wires out from along side the freezer coil. Remove the clips that hold the old defrost heater elements to the mounting plates. Install new heating elements into the two mounting plates with the clips. Reinstall the two mounting plates to brackets on freezer coil and reinstall connecting wiring up to connector block and reconnect them. Reinstall freezer coil cover, icemaker auger motor and freezer compartment light plate, and icemaker and bin to complete job. Due to the confined space in the freezer compartment, reinstalling the freezer coil cover and light plate was difficult as I could only use one arm at a time resulting in many dropped screws.
-
Jack D from CLEBURNE, TX
-
Difficulty Level:A Bit Difficult
-
Total Repair Time:30 - 60 mins
-
Tools:Nutdriver, Pliers, Screw drivers
1 person
found this instruction helpful.
Was this instruction helpful to you?
Thank you for voting!
Refridgerator constandly running
Turned out the defrost heater has burnt out in the freezer compartment on both heater tubes. To get to it. 1) take out all the shelves 2)remove the light bulb 3)unscrew 6 screws for back panel 4)Mine had a lot frost build up on the evaporator coils which I used a portable heater to defrost. which it took about 2 hrs to get all the frost thawed out. 5) Defrost heaters are located below each of the coils remove 2 screws on each plate there are 2 plates holding the heaters in place. 5) You may have to bend the sheet metal in order to get the heaters out and trace the wires to where it connects to towards the top or the freezer. 6) Put in the new heaters and plug in then put back together. 7) I also replaced the Defrost thermometer which it is easy to replaced while I had it apart. Now the fridge works perfect just like new.
Other Parts Used:
-
David from Clintonville, WI
-
Difficulty Level:Easy
-
Total Repair Time:More than 2 hours
-
Tools:Nutdriver, Screw drivers
2 of 2 people
found this instruction helpful.
Was this instruction helpful to you?
Thank you for voting!
defrost heater burn out
Frist pulled everything out of freezer put in refridge then took out ice maker box then removed ice maker motor removed back panel took hair drier defrosted the coil then removed bracket screws that hold heaters in place removed bad heater, the hardest part of the job was getting the wirers back around the coils when done just reversed the process.I have a side by side so there was not a whole lot of room to work with. I only weigh 160 lbs it was a tight fit for me. But all in all it went well.
Thanks
Thanks
-
Jerry from Cleveland, NC
-
Difficulty Level:A Bit Difficult
-
Total Repair Time:30 - 60 mins
-
Tools:Pliers, Screw drivers
2 of 2 people
found this instruction helpful.
Was this instruction helpful to you?
Thank you for voting!
Ice Build Up On Evap Coil
Removing the old heater coil was a bit of a task as you need to take off all the brackets holding the heater coil and then remove the wiring from back of the coil. Installing the new heater coil assembly in the brackets and feeding the wirings back up to the top was a major task. Need to have long arms as the heater is located way back in the freezer compartment. The part was the exact match. The part was delivered in 2 days. Thanks alot. Will use your site again.
-
bobbie from belleville, IL
-
Difficulty Level:Very Difficult
-
Total Repair Time:1- 2 hours
-
Tools:Nutdriver, Pliers
4 of 5 people
found this instruction helpful.
Was this instruction helpful to you?
Thank you for voting!
Freezer-side cold; Fridge-side warm of side-by-side Refridgerator
evaporator coils were frozen solid and air wasn't flowing across them
read all directions first, then consider which steps you'd like to take
in any case...
- check for blockages in the upper and lower air vents that allow air from freezer side to cool the fridge-side
- inspect that the fan in the freezer side is actually turning and not blocked
- if no blockages and air is flowing between the sides...
- unplug the unit
- remove all goods from freezer and fridge
- remove freezer side racks
- remove rear panel on freezer side using philips screwdriver (note that the ice-cube tray motor housing must be freed by removing its screws. it can be pull out a bit to get to a single screw holding the top of the rear panel in place)
- allow the evaporator coils to evaporate all ice off, checking the drain pan under the fridge frequently - accelerate the process using a hair dryer or paint stripper (heat gun)
- disconnect the white wires from the connection block located about 2/3 of the way up the rear wall and check resistance using an ohmeter (see specs on back of fridge on circuit diagram)
- if you get a very high resistance reading, the heater element is likely broken. if so...
-- remove the 2 metal shields located horizontally across the evaporator coils (behind them are the two series-connected defrost heater elements)
-- visually inspect the elements - if they are discolored green or black, remove and inspect more closely (most likely they are blown, just like a light-bulb filament that shows black on the glass)
-- if you see nothing, remove them anyway (since high reading) and check connectors
-- replace them (likely only $30 to $75, depending on type)
- if coils seem ok, or if not suspect, check the defrost thermostat WHILE IT IS STILL IN A WORKING/COLD FREEZER.
- get the defrost thermostat into a coil chamber (other freezer or bucket of ice?) and check resistance using an ohmeter. It must be WELL-BELOW 40F to test it. When it is truly immersed in cold (as it would be in a working freezer), test the resistance. it should be 0-ohms when <<40F and some much higher resistance (>200KOhms) when > 40F.
- if not, replace it
-lastly, if neither the defrost heater elements are bad nor the defrost thermostat is bad, open up the defrost timer
-- the defrost timer is located in the fridge side, likely with the fridge thermostat knobs/controller
-- it is a 5-pin part that cannot be repaired. If all else is checked, most likely the defrost element is never coming on because the timer is not turning it on
-
Cami from Carmel, IN
-
Difficulty Level:A Bit Difficult
-
Total Repair Time:More than 2 hours
-
Tools:Screw drivers
2 of 3 people
found this instruction helpful.
Was this instruction helpful to you?
Thank you for voting!
Not defrosting
Removed existing and installed the new part. The hard part is reaching to the back of freezer as it not very wide and is farily deep. Hard to get to arms in at the same time.
-
DON from CHANDLER, AZ
-
Difficulty Level:A Bit Difficult
-
Total Repair Time:30 - 60 mins
-
Tools:Screw drivers
5 of 6 people
found this instruction helpful.
Was this instruction helpful to you?
Thank you for voting!
The freezer section would work OK but the refrigerator stopped cooling
Tips from internet forums helped me figure out the problem: The defroster heaters were not working and the freezer side would frost up and prevent cold air from entering the refrigerator side. I removed the drawers, drawer slides, ice maker, then the back panel to expose the cooling coils. You can check the heaters for continuity before rempving them by disconnecting the two lead wiresonce you have the back panel removed. Not getting any continuity, I removed the old heaters after defrosting the coils. Removing the heaters was the most difficult part as they are a little "long" for where they fit, but with care it can be done, the same applies to installing the new heaters. I had to cut the connecting wire on one of the heaters to remove it, but got the new set installed OK. Works fine now, the bottom heater was defective, and since the are wired in series neither one will work independently. Everything works fine now, problem solved.
-
Kenneth from Laingsburg, MI
-
Difficulty Level:A Bit Difficult
-
Total Repair Time:1- 2 hours
-
Tools:Nutdriver, Pliers, Screw drivers
9 of 11 people
found this instruction helpful.
Was this instruction helpful to you?
Thank you for voting!
defrost light on,not getting cold enough
remove all tray,remove back panel,cut out out old heater adn replace with new heatger,refitted back panel and alll tray.
-
Amrat from Pomona, CA
-
Difficulty Level:Really Easy
-
Total Repair Time:30 - 60 mins
-
Tools:Screw drivers
1 person
found this instruction helpful.
Was this instruction helpful to you?
Thank you for voting!
refrigator would cool properly
The most difficult part was determining what the problem was, was it the defrost timer, the themostat or the heater. Once I diagnosed the heater the ordering was easy. Installing it took about 30 minutes but waiting for the frig to cool to the point where the thermostat opened took a little longer than I thought. When I saw that orange glow from the heater I knew I saved myself a hundred buck.
-
john from irvine, CA
-
Difficulty Level:A Bit Difficult
-
Total Repair Time:More than 2 hours
-
Tools:Pliers, Screw drivers
0 of 1 people
found this instruction helpful.
Was this instruction helpful to you?
Thank you for voting!
- < Prev
- 1
- 2
- 3
- Next >
Questions and Answers
Ask our experts a question about this part and we'll get back to you as soon as possible!
- < Prev
- 1
- Next >
Sort by:
Search filter:
Clear Filter
Your search term must have 3 or more characters.
Keep searches simple. Use keywords, e.g. "leaking", "pump", "broken" or "fit".
Sorry, we couldn't find any existing answers that matched.Try using some different or simpler keywords, or submit your new question by using the "Ask a Question" button above!
Lillie
January 21, 2018
Need heater for defrost. Can you help?
For model number RSW2200EAM
Hello Lillie,
Thanks for your question. The defrost heater for your model is part number PS11743110.
I hope this helps.
1 person found this helpful.
Was this helpful?
Thank you for voting!
Chris
August 13, 2021
What’s the length of this defrost heat element? “ partselect number ps11743110”
Hello Chris, Thank you for your inquiry. This part includes two 9 1/4 inch heating element rods, joined by a wire that is approximately 13 inches in length, the manufacturer does not list the length of the additional wires. Hope this helps.
Was this helpful?
Thank you for voting!
- < Prev
- 1
- Next >
✖
Ask a Question
Ask our experts a question on this part and we'll respond as soon as we can.
Something went wrong. Please try again later.
Your Question Has Been Submitted!
Our experts will send you an email as soon as your question has been answered.
You May Also Need?
Model Cross Reference
This part works with the following models:
PartSelect Number: PS11743110
Manufacturer Part Number: WP61001846
Brand
Model Number
Description