















4LBR8255DN1 Whirlpool Washer - Instructions
Keep searches simple. Use keywords, e.g. "leaking", "pump", "broken" or "fit".
Top Half of Agitator would not function without appying sideways pressure
Heard about the website... 1 minute to find it, 10 minutes to order new cogs... 3 day wait for new parts... Rec'd Fedex, 15 minutes total to pull the agitator cover (bleach dispenser) then the bung cover with o-ring (just lift out) expose bolt, unskrew and remove top portion of agitator or entire agitator if it's easier. Seperate, remove black cog holder (slides up the spindle) and replace cogs one at a time just like the old ones. Reassemble in reverse and you are back in business. Saved the $75 deductible on my home appliance warrenty. You guys are the best... cheers...
Parts Used:

-
Donald from Fredericksburg, VA
-
Difficulty Level:Really Easy
-
Total Repair Time:15 - 30 mins
-
Tools:Socket set
18 of 21 people
found this instruction helpful.
Was this instruction helpful to you?
Thank you for voting!
Agitator was barely agitating. Making a clicking noise.
Removed agitator cap. Removed bolt inside with socket wrench. Located plastic cogs Pulled out old cogs and slid in new cogs and put back together and works great. Easy to take apart and put back together. Very cheap repair. Cogs less that $4.00 plus shipping. Shipped next working day.
Parts Used:
-
Charmaine from Slidell, LA
-
Difficulty Level:Easy
-
Total Repair Time:15 - 30 mins
-
Tools:Socket set
17 of 18 people
found this instruction helpful.
Was this instruction helpful to you?
Thank you for voting!
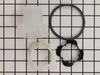
Agitator did not rotate properly
1. Removed the softener dispenser
2. Removed the cap covering the clutch dogs and the bolt holding it all in place.
3. Removed the bolt holding the two agitator pieces and the clutch dogs together.
4. Removed the two agitator parts.
5. Replaced the clutch dogs.
6. Reassembled and put the bolt back in place.
7. Replaced the gasket on the cover that goes over the clutch and bolt.
8. Replaced the softener dispenser
Very easy!
2. Removed the cap covering the clutch dogs and the bolt holding it all in place.
3. Removed the bolt holding the two agitator pieces and the clutch dogs together.
4. Removed the two agitator parts.
5. Replaced the clutch dogs.
6. Reassembled and put the bolt back in place.
7. Replaced the gasket on the cover that goes over the clutch and bolt.
8. Replaced the softener dispenser
Very easy!
Parts Used:
-
Tenel from The Woodlands, TX
-
Difficulty Level:Easy
-
Total Repair Time:30 - 60 mins
-
Tools:Pliers, Socket set
18 of 21 people
found this instruction helpful.
Was this instruction helpful to you?
Thank you for voting!
Would not spin
Remove the nut from the top of the motor shift inside of wsher. then remove the wire harness plug. Take out three bolts side the shaft and motor out. Replace clutch and install in reverse order.
Parts Used:

-
floyd from Slidell, LA
-
Difficulty Level:Easy
-
Total Repair Time:1- 2 hours
-
Tools:Pliers, Screw drivers, Socket set
24 of 40 people
found this instruction helpful.
Was this instruction helpful to you?
Thank you for voting!
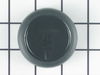
Timer knob and Dial was broken
The top part of the dial pried off with a screwdriver and the replacement part screwed right back in it's place.
Parts Used:
-
JEFF M from BLOOMINGTON, MN
-
Difficulty Level:Really Easy
-
Total Repair Time:Less than 15 mins
-
Tools:Pliers, Screw drivers
25 of 44 people
found this instruction helpful.
Was this instruction helpful to you?
Thank you for voting!
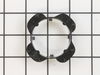
The Agitator in my washing machine wasn't spinning, and was loose.
After researching and learning from the university of YouTube, I ordered new agitator 'dogs' from PartSelect - the rubbery dogs which look like gummy bears, were worn out in my machine and needed to be replaced. These dogs secure the inner part of the agitator. After watching several videos on YouTube, I knew precisely what to do and what I needed. I researched and found PartSelect on-line and they were very helpful and sending me the dogs. It was a very simple fix, and my washing machine now is working like brand new. Thanks PartSelect for all your help and will reach out again for any future self-fix projects!!
Parts Used:
-
Anton from BRONX, NY
-
Difficulty Level:Really Easy
-
Total Repair Time:30 - 60 mins
-
Tools:Socket set
15 of 15 people
found this instruction helpful.
Was this instruction helpful to you?
Thank you for voting!
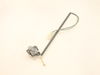
shut off before finished
i knew the lid sw. must be bad and had a new one in hand, but when i remove the sw. ( near the lid ) i found the wires going back to where i could not reach. was not sure how to get at them so i repaired the sw. with tape untill i could find how to get at the wire end. after reading more in this repair area i know that i need to remove the control panel which is easy to do. next time i will read all i can on repairs in this section!!
Parts Used:
-
LARRY from LUCERNE, CA
-
Difficulty Level:Easy
-
Total Repair Time:15 - 30 mins
-
Tools:Screw drivers
17 of 22 people
found this instruction helpful.
Was this instruction helpful to you?
Thank you for voting!
Leaking drain hose
First I removed hose from drain, next I loosened the clamp at the drain hose connection at the washer. Removed hose. Have rags/towels as there is some residual water that will spill out of the washer. Reinstall in reverse.
Parts Used:
-
Steve from Cypress, CA
-
Difficulty Level:Really Easy
-
Total Repair Time:Less than 15 mins
-
Tools:Pliers
16 of 19 people
found this instruction helpful.
Was this instruction helpful to you?
Thank you for voting!
The washer did not spin fast enough during the rinse cycle to adequately dry the load of clothes
I repaired my Kenmore washing machine replacing the clutch, Motor coupling and cogs. All of the parts came quickly and with good instructions. Best of all there were links to youtube repair walkthroughs. With out these step by step instructions this project would have taken much longer. Now the washer is like new! WATCH THE YOUTUBE PAUSE DO THE STEP AND REPEAT
Parts Used:

-
Richard from EL SEGUNDO, CA
-
Difficulty Level:A Bit Difficult
-
Total Repair Time:More than 2 hours
-
Tools:Socket set
15 of 17 people
found this instruction helpful.
Was this instruction helpful to you?
Thank you for voting!
Washmachine wouldn't spindry
I removed three bolts from the transmission and two clips that hold the motor to the drive gear. I replaced the brake cam that had cracked and the lining. Now it works great ! Ordered part on Friday before two and it came Saturday at four.
Parts Used:
-
Chuck from South Holland, IL
-
Difficulty Level:A Bit Difficult
-
Total Repair Time:1- 2 hours
-
Tools:Pliers, Screw drivers, Socket set, Wrench set
15 of 17 people
found this instruction helpful.
Was this instruction helpful to you?
Thank you for voting!
Washer did not spin.
First I removed the two screws on the back side of the switch panel and tilted it back to expose the controls. I then pryed up the top of the washer to expose the lid switch. This was a mistake because I damaged the clips and bent the metal frame. Anyway after that I unlatched the lid switch on the top side, pulled it through the bottom, removed two screws holding the lid switch in place and replaced the switch and lid switch strike. Because I wrecked the machine top I had no alternative but to drill two holes from the top and put two screws in to hold the top down. It's ugly but it works.
The best part of all this is I received the part so fast that I was able to keep up the pace of doing laundry with no interruption. Thanks for being so reliable and quick to deliver. I already told many people about your service!
The best part of all this is I received the part so fast that I was able to keep up the pace of doing laundry with no interruption. Thanks for being so reliable and quick to deliver. I already told many people about your service!
Parts Used:
-
Matt from Sussex, WI
-
Difficulty Level:Easy
-
Total Repair Time:1- 2 hours
-
Tools:Screw drivers, Socket set
15 of 18 people
found this instruction helpful.
Was this instruction helpful to you?
Thank you for voting!
Washer worked fine but wouldn't spin. Hot smell. I could turn tub by hand to help it get started and it would spin okay. Silver clutch cover was very hot to touch.
I pulled back off machine. A real pain. Not something you have to do although once the back is off, the whole cabinet just lifts off. Idealy: Remove agitator and reatiner clip, lay washer on it's side or face, Remove electrical connector form motor, remove two hoses from pump, (motor can be remove easily from transmission if desired. It's lighter), remove three 1/2" bolts, lift transmission w/clutch assembly out. Pay attention to orientation of flat washer and clip (remove). The cluch band is indside the silver cover. Pich together with pliers to relieve tension and lift out. There are three while pads that wear away and glaze over when they get too hot from slipping. Reassemble. Ths is from memory so I hope I didn't forget anything. Time to do it this way would probably only be 45 minutes.
Parts Used:
-
Kevin from Disputanta, VA
-
Difficulty Level:A Bit Difficult
-
Total Repair Time:1- 2 hours
-
Tools:Nutdriver, Pliers, Screw drivers, Socket set, Wrench (Adjustable)
17 of 24 people
found this instruction helpful.
Was this instruction helpful to you?
Thank you for voting!
Lid Switch broke off at screws
First off it was much easier after watching the video that was on PartSelect website. It was a very good description of how to do the repair. The main thing is to have enough room to be able to move the washer around and be able to get around it.. Our washer and dryer are in our 1/2 bath so we had to completely unhook the dryer to move it out of the way to have room to work around the washer.. It was still a tight squeeze but it was pretty quick and easy once we got the area where the lid switch is attached. The only trouble we had was putting the front of the washer back on the tub correctly. That was mainly in part with not having enough room to move around. It was easy enough that is was worth saving the service call from the repairman. The most help was watching the video. Thanks PartSelect for your help.
Parts Used:
-
Dale from West Branch, MI
-
Difficulty Level:A Bit Difficult
-
Total Repair Time:30 - 60 mins
-
Tools:Pliers, Screw drivers
13 of 13 people
found this instruction helpful.
Was this instruction helpful to you?
Thank you for voting!
Leaking water on floor under front center.
Disconnet the washer from supply lines. pull washer out, tip on side. Remove water hoses from pump, have to squeeze hose clamps with pliers and slide them down the hose. Then remove the hoses from the pump. Then locate spring retainers that hold pump to drive motor, place flat blade screw driver under each clip and pry clip loose, then remove pump.
Install new pump on shaft, making sure that alignment dowels line up with holes on pump. Hold pump in place and using finger push retainer clips over lip of pump, install hoses on pump, install hose clamps. Hook washer up to supply lines, drain lines, plug in and you'r done.
Install new pump on shaft, making sure that alignment dowels line up with holes on pump. Hold pump in place and using finger push retainer clips over lip of pump, install hoses on pump, install hose clamps. Hook washer up to supply lines, drain lines, plug in and you'r done.
Parts Used:

-
Christopher from Leadville, CO
-
Difficulty Level:Easy
-
Total Repair Time:15 - 30 mins
-
Tools:Pliers, Screw drivers
14 of 17 people
found this instruction helpful.
Was this instruction helpful to you?
Thank you for voting!
Machiine would fill with water and then stop cycle. I determined that it was the lid switch because that is the sam e thing th emachine does when the lid is up.
Followed some very handy instructions I found on the web.
First unplug machine and next back off the screws in the back of the plastic end caps holding down the control panel.
Then slip a putty knife under each of the front corners to release the panel so it can flip back
exposing the lid switch wiring harness clip connector.
Release the lid switch clip connector from the wiring harness.
Next release the two brass colored clips that hold the top to the sides.
Remove sides.
Remove screws holding lid switch and unclip switch from back of top nd from under top .
Remove switch and replace with new one.
Reverse order reassembly making sure the four base tabs of the sides are in the four slots in the machine base frame.
Reinstall brass clips.
Make sure new switch is clipped to the control panel harness.
Screw down corner screws in control panel end caps.
Done.
Thank you PartsSelect for your pormpt, courteous, and informative service.
You also had the lowest price and fastest delivery.
Well done!
First unplug machine and next back off the screws in the back of the plastic end caps holding down the control panel.
Then slip a putty knife under each of the front corners to release the panel so it can flip back
exposing the lid switch wiring harness clip connector.
Release the lid switch clip connector from the wiring harness.
Next release the two brass colored clips that hold the top to the sides.
Remove sides.
Remove screws holding lid switch and unclip switch from back of top nd from under top .
Remove switch and replace with new one.
Reverse order reassembly making sure the four base tabs of the sides are in the four slots in the machine base frame.
Reinstall brass clips.
Make sure new switch is clipped to the control panel harness.
Screw down corner screws in control panel end caps.
Done.
Thank you PartsSelect for your pormpt, courteous, and informative service.
You also had the lowest price and fastest delivery.
Well done!
Parts Used:
-
Louise from Bridgewater, NJ
-
Difficulty Level:Easy
-
Total Repair Time:15 - 30 mins
-
Tools:Screw drivers
15 of 20 people
found this instruction helpful.
Was this instruction helpful to you?
Thank you for voting!