















3XART735G01 Whirlpool Refrigerator - Instructions
Keep searches simple. Use keywords, e.g. "leaking", "pump", "broken" or "fit".
Defuser in refrig. would not open
I ordered a Thermostat but didnot need it, here's why. I removed the old thermostat that is under a white plastic cover at the top of the refrig.inside.By the way ,the cover just snaps off very carefully.after ordering a new Defuser and it still would not work I ordered a thermostat hopeing that would open the Defuser to let cool air in the refrig. Long story short there are two very small holes in the thermostat that hold two very tiny screws, spring activated and one screw while I was looking at the thermostat just fell out in my hand.I put the screw back in the hole and pushed down on the screw with a straight eye glass screwdriver and tighten it. Everything works fine now [just a loose screw].
Parts Used:
-
David from Seaford, DE
-
Difficulty Level:A Bit Difficult
-
Total Repair Time:30 - 60 mins
-
Tools:Nutdriver, Screw drivers
18 of 26 people
found this instruction helpful.
Was this instruction helpful to you?
Thank you for voting!
Replace broken ice machine feeder drum
Be advised that to do this job, you have to take the ice tray and feeder assembly completely apart. The only tricky part is that the nut, part 31 in the drawing, that holds everything together is reverse threaded. Since it's plastic, you're afraid you'll break it. If you know it's reverse threaded to begin with you can go ahead and apply the required force to get it off.
Parts Used:

-
David from League City, TX
-
Difficulty Level:Easy
-
Total Repair Time:30 - 60 mins
-
Tools:Pliers, Screw drivers, Wrench (Adjustable), Wrench set
14 of 15 people
found this instruction helpful.
Was this instruction helpful to you?
Thank you for voting!
The edges of the Meat pan slide were broken.
I removed the glides under the edges of the meat pan, remove the old pan, put the new pan in and replaced the glides. I was very pleased with PartSelect. I ordered my part, and it arrived the very next day. I will definitely order my next replacement part thru PartSelect.
Parts Used:
-
Michael from Bakersfield, CA
-
Difficulty Level:Really Easy
-
Total Repair Time:Less than 15 mins
-
Tools:Screw drivers
15 of 18 people
found this instruction helpful.
Was this instruction helpful to you?
Thank you for voting!
plastic ice cube guide installed
Mine is a simple tale of the missing ice cube dispensor guide. When we moved, the guide was missing so when I built our new home with a kitchen in the basement I wanted to hook up the ice dispensor but when I did, the ice cubes always fell off to one side. I decided to order the misssing part on-line. I ordered it paid for it and then received it the next day-wonderful. Within ten minutes, I was ready to go. Thanks for great service. Rick Davis, Bloomington, IL.
Parts Used:

-
Richard from Bloomington, IL
-
Difficulty Level:Easy
-
Total Repair Time:Less than 15 mins
15 of 18 people
found this instruction helpful.
Was this instruction helpful to you?
Thank you for voting!
Ice stripper broken on ice maker
I unplugged the fridge. Loosened the 2 top screws on the ice maker and removed the lower screw. I disconnected the wiring harness and removed the Ice maker. I removed the plastic timer cover in front. I then loosened the screws on the face of the ice maker and removed the broken ice stripper and replaced it with a new one. Re-tightened the screws on the face, installed the timer cover, plugged in the wiring harness, re-attached the ice maker. Plugged the fridge back in and walla, it was making ice in 30 minutes!
Parts Used:

-
Kenneth from New Braunfels, TX
-
Difficulty Level:Really Easy
-
Total Repair Time:Less than 15 mins
-
Tools:Screw drivers
17 of 24 people
found this instruction helpful.
Was this instruction helpful to you?
Thank you for voting!
Ice bin drum blades broke into pieces wouldn't despense ice.
After removing a few screws to get to the drum my husband had it back to working like a charm.This part seems to be better made than the original part in the refrigerator.
Parts Used:
-
Becky from Hamlet, NC
-
Difficulty Level:Easy
-
Total Repair Time:Less than 15 mins
-
Tools:Nutdriver, Screw drivers
14 of 16 people
found this instruction helpful.
Was this instruction helpful to you?
Thank you for voting!
Not enough door storage
Excellent fit and installation. The door bins slid right in and created the extra space needed on the shelves.
Parts Used:
-
Dennis from Owings, MD
-
Difficulty Level:Really Easy
-
Total Repair Time:Less than 15 mins
13 of 14 people
found this instruction helpful.
Was this instruction helpful to you?
Thank you for voting!
Broken cup water fill on ice maker
I called the local Amana repair man, wanted $150 for a new ice maker because they could not get the part I needed. Found Partsselect.com and the part cost $17 with shipping. They saved me over $100. The repair was very easy too, just removed a couple of screws.
Thanks,
Matt
Thanks,
Matt
Parts Used:

-
Matthew from Aurora, CO
-
Difficulty Level:Easy
-
Total Repair Time:15 - 30 mins
-
Tools:Nutdriver, Screw drivers
13 of 15 people
found this instruction helpful.
Was this instruction helpful to you?
Thank you for voting!
Cracked Crisper Drawer
This company is WONDERFUL! I ordered the wrong drawer the first time, but their return process was a snap and the correct drawer arrived the next day. It's great to know that there is someone out there with just about every part you'll need for about any appliance that is truly customer friendly.
Parts Used:
-
Jennifer from Salvisa, KY
-
Difficulty Level:Really Easy
-
Total Repair Time:Less than 15 mins
13 of 15 people
found this instruction helpful.
Was this instruction helpful to you?
Thank you for voting!
The Ice maker would not work.
We rolled the refrigerator out away from the wall and it was obvious where the break was located. We took out the old water spout for the ice maker and replaced the tube and the tubing from the solenoid. We turned it on and soon we had water dripping everywhere. We unloaded and defrosted the freezer which got all of the remaining ice that was stuck in there. We put everything back together. I read in some instructions in the manual that it might take 24 hours for the ice maker to reprogram itself and start producing ice. I was only about 12 hours and we had ice again and everything worked well. You really do not have to disconnect the water from the main line, the solinoid controls that part of operation and turns the water off until the ice trays are free and clear.
JLB
JLB
Parts Used:

-
Jerry from Boulder, CO
-
Difficulty Level:Easy
-
Total Repair Time:1- 2 hours
-
Tools:Screw drivers
22 of 42 people
found this instruction helpful.
Was this instruction helpful to you?
Thank you for voting!
Auger drum broke

-
Michael from Deer Park, TX
-
Difficulty Level:Really Easy
-
Total Repair Time:Less than 15 mins
-
Tools:Nutdriver, Wrench (Adjustable)
15 of 22 people
found this instruction helpful.
Was this instruction helpful to you?
Thank you for voting!
Water would not come out of the dispenser.
Removed catch tray and then removed two screws that are underneath. I left the control panel hanging from its wires, then removed the two screws from the control bracket.
A word of caution before next step: You need to remove the two micro switches on the left and right. While trying to remove one, it split apart and the pieces fell out. I was able to put it back together and it worked fine. So be careful with the micro switches.
Continue tranferring wires and switches to the new bracket and reassemble in the opposite order.
An easy repair.
A word of caution before next step: You need to remove the two micro switches on the left and right. While trying to remove one, it split apart and the pieces fell out. I was able to put it back together and it worked fine. So be careful with the micro switches.
Continue tranferring wires and switches to the new bracket and reassemble in the opposite order.
An easy repair.
Parts Used:

-
Ralph from Saint Petersburg, FL
-
Difficulty Level:Easy
-
Total Repair Time:15 - 30 mins
-
Tools:Screw drivers
11 of 11 people
found this instruction helpful.
Was this instruction helpful to you?
Thank you for voting!
Refrigerator No Longer Cooling Properly
Approximately:
1. Unplugged refrigerator.
2. Emptied Freezer.
3. Removed Ice Maker.
4. Waited a few hours for ice to melt around back panel & nuts.
5. Removed back panel and the cover over fan and fan motor.
6. Waited many more hours for ice to thaw over fins, wiring, etc.
7. Easily replaced the bi-mental defrost thermostat.
8. Replaced panel, fan cover, ice maker.
9. Plugged in refrigerator and waited a bit.
This worked! Yahoo.
p.s. I am a 65+ year old mechanically minded woman. :-)
1. Unplugged refrigerator.
2. Emptied Freezer.
3. Removed Ice Maker.
4. Waited a few hours for ice to melt around back panel & nuts.
5. Removed back panel and the cover over fan and fan motor.
6. Waited many more hours for ice to thaw over fins, wiring, etc.
7. Easily replaced the bi-mental defrost thermostat.
8. Replaced panel, fan cover, ice maker.
9. Plugged in refrigerator and waited a bit.
This worked! Yahoo.
p.s. I am a 65+ year old mechanically minded woman. :-)
Parts Used:

-
Elizabeth from DELRAY BEACH, FL
-
Difficulty Level:A Bit Difficult
-
Total Repair Time:More than 2 hours
-
Tools:Nutdriver, Screw drivers
11 of 11 people
found this instruction helpful.
Was this instruction helpful to you?
Thank you for voting!
ice maker and water dispenser would not work due to switch clamps being broken off the control plate
remove the front cover. everything else is a quick disconnect type of connection. Nothing to it! I would remove the cover and check these connections anytime the dispenser does not work. Look for broken or disconnected switches. This reapir took me a couple of minutes whereas the repair guy wanted almost 200 bucks to do this job. Parts ran around 30 with shipping.
Parts Used:

-
scott from huntersville, NC
-
Difficulty Level:Easy
-
Total Repair Time:15 - 30 mins
-
Tools:Screw drivers
13 of 18 people
found this instruction helpful.
Was this instruction helpful to you?
Thank you for voting!
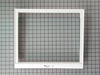
Cover Pan Crisper(bottom glass shelf and frame) were broken
-
anthony from ormond beach, FL
-
Difficulty Level:Really Easy
-
Total Repair Time:Less than 15 mins
13 of 18 people
found this instruction helpful.
Was this instruction helpful to you?
Thank you for voting!