















3XART718F00 Whirlpool Refrigerator - Instructions
Keep searches simple. Use keywords, e.g. "leaking", "pump", "broken" or "fit".
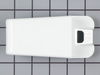
Shelf holder mising
All I had to do was snap the end caps into the shelf holder and snap into the door. Easy as can be!
Parts Used:

-
Pierre from Kildeer, IL
-
Difficulty Level:Really Easy
-
Total Repair Time:Less than 15 mins
Was this instruction helpful to you?
Thank you for voting!
light would come on and off

-
Dora from Rock Island, IL
-
Difficulty Level:Really Easy
-
Total Repair Time:Less than 15 mins
Was this instruction helpful to you?
Thank you for voting!
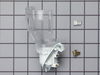
No Light
Took socket out and replace it with new one. Very easy. W saved alot of money doing it ourself.
Parts Used:
-
Mary from Jefferson Township, PA
-
Difficulty Level:Really Easy
-
Total Repair Time:Less than 15 mins
-
Tools:Screw drivers
Was this instruction helpful to you?
Thank you for voting!
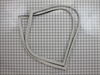
water pooling inthe bottom of refrigerator and then running onto floor
The instuctions say take the door off. I didnt find that necessary. Made sure the new gasket would fit. Pulled the old gasket out inline with the door instead of away. The gasket came off like an innertube on a bicycle. Installation of my new gasket was easy. I started on a corner hooking the lip behind the ledge and worked my way around the door. 10 min maybe. That's it
Parts Used:
-
mike from little rock, AR
-
Difficulty Level:Really Easy
-
Total Repair Time:Less than 15 mins
Was this instruction helpful to you?
Thank you for voting!
Crisper drawer rail broke
Removed glass shelf. Removed both crisper bowls. Removed broken rail and put new rail in! Hardest part was taking out all the items sitting on the glass shelf. Actual installation time under 1 minute.
Parts Used:

-
Al from Brewster, NY
-
Difficulty Level:Really Easy
-
Total Repair Time:Less than 15 mins
Was this instruction helpful to you?
Thank you for voting!
crisper rail
-
Jim from San Jose, CA
-
Difficulty Level:Really Easy
-
Total Repair Time:Less than 15 mins
Was this instruction helpful to you?
Thank you for voting!
Light switch which turns on the lights when the door opens went out
This is an easy fix, simply remove and replace. What I was impressed with is that a how to video was provided along with my part. I wish all manufactures would offer this, the video was easy to understand and you had a good view of the operation. Thanks, a job well done.
Parts Used:
-
Dennis from Lawrenceville, GA
-
Difficulty Level:Really Easy
-
Total Repair Time:Less than 15 mins
-
Tools:Nutdriver
Was this instruction helpful to you?
Thank you for voting!
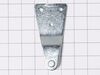
Lost hindges on the refrig. door
Ordered new set and installed
Parts Used:





-
John from Magnollia, TX
-
Difficulty Level:Really Easy
-
Total Repair Time:30 - 60 mins
-
Tools:Pliers, Screw drivers, Socket set
Was this instruction helpful to you?
Thank you for voting!
right front wheel broken off ...couldn't roll refrig out
Looked up the refrigerator model number, found parts break down and ordered wheel assy...thought it was the wrong but wheel size was right...read the instructions (good thing) and found out you had to slide entire bottom panel out 1/2 inch to access a hidden pin...did as the instructions said, slid out the bottom panel, found pin as advertised, removed pin, broken part fell out, replaced the wheel assembly, repinned, slid the bottom panel in (a bit more harder than getting it out), replaced all screws and was completed in about 40 -50 minutes. Good thing it came with instructions!!
Parts Used:
-
ROBERT from Pilot Hill, CA
-
Difficulty Level:A Bit Difficult
-
Total Repair Time:30 - 60 mins
-
Tools:Wrench set
Was this instruction helpful to you?
Thank you for voting!
Both light bulbs had been replaced, but lights did not turn on.
I tried to remove the old light switch using a putty knife and a hammer. It was hard to compress the plastic tabs to pull it back through the hole, but all of a sudden, the lights came on. I guess banging on the switch freed-up the contacts. The new switch is now a spare part in case I need it.
Parts Used:
-
Richard from Arlington, MA
-
Difficulty Level:A Bit Difficult
-
Total Repair Time:30 - 60 mins
-
Tools:Pliers, Screw drivers
Was this instruction helpful to you?
Thank you for voting!
Broke the arm off the food compartment rocker switch
After receiving the new part almost immediately,using two screw drivers, removed the broken switch from the plastic frame. Be careful not to scratch or otherwise tear the plastic...very pliable. Since the original switch was factory installed and the wires were packed in fiberglass insulation, the switch came out but the wires and clips were still in place and could not reach the new switch. It was necessary to pull them down with bent long nose pliers...used a lot of "pull" but the wires held up.Connected the switch, turned the power on and there was light! Reports from other users really took the uncertainty out of the task.
Parts Used:
-
David from St. Pete Beach, FL
-
Difficulty Level:A Bit Difficult
-
Total Repair Time:15 - 30 mins
-
Tools:Pliers, Screw drivers
Was this instruction helpful to you?
Thank you for voting!
Protective cover for bulb had melted
I tried to just replace the cover rather than the whole unit but it was impossible - the cover would not go/stay on. I tried to remove the old unit completely but it would not unplug it was practically fused to the back of the fridge and the liner was cracking. I ended up breaking the cover and jerry rigging it over the bulb to prevent items in the fridge from being able to touch. Bad solution.
Parts Used:
-
Lee from Brooklyn, NY
-
Difficulty Level:Very Difficult
-
Total Repair Time:15 - 30 mins
-
Tools:Screw drivers, Wrench (Adjustable)
Was this instruction helpful to you?
Thank you for voting!
defrost tray & drain, pluged with ice in freezer section
poured boiling hot water into drain; removed most ice with hair dryer. Clips(2) positions the defrost tray & drain under the freezer condenser. A "home-made" coil of 18g copper wire inserted into the drain hole, & secured to the defrost heater further prevents the drain from iceing shut!
Parts Used:
-
Gerald from Woodacre, CA
-
Difficulty Level:A Bit Difficult
-
Total Repair Time:1- 2 hours
-
Tools:Nutdriver, Pliers
Was this instruction helpful to you?
Thank you for voting!
lower door gasket was worn out
removed the lower door. took out the old gasket, snap in the new one. piece of cake.
Parts Used:
-
DON from MESA, AZ
-
Difficulty Level:Really Easy
-
Total Repair Time:15 - 30 mins
-
Tools:Socket set
Was this instruction helpful to you?
Thank you for voting!
bent door shelf bars
I was able to replace the the shelf bars with no difficulty after finding the right parts on PartSelect. The easy to view measuring menu helped me get the right size for the fit I needed. You always worry when you don't have the item in front of you but they make it easy to gauge. I will use them again. I replaced three bars that had been driving me crazy.
Parts Used:

-
Lucy from Portland, OR
-
Difficulty Level:Really Easy
-
Total Repair Time:15 - 30 mins
Was this instruction helpful to you?
Thank you for voting!