















3XARG486WP00 Whirlpool Refrigerator - Instructions
Keep searches simple. Use keywords, e.g. "leaking", "pump", "broken" or "fit".
Water Fill Cup Broke
The Ice maker unit had to be removed and the shaft had to also be removed, which required dis-assembling the motor drive. The thickness of the shaft and the bearing fill cup prevents it from simply pushing it in place. Other than that I have Ice.
Parts Used:

-
Sam from Las Vegas, NV
-
Difficulty Level:A Bit Difficult
-
Total Repair Time:30 - 60 mins
-
Tools:Screw drivers
5 of 7 people
found this instruction helpful.
Was this instruction helpful to you?
Thank you for voting!
Not cooling properly and had to tap the thermostat to get it to kick on.
My fridge was not cooling properly as I would have to tap the thermostat at times to get it to kick on again. Ordered the temperature control thermostat from this site t and watched video on how to install. Not hard at all and did it in under an hour. Fridge is working like new..
Parts Used:

-
dee from FERNANDINA, FL
-
Difficulty Level:Really Easy
-
Total Repair Time:30 - 60 mins
-
Tools:Screw drivers
4 of 4 people
found this instruction helpful.
Was this instruction helpful to you?
Thank you for voting!
Ice would not dispense from the door
Removed ice bucket and discovered the auger drum was broken.
After I received the new part, I removed the front screws of the ice bucket, removed the clip that held the auger and other parts together, and then slide each part off the auger until I got to the broken drum.
Assembly was in reverse except you must pay attention where all the spacers and ice crusher bars go back into the original position. This was the most difficult step.
Works great now, crushed and cubed ice dispenses thru the door like new.
After I received the new part, I removed the front screws of the ice bucket, removed the clip that held the auger and other parts together, and then slide each part off the auger until I got to the broken drum.
Assembly was in reverse except you must pay attention where all the spacers and ice crusher bars go back into the original position. This was the most difficult step.
Works great now, crushed and cubed ice dispenses thru the door like new.
Parts Used:

-
Jeffrey from Jacksonville, FL
-
Difficulty Level:A Bit Difficult
-
Total Repair Time:30 - 60 mins
-
Tools:Pliers, Screw drivers
4 of 4 people
found this instruction helpful.
Was this instruction helpful to you?
Thank you for voting!
Fridge wouldn't turn on unless I hit the thermostat.
Removed old thermostat and replaced with new one. The video link in the shipping email was great - really detailed even though it was a simple fix.
Parts Used:
-
Vince from CERRO GORDO, IL
-
Difficulty Level:Really Easy
-
Total Repair Time:15 - 30 mins
-
Tools:Nutdriver, Screw drivers
4 of 4 people
found this instruction helpful.
Was this instruction helpful to you?
Thank you for voting!
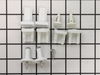
Lost shelf support bracket
Ordered shelf support stud kit. Product was promptly delivered, and contained the parts as shown on website. Took longer to open the package than to replace the missing shelf support bracket. No problems. Would order from them again.
Parts Used:
-
DAVID from LAFAYETTE, LA
-
Difficulty Level:Really Easy
-
Total Repair Time:Less than 15 mins
4 of 4 people
found this instruction helpful.
Was this instruction helpful to you?
Thank you for voting!
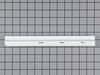
Rail broke on top left glass shelf.
This is probably the easiest repair in history! The part arrived in record time and we had the rail installed in less than 5 minutes without any tools. This was a great experience.
Parts Used:
-
Carol from Murchison, TX
-
Difficulty Level:Really Easy
-
Total Repair Time:Less than 15 mins
4 of 4 people
found this instruction helpful.
Was this instruction helpful to you?
Thank you for voting!
the nozzle was broken
1. PUsh the Lock button so the water will not run.
2.Remove the screw holding the nozzle.
3. Remove the Grill
4. Disconnect the black water tube. Pull the female part of the union off the old tube and hold it for the new tube.
5. PUll it the tube out from the nozzle end.
6. Snake the new tube into the hole and shove it through until it comes out the door hinge port at the bottom of the door.
7. Continue pushing and pulling the tube until the nozzle is in position.
8.Test fit the new tube and cut a short piece off to fit properly.
9. Slide the female part of the union onto the new tube. Insert it onto the union and tighten.
10. Insert the screw that holds the nozzle in place and tighten.
11. Push the on unlock button and fill a glass with water.
12. Check for leaks. If no leaks reinstall the grill.
Job done.
2.Remove the screw holding the nozzle.
3. Remove the Grill
4. Disconnect the black water tube. Pull the female part of the union off the old tube and hold it for the new tube.
5. PUll it the tube out from the nozzle end.
6. Snake the new tube into the hole and shove it through until it comes out the door hinge port at the bottom of the door.
7. Continue pushing and pulling the tube until the nozzle is in position.
8.Test fit the new tube and cut a short piece off to fit properly.
9. Slide the female part of the union onto the new tube. Insert it onto the union and tighten.
10. Insert the screw that holds the nozzle in place and tighten.
11. Push the on unlock button and fill a glass with water.
12. Check for leaks. If no leaks reinstall the grill.
Job done.
Parts Used:

-
Alvin from Sugar Land, TX
-
Difficulty Level:Really Easy
-
Total Repair Time:Less than 15 mins
-
Tools:Screw drivers
4 of 4 people
found this instruction helpful.
Was this instruction helpful to you?
Thank you for voting!
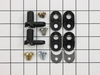
had to push door closed
lifted door 1/2 inch and put blocks of wood under the door and replaced the lower hindge cam.
Parts Used:
-
peter from portsmouth, RI
-
Difficulty Level:Really Easy
-
Total Repair Time:15 - 30 mins
-
Tools:Nutdriver, Screw drivers
4 of 4 people
found this instruction helpful.
Was this instruction helpful to you?
Thank you for voting!
fridge stopped cooling then the freezer
Searched my issue on the internet then chose part select to see if bi-metal thermostat was available and it was so I ordered part which was under $30.00 incl. shipping. I then went to You Tube to watch how to replace the part but most importantly to find out where it was located and degree of difficulty. Replacement was rather simple and it fixed our 22 year old fridge. I must add that when I looked up the part it also told you what percent of the time that particular item actually fixed the problem based on others experience. I thought that was neat info. as I felt better about ordering something that may or may not fix my problem. Thank you,
Parts Used:

-
Joseph from DELTONA, FL
-
Difficulty Level:Really Easy
-
Total Repair Time:30 - 60 mins
-
Tools:Nutdriver, Screw drivers
4 of 4 people
found this instruction helpful.
Was this instruction helpful to you?
Thank you for voting!
Erratic refrigerator temperature. Generally too cold - frozen produce.
The repair video was a great help in this specific repair and matched my refrigerator model exactly. The only issue was an apparent design change in the thermostat that I received. The location of the electrical leads has changed. It might be worth mentioning this in the video. Polarity is not an issue in this case, but if it was, it would be worth noting in the video. So far the refrigerator has been operating normally.
Parts Used:
-
Dave from BRIDGEWATER, MA
-
Difficulty Level:Really Easy
-
Total Repair Time:30 - 60 mins
-
Tools:Nutdriver, Pliers, Screw drivers
4 of 4 people
found this instruction helpful.
Was this instruction helpful to you?
Thank you for voting!
Frig wasn't reliable,kept going off and staying off until I discovered "hitting the knob" trick.
I followed the procedures that others described that had the same problem,very handy
Parts Used:
-
Bob from Norman, OK
-
Difficulty Level:Easy
-
Total Repair Time:15 - 30 mins
-
Tools:Nutdriver, Screw drivers, Wrench (Adjustable)
4 of 5 people
found this instruction helpful.
Was this instruction helpful to you?
Thank you for voting!
shelf support stud broke in half
Removing old stud was difficult. It will not stap or pull out. Had to cut it off with a Dremel tool, then drill into the center of the old stud and pull out the pieces with needle nose pliers. Be careful, there are 2 metal pins on the side of the hole in the wall of the frid that need to stay there. These are in addition to the 2 metal pins on the shelf support stud. New stud popped right in easily.
Parts Used:

-
Cindy from Fort Worth, TX
-
Difficulty Level:A Bit Difficult
-
Total Repair Time:15 - 30 mins
-
Tools:Pliers
4 of 5 people
found this instruction helpful.
Was this instruction helpful to you?
Thank you for voting!
Ice maker quit making ice
Replacing the parts was easy. I am 62 years old and have been repairing all my own appliances for yerars. I have found more problems in recieving the corect parts in a timley mater more difficult than fixing the problem. I am impressed with the promedness of your delivery, and in rtecieving the corect parts. Thank you much!!!!!!!!!!! Bill
Parts Used:
-
William from Los Osos`, CA
-
Difficulty Level:Really Easy
-
Total Repair Time:Less than 15 mins
-
Tools:Nutdriver, Screw drivers, Socket set
5 of 8 people
found this instruction helpful.
Was this instruction helpful to you?
Thank you for voting!
Filler tube broken and old tube frozen over
this is a snap! 2 screws an a nut to tighten and it works like a charm. the filler tube in my Kenmore refer had broken off in the back. ( really bad location to put this in the beginning) if you push the refer to close to the wall you can break it off easily. remove the water line by loosing the nut and remove the hose from the fill tube ( This assumes you have already turned of the water supply or you are standing in a large puddle)remove the 2 screws that hold the filler tube in place. pull out the old filler tube in and slightly upright motion. replace the new fill tube into the same hole and replace the screws. replace the hose and tighten the nut, turn the water back on and check for leaks your done !!
doesn't that feel great?
doesn't that feel great?
Parts Used:
-
Alan from Chino, CA
-
Difficulty Level:Really Easy
-
Total Repair Time:Less than 15 mins
-
Tools:Nutdriver, Pliers, Screw drivers
4 of 5 people
found this instruction helpful.
Was this instruction helpful to you?
Thank you for voting!
Lights not working some times
-
Harry from COLUMBIA STA, OH
-
Difficulty Level:A Bit Difficult
-
Total Repair Time:30 - 60 mins
-
Tools:Nutdriver, Screw drivers
4 of 5 people
found this instruction helpful.
Was this instruction helpful to you?
Thank you for voting!