















3XARG486WP00 Whirlpool Refrigerator - Instructions
Keep searches simple. Use keywords, e.g. "leaking", "pump", "broken" or "fit".
Ice bucket had cracked and came apart at the front bottom.
Watched a video on how to disassemble the old bucket and reassemble the new one. Piece of cake. Thank you for the part and how to video.
Henry
Henry
Parts Used:

-
Henry from ROWLETT, TX
-
Difficulty Level:Very Easy
-
Total Repair Time:15 - 30 mins
-
Tools:Screw drivers
6 of 7 people
found this instruction helpful.
Was this instruction helpful to you?
Thank you for voting!
Refrigerator water nozzle broke
The nozzle of the water dispenser broke. I ordered the part which arrived the next day. I did not use the white line, only the black. I turned the water off, then I removed the screw under the broken nozzle and cut off it off from the line. I took a new screw and cut off the top with pliers, then twisted half of a screw in the old line and inserted the other half in the new line and pulled the line from the bottom corner of the refrigerator and connected it to the white line under the grid. Screwed the new nozzle back to the lever, replaced the grid and turned water on.
Parts Used:

-
Sandra from RESTON, VA
-
Difficulty Level:Really Easy
-
Total Repair Time:Less than 15 mins
-
Tools:Screw drivers
5 of 5 people
found this instruction helpful.
Was this instruction helpful to you?
Thank you for voting!
water leaked when the paddel was pushed
Followed the video on parts page. I was worried I would brake the cover but learned from the video the right way to remove the front plate. I found the video very informing. Thank you for saving me a service call and the part cost was minimal compared to a new refrigerator .
Parts Used:

-
Monica from EDMOND, OK
-
Difficulty Level:Really Easy
-
Total Repair Time:30 - 60 mins
-
Tools:Nutdriver, Pliers, Screw drivers
6 of 8 people
found this instruction helpful.
Was this instruction helpful to you?
Thank you for voting!
The frig/freezer shut off too often and would not stay cold.
The new thermostat assembly installed quite easily, just a couple of screws, but the thermostat probe however was kind of a pain in the rear. The probe is about 3 feet long and you have to remove a plastic sleeve from the old part and re-install on the new probe, it fits very tight and takes some time to do. Overall it was a very easy fix.
Parts Used:

-
Ron from Eaton Rapids, MI
-
Difficulty Level:Easy
-
Total Repair Time:Less than 15 mins
-
Tools:Nutdriver, Screw drivers
7 of 11 people
found this instruction helpful.
Was this instruction helpful to you?
Thank you for voting!
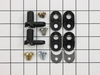
door would not stay closed
Removed the top plastic hinge cover, remove (2) bolts from top hinge. Lifted door up and off of lower hinge, removed both halves of door cam, replaced cam halves and re-installed door. Super easy and effective. Door now opens and closes (stays closed) properly.
Parts Used:
-
David from Chagrin falls, OH
-
Difficulty Level:Really Easy
-
Total Repair Time:15 - 30 mins
-
Tools:Screw drivers, Wrench set
5 of 5 people
found this instruction helpful.
Was this instruction helpful to you?
Thank you for voting!
Refregirator would not turn cooling back on after shutting down.
After spending $250 on repair by calling appliance repair professional who changed relay in the fridge, the problem was not solved. I had to manually turn the switch off and on again to make sure my fridge would maintain its temperature. I read some similar problems on this web site, watched instalation video and decided to give it a try. Part came in very quick and it took me (female) 45 minutes to install the new part and refregirator worked like a champ. I would never call professional again until I try fixing the problem myself.
Parts Used:
-
Olesya from ORLANDO, FL
-
Difficulty Level:Very Easy
-
Total Repair Time:30 - 60 mins
-
Tools:Nutdriver, Pliers, Screw drivers
5 of 6 people
found this instruction helpful.
Was this instruction helpful to you?
Thank you for voting!
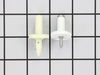
The flat support part of the stud had broken off, and I had removed the part to try to find a replacement. So, the shelf that holds one of the drawershad no front support on one side.
I removed the drawer and the shelf. I looked at the support on the other side to figure out how to insert the new one. Due to the shape of the "hook" part of the support, and the hole it needed to go into, I figured out which way I needed to insert it to be able to twist it so it would stay in place. From another online hint, and from talking to a repairman at a local shop (who had ordered me the wrong part) I knew I needed to twist it after inserting it. I used a pair of pliers to twist it counterclockwise, about a 3/4 turn. I put the shelf in and re-installed the drawer.
Parts Used:
-
Mary from Olympia, WA
-
Difficulty Level:Really Easy
-
Total Repair Time:Less than 15 mins
-
Tools:Pliers
5 of 6 people
found this instruction helpful.
Was this instruction helpful to you?
Thank you for voting!
3 years ago, we broke the shelf
When we moved into the house, we cleaned the fridge and broke the glass shelf and thats how it has stayed.Then I finally got over my fear of ordering things "online" and within a week, we had a new shelf which just slid into place.
The shelf was packaged so well that even the UPS guy throwing over our locked gate didn't break it.
Thanks Part Select....job done !!!
The shelf was packaged so well that even the UPS guy throwing over our locked gate didn't break it.
Thanks Part Select....job done !!!
Parts Used:

-
James from Sherman Oaks, CA
-
Difficulty Level:Really Easy
-
Total Repair Time:Less than 15 mins
5 of 6 people
found this instruction helpful.
Was this instruction helpful to you?
Thank you for voting!
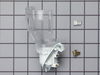
Lower Light Socket removed and Wires capped with wire nuts
My tenants moved out of my rental property and abandoned their refrigerator there. The freezer door would not close properly because someone had previously removed the lower door support bracket and failed to replace the lower bracket shim that positions the lower part of the freezer door properly out from the refrigerator cabinet causing the door gasket seal to bind before the freezer door was fully closed. I removed and replaced this lower door bracket with a new shim made up of serveral thicknesses of cardboard to achieve this spacing and freezer door now closes and seals properly. They had never connected a water supply to the refrigerator although this model is equiped with an ice maker and in door ice and cold water dispenser. The access panel on the back of the unit had been previously removed and discarded. I made up a new access panel from cardboard and connected the water line to the solenoid valve. Valve was so old it would barely open when valve energized and water flow was too slow to make proper sized ice cubes and fill a water glass. I purchased a new water solenoid valve and replaced ther original valve and cured that problem. Replacing the access panel cured an improper cooling problem because with panel removed, most of the air flow bypasses the condenser coils. Lastly I replaced the upper tubular light bulb and the lower light socket I purchased here and installed a 40 watt bulb in the new light socket. Presto! I was able to turn non working abandoned refrigerator into a workable unit.
Parts Used:
-
Wayne from Arlington, TX
-
Difficulty Level:A Bit Difficult
-
Total Repair Time:Less than 15 mins
6 of 9 people
found this instruction helpful.
Was this instruction helpful to you?
Thank you for voting!
the floating baffle broke
took the auger off and baffle replaced the baffle put every thing back together installed back to the freezer tried it out it dont work have to tear into the the motor which works the auger to see if anything else is broke.
Parts Used:

-
Darlene from Glasgow, KY
-
Difficulty Level:A Bit Difficult
-
Total Repair Time:1- 2 hours
-
Tools:Screw drivers
8 of 15 people
found this instruction helpful.
Was this instruction helpful to you?
Thank you for voting!
I was just missing two parts to the icemaker
I slid in the arm and slid in the ice bucket with augar.
Parts Used:
-
Richard from Casper, WY
-
Difficulty Level:Really Easy
-
Total Repair Time:Less than 15 mins
8 of 15 people
found this instruction helpful.
Was this instruction helpful to you?
Thank you for voting!
despenser arm broken in 1/2 from use
remove decorattive trim around ice and whater dispenser area, Remeved 2 hex nuts holing ice dispenser are in place, one nut has a spring attatched to help the arm go back into position once the arm has been depressed. removed and replaced new arm, works good as new.
Parts Used:
-
Kim from Tyler, TX
-
Difficulty Level:Easy
-
Total Repair Time:15 - 30 mins
-
Tools:Nutdriver
5 of 6 people
found this instruction helpful.
Was this instruction helpful to you?
Thank you for voting!
The door light socket was broken and hanging down
The refrigerator light in our Kenmore fridge has been flaky for a number of years. The slightest bump would knock it out of the hole it fits into leaving the bulb dangling. Usually since we were used to it, we could avoid bumping it so it was no real problem, but a recent visitor bumped it and it once again was hanging. I decided this time, to take a serious look at it and fix the problem for real. I had options, duct tape, hot glue gun, goop...or a new part! A quick search on the internet, and I found www.PartSelect.com I entered my model # , quickly found the correct part number. The part came 1 1/2 days after I ordered it. The repair was very simple, I unplugged the fridge, removed the wires from the spade connectors on the old light socket, and attached them to the new socket. I then pushed the socket into the hole, and with new spring clips, it snapped snuggly into place. The socket came with extra wire connectors which I didn't need, the socket fits multiple brands of appliances. It also came with a bulb protector, but that wasn't needed for my fridge either. I was very pleased with the speed and ease of the repair. No more dangling light bulbs!
Parts Used:
-
David from Roanoke, VA
-
Difficulty Level:Really Easy
-
Total Repair Time:Less than 15 mins
6 of 9 people
found this instruction helpful.
Was this instruction helpful to you?
Thank you for voting!
Loud thud when door opened.
Remove all items from the door shelves. Removed the top hinge cover and removed hinge mounting screws. Lifted door off bottom hinge and laid it on its side. I then replaced bottom hinge cam by removing (1) cap screw. Very simple job.
Parts Used:
-
Floyd from Rushville, IN
-
Difficulty Level:Really Easy
-
Total Repair Time:Less than 15 mins
-
Tools:Socket set
4 of 4 people
found this instruction helpful.
Was this instruction helpful to you?
Thank you for voting!
Auger broke
-
Michael from JONESBORO, AR
-
Difficulty Level:Very Easy
-
Total Repair Time:Less than 15 mins
4 of 4 people
found this instruction helpful.
Was this instruction helpful to you?
Thank you for voting!