















3RAWZ481EML3 Whirlpool Dryer - Instructions
Keep searches simple. Use keywords, e.g. "leaking", "pump", "broken" or "fit".
dryer door would not latch
my dryer door didn't latch for over a year. We were accustom to proping large objects against it. a friend told me to look on line. The close up pictures and parts diagrams were awesome. It was here in 4 days . Now my family thinks I am a hero. The end
Parts Used:

-
Robert from Livermore, ME
-
Difficulty Level:Really Easy
-
Total Repair Time:Less than 15 mins
13 of 15 people
found this instruction helpful.
Was this instruction helpful to you?
Thank you for voting!
Lint has been bypassing the lint filter and building up in the fan (and duct)
I noticed that drying time was increasing. I took the covers off the dryer to reach the fan and discovered that the squirrel cage fan buckets were packed with lint, and therefore not moving the air as intended. This was because the original lint filter caught most of the lint, but some bypassed the lint filter and then built up in the fan wheel buckets. The lint bypassed the lint filter because there was no felt gasket on the original filter as far as I can tell. I replaced the lint filter...and the replacement filter includes the felt seal (and fits tightly in the slide). The original lint filter has a provision for the felt seal, but I don't recall ever seeing it (and I did not see remnants of it in the fan or duct). As a matter of fact, I was always suspicious of how loosely the lint filter fit in the slide. The felt seal is not available as a replacement part from Maytag. That said, felt material 3/16"x1/2"x10ft is available from McMaster-Carr...and it fits nicely in the original lint filter.
Parts Used:

-
David from PINETOWN, NC
-
Difficulty Level:Really Easy
-
Total Repair Time:Less than 15 mins
12 of 12 people
found this instruction helpful.
Was this instruction helpful to you?
Thank you for voting!
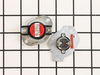
The dryer suddenly started running cold - it would turn, the timer worked...but no heat. My wife mentioned that it had been taking longer and longer to dry a load of clothes....
Popped the lower cover off the dryer, found the thermal fuse and thermostat mounted on the heating tube. Removed the screws with a nutdriver, swapped wires to the new parts, and reinstalled. Then I spent 30 minutes vacuuming 13 years worth of lint and crud out of the machine - it was pretty gummed up in spots, which is probably the cause of the failure.
I have a 25 foot run of hose from the dryer outside, so I replaced that with 4" metal ducting. Clothes dry much faster now!!! Maybe my electric bill will go down (fat chance :) )
I have a 25 foot run of hose from the dryer outside, so I replaced that with 4" metal ducting. Clothes dry much faster now!!! Maybe my electric bill will go down (fat chance :) )
Parts Used:
-
Geoff from Farmington, CT
-
Difficulty Level:Easy
-
Total Repair Time:1- 2 hours
-
Tools:Nutdriver, Screw drivers
12 of 12 people
found this instruction helpful.
Was this instruction helpful to you?
Thank you for voting!
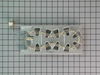
No heat
Wife completed the element and thermal cutoff installation while I was at work. The leads to the cutoff were removed, the screws removed the new parts were screwed in and the wires reconnected. The hardest part was putting the face back on the dryer. Partselect was a great source of information and the delivery was fast. Dryer works great.
Parts Used:
-
Kevin from Mount Morris, MI
-
Difficulty Level:Easy
-
Total Repair Time:Less than 15 mins
-
Tools:Screw drivers
23 of 46 people
found this instruction helpful.
Was this instruction helpful to you?
Thank you for voting!
Door latch (female part) was broken.
I used a screwdriver to remove the old part and pushed the new part in with my fingers, it was very easy. If I could do it, anyone can. I was a lot cheaper then having a repair man come to house. I am very glad I found your site online, I will definitely be using your company again.
Parts Used:

-
JEANMARIE from BELLEROSE, NY
-
Difficulty Level:Really Easy
-
Total Repair Time:Less than 15 mins
-
Tools:Screw drivers
11 of 11 people
found this instruction helpful.
Was this instruction helpful to you?
Thank you for voting!
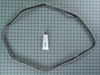
Rear dryer drum seal came out
Used my Whirlpool Dryer User Instructions Manual and followed instructions and used the Cabinet Parts page to see the diagrams.
Parts Used:
-
William from Pontiac, MO
-
Difficulty Level:Easy
-
Total Repair Time:More than 2 hours
-
Tools:Screw drivers, Socket set
17 of 29 people
found this instruction helpful.
Was this instruction helpful to you?
Thank you for voting!
Dryer would not generate heat
My dad was ready to spend $2000 on a new washer/dryer (he has to have a matching set!). Anyway, his dryer would not generate heat. A google search turned up partselect.com, which walked me through the procedure to see what we needed.
It turned out to be a simple to replace $25.00 part! The dryer is drying as if it was brand new. Saved $1,975. Hehe.
Thanks, partselect!
It turned out to be a simple to replace $25.00 part! The dryer is drying as if it was brand new. Saved $1,975. Hehe.
Thanks, partselect!
Parts Used:
-
Douglas from Greensburg, PA
-
Difficulty Level:Really Easy
-
Total Repair Time:Less than 15 mins
-
Tools:Nutdriver
11 of 13 people
found this instruction helpful.
Was this instruction helpful to you?
Thank you for voting!
Idler pulley wore out
Removed the back panel and saw that the idler pulley was worn out. It only took me 5min. To replace, it was very easy to replace.
Parts Used:

-
Peter from HUEYTOWN, AL
-
Difficulty Level:Very Easy
-
Total Repair Time:15 - 30 mins
-
Tools:Screw drivers, Socket set
10 of 11 people
found this instruction helpful.
Was this instruction helpful to you?
Thank you for voting!
gasket came off lent filter
i could not find this part anywhere locally,so i found this web site which had this part.i ordered this part and am very glad i did.i received it in 2 days.thank you very much.if you need anything check this place first,you will be very satisfied.
Parts Used:
-
stephen from langley, KY
-
Difficulty Level:Really Easy
-
Total Repair Time:Less than 15 mins
11 of 15 people
found this instruction helpful.
Was this instruction helpful to you?
Thank you for voting!
my teenage son was messing around and got into the dryer and broke the door catch and bent the door.
removed the catch and the pin and replaced it. We were sent a couple different sizes so we tested the one that looked like the closest match. I think the pin was made with different thicknesses of metal. Worked great and saved us from having to get a new dryer!
Parts Used:
-
Dawn from Chesapeake City, MD
-
Difficulty Level:Really Easy
-
Total Repair Time:Less than 15 mins
13 of 21 people
found this instruction helpful.
Was this instruction helpful to you?
Thank you for voting!
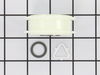
Dryer squeeching very loud
Took off back of dryer Undid belt from belt adjuster pulled and took off adjuster put new one on redid belt and put back on dryer. Done
Parts Used:
-
Michael from ENOLA, PA
-
Difficulty Level:Very Easy
-
Total Repair Time:15 - 30 mins
-
Tools:Nutdriver, Socket set
9 of 9 people
found this instruction helpful.
Was this instruction helpful to you?
Thank you for voting!
Dryer runs heats up, will run for a short period and then shuts down, after a minute or two it will come back on and will resume drying.
Replaced the thermastat first, then the cutoff switch, still the same, I then replaced the thermister, and still have the problem.
Parts Used:
-
John from Brookings,, OR
-
Difficulty Level:Really Easy
-
Total Repair Time:30 - 60 mins
-
Tools:Nutdriver, Screw drivers, Socket set, Wrench set
18 of 36 people
found this instruction helpful.
Was this instruction helpful to you?
Thank you for voting!
The old door catch failed. Clothes won't dry with door open !
-
Theresa from Norfolk, VA
-
Difficulty Level:Really Easy
-
Total Repair Time:Less than 15 mins
-
Tools:Pliers, Screw drivers
8 of 8 people
found this instruction helpful.
Was this instruction helpful to you?
Thank you for voting!
Dryer was working but not generating heat.
I was reluctant to call a repair service. Typically when an appliance is as old as my dryer (14 years old), service people encourage you to replace, not repair. I had replaced the dryer's motor within the last 5 years and believed my dryer still had life to it. At first, I tried cleaning the lint build up from the dryer cavity and hoses. This worked but only for a couple of days. After reading other successful repair stories on the website, I decided to try replacing the thermal fuse. It was so easy. The part was easily identifiable. It was just a little hard to yank off the connecting wires. Good as new and no service call.
Parts Used:
-
Laurie from Natick, MA
-
Difficulty Level:Easy
-
Total Repair Time:15 - 30 mins
-
Tools:Screw drivers
8 of 9 people
found this instruction helpful.
Was this instruction helpful to you?
Thank you for voting!
plastic female latch part had broken...door would not stay shut
It was so easy... Pop out the old with flatblade screw driver and insert new piece... Works perfectly and looks better than the velcro strip I was using to hold the door shut...! Thanks for fast delivery and having the part available...
Regards,
JBL
Regards,
JBL
Parts Used:
-
JOHN from HENDERSONVILLE, NC
-
Difficulty Level:Really Easy
-
Total Repair Time:Less than 15 mins
-
Tools:Screw drivers
8 of 9 people
found this instruction helpful.
Was this instruction helpful to you?
Thank you for voting!