















36275702002 Kenmore Range - Instructions
Keep searches simple. Use keywords, e.g. "leaking", "pump", "broken" or "fit".
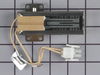
igniter burned out
Removed the screws that held the shield in place. Then unplugged the igniter and removed the 2 screws that hold igniter in place. I had to cut the connector off the new igniter and wire nut the old connector on because of a different connector.
I then put everything back together and ooolaalaa, it worked!!!!!!!
Thanks for the quick service,
Tom
I then put everything back together and ooolaalaa, it worked!!!!!!!
Thanks for the quick service,
Tom
Parts Used:
-
Tom from Keuterville, ID
-
Difficulty Level:Easy
-
Total Repair Time:30 - 60 mins
-
Tools:Nutdriver, Pliers, Screw drivers
2 of 3 people
found this instruction helpful.
Was this instruction helpful to you?
Thank you for voting!
Oven broiler igniter glows but weak and doesn't open gas valve
Unplugged the stove and pulled it out from the wall. Took the metal shield off the back of stove held by 2 screws. Unplugged the Molex connector for the igniter. unscrewed the round metal shield covering the opening where the igniter wires run to the back of the stove. Removed the 2 screws that held igniter bracket to the burner. Next, I pulled the wires and Molex connector through the opening. Installed new igniter in the reverse order. Be very careful with new igniter as they are very fragile and can break easily.
Parts Used:
-
Steve from Olympia, WA
-
Difficulty Level:Easy
-
Total Repair Time:15 - 30 mins
-
Tools:Nutdriver, Screw drivers
2 of 3 people
found this instruction helpful.
Was this instruction helpful to you?
Thank you for voting!
broke tubes while cleaning under top
was still using back burners while waiting for parts (after safety check). I unplugged the electric for the igniters, raised top, installed tubes, checked for leaks with soap solution, closed top, plugged in electric tested burners. Got a big hug and kiss from my wife.
Parts Used:
-
Sally from Bakersfield, CA
-
Difficulty Level:Really Easy
-
Total Repair Time:Less than 15 mins
-
Tools:Wrench set
2 of 3 people
found this instruction helpful.
Was this instruction helpful to you?
Thank you for voting!
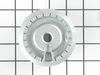
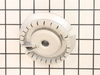
The old burners were damaged by the prior owners.
The repair was extremely easy. Just removed the old burners and dropped in the new ones. No tools needed.
Parts Used:
-
Mohammad from BARTLETT, IL
-
Difficulty Level:Very Easy
-
Total Repair Time:Less than 15 mins
1 person
found this instruction helpful.
Was this instruction helpful to you?
Thank you for voting!
Burners wouldn't light
Had two burners on the stove that would not light. Had tried cleaning them but they still did not ignite. Replaced both burner heads. Once replaced. they ignited right away and have worked ever since.
Parts Used:
-
Robert from SOUTH ELGIN, IL
-
Difficulty Level:Very Easy
-
Total Repair Time:Less than 15 mins
1 person
found this instruction helpful.
Was this instruction helpful to you?
Thank you for voting!
Light burnt out.
Turned the wire protector to the side. Turned out the old bulb and replaced it with the new. Turned the wire protector back in place and I'm like new.
Parts Used:

-
Roscoe G from ROCHESTER, NY
-
Difficulty Level:Very Easy
-
Total Repair Time:Less than 15 mins
2 of 4 people
found this instruction helpful.
Was this instruction helpful to you?
Thank you for voting!
Oven wouldn't turn on
To get to the element I had to remove the lower cover from inside the oven.
After that I removed the two screws that hold the element in place. I then pulled the element out about 3 inches and disconnected the wires. The wires are accessible from behind the undertray.
Installation of the new one was simply the reverse.
Before re-installing the burner cover I did a quick test to ensure the new igniter functioned properly and that I hadn't mis-diagnosed the problem. The element quickly started to glow and that was it.
The oven now works as it should.
After that I removed the two screws that hold the element in place. I then pulled the element out about 3 inches and disconnected the wires. The wires are accessible from behind the undertray.
Installation of the new one was simply the reverse.
Before re-installing the burner cover I did a quick test to ensure the new igniter functioned properly and that I hadn't mis-diagnosed the problem. The element quickly started to glow and that was it.
The oven now works as it should.
Parts Used:
-
Maurice from Lebanon, NJ
-
Difficulty Level:Really Easy
-
Total Repair Time:Less than 15 mins
-
Tools:Socket set
2 of 4 people
found this instruction helpful.
Was this instruction helpful to you?
Thank you for voting!
tube that sends gas to burners broke both left and right front this happen due to opening the range hood to clean inside
I turn gas off to the appliance then I remove the old gas lines and installed the new ones. I did find it easlier to attach the line at the burner knob first then attach it to the burner.
Parts Used:
-
LEAH from YUMA, AZ
-
Difficulty Level:A Bit Difficult
-
Total Repair Time:15 - 30 mins
-
Tools:Pliers, Screw drivers, Socket set, Wrench (Adjustable)
1 person
found this instruction helpful.
Was this instruction helpful to you?
Thank you for voting!
the tubes both leaked
replacement was a snap and took only a small adjustable wrench and a flashlight. asome slight bending of the tube was required, but a gentle hand solved the problem easily.
Parts Used:
-
PHILL from SOMERSET, NJ
-
Difficulty Level:Really Easy
-
Total Repair Time:15 - 30 mins
-
Tools:Wrench (Adjustable)
1 person
found this instruction helpful.
Was this instruction helpful to you?
Thank you for voting!
Oven would not light-element glowed
First I removed the botoom drawer.
Second, removed three 1/4 in (head size) screws and removed the reflector pan from the bottom of the oven.
Third I removed the three racks in the main part of the oven and then the two slot head screws that retain the oven floor. I then removed the oven floor.
Four, now that I had access to the ignitor, I removed the two 1/4 (head size) screws that mounted the ignitor to the burner.
Fifth I disconnected the wire plug which is located in the lower section of the oven. I was unable to route the wire with it's connector on out of the oven, so I just snipped the wires and took it out in two pieces.
Installation was just the reversal of this with the obvious exception of snipping the wires. I was able to route the wires differently so that I did not have to pass the connector behind any restrictions.
Finally afte all was reassembled, I did an ops check and everything worked just fine.
Second, removed three 1/4 in (head size) screws and removed the reflector pan from the bottom of the oven.
Third I removed the three racks in the main part of the oven and then the two slot head screws that retain the oven floor. I then removed the oven floor.
Four, now that I had access to the ignitor, I removed the two 1/4 (head size) screws that mounted the ignitor to the burner.
Fifth I disconnected the wire plug which is located in the lower section of the oven. I was unable to route the wire with it's connector on out of the oven, so I just snipped the wires and took it out in two pieces.
Installation was just the reversal of this with the obvious exception of snipping the wires. I was able to route the wires differently so that I did not have to pass the connector behind any restrictions.
Finally afte all was reassembled, I did an ops check and everything worked just fine.
Parts Used:
-
David from Huntington Woods, MI
-
Difficulty Level:Easy
-
Total Repair Time:15 - 30 mins
-
Tools:Screw drivers, Socket set
2 of 4 people
found this instruction helpful.
Was this instruction helpful to you?
Thank you for voting!
oven would not come on
remove the door,racks,cover over burner,burner,element,replaced element and rest in reversed order.
Parts Used:
-
Carl from Bristol, VT
-
Difficulty Level:Really Easy
-
Total Repair Time:30 - 60 mins
-
Tools:Socket set
2 of 4 people
found this instruction helpful.
Was this instruction helpful to you?
Thank you for voting!
while cleaning I broke the tubes either lifting or closing the top.
I bent the tubes very slghtly to rech the area of attachment. I first screwed them with my hand then tightened them with an adjstable wrench. It was really simple and fast.
Parts Used:
-
DAPHNE from CHICAGO, IL
-
Difficulty Level:Really Easy
-
Total Repair Time:15 - 30 mins
-
Tools:Wrench (Adjustable)
2 of 4 people
found this instruction helpful.
Was this instruction helpful to you?
Thank you for voting!
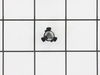
some of electrodes not working at times,found were bad,wires had some insulation missing, clips looked burnt,found all new parts replaced
the electrodes on this model have to be removed before you can raise cooktop, once cooktop is raised remove wire from burner bracket, use needle nose pliers to squeeze bottom of clip,remove &replace with new parts.
Parts Used:
-
Dana from LEEDS, AL
-
Difficulty Level:Really Easy
-
Total Repair Time:More than 2 hours
-
Tools:Pliers
1 person
found this instruction helpful.
Was this instruction helpful to you?
Thank you for voting!
igniter wouldn.t work
had to take back off of oven because of the connector and the plug end insert had the wrong pin so i had to take it apart and use old ones then i put the assembly in /and put oven back together
Parts Used:
-
don from rohnert park, CA
-
Difficulty Level:A Bit Difficult
-
Total Repair Time:30 - 60 mins
-
Tools:Nutdriver, Socket set
2 of 4 people
found this instruction helpful.
Was this instruction helpful to you?
Thank you for voting!
Gas Range oven not heating/replaced new heating element
Removed oven shelves, removed lower cover, removed heating element, removed lower drawer and unplugged element.
Parts Used:
-
Andrew from EL SOBRANTE, CA
-
Difficulty Level:Really Easy
-
Total Repair Time:15 - 30 mins
-
Tools:Nutdriver, Screw drivers
2 of 4 people
found this instruction helpful.
Was this instruction helpful to you?
Thank you for voting!