















25354362409 Kenmore Refrigerator - Instructions
Keep searches simple. Use keywords, e.g. "leaking", "pump", "broken" or "fit".
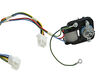
Food compartment not cooling, freezer working well.
Fantastic!
Sent in a brief description of problem and model number. Reply and description of other customers experiences guided us to the exact problem.
We ordered the part on Friday and it was here on Tuesday.
I prepared the freezer compartment for the removal of the old motor and on Sunday husband installed new Evaporator Fan Motor.
It works and is cooling like it did when it was new.
This has been a great experience as all repairmen wanted at least 60.00 to just come out and determine what the problem was. I can only imagine what the final bill would have been.
This was easy and inexpensive.
Thanks for all the help.
Sent in a brief description of problem and model number. Reply and description of other customers experiences guided us to the exact problem.
We ordered the part on Friday and it was here on Tuesday.
I prepared the freezer compartment for the removal of the old motor and on Sunday husband installed new Evaporator Fan Motor.
It works and is cooling like it did when it was new.
This has been a great experience as all repairmen wanted at least 60.00 to just come out and determine what the problem was. I can only imagine what the final bill would have been.
This was easy and inexpensive.
Thanks for all the help.
Parts Used:
-
Mary from Kenmore, WA
-
Difficulty Level:Easy
-
Total Repair Time:30 - 60 mins
-
Tools:Nutdriver, Screw drivers
13 of 19 people
found this instruction helpful.
Was this instruction helpful to you?
Thank you for voting!
water actuator broke due to extreme pressure in trying to make water run quicker
Remove the housing holding the sensors and actuador. The white sensor tape came off the command console, however this was easily replaced by removing the console cover and inserted the tape back. At first the fridge console (lights) did not respond, removed the tape again and re-installed the right way. The most difficult part was trying to push the small hose to fit through the housing and stay in place. In the beginning water was coming out through several places, but removed the housing again, fudgec with the little hose until it fitted snuggly into water dispensing opening. Replaced housing again, screwed all little screws and repair work was complete. The most difficult part was getting a tool that would allow you to guide the hose. Used a fine small plyer to pull through.
Works perfectly now.
Works perfectly now.
Parts Used:
-
GLORIA from MIAMI, FL
-
Difficulty Level:A Bit Difficult
-
Total Repair Time:30 - 60 mins
-
Tools:Pliers, Screw drivers
13 of 19 people
found this instruction helpful.
Was this instruction helpful to you?
Thank you for voting!
Support rail broke
I recieved the part within 48 hours. I snapped the part in place and I was done in seconds.
Parts Used:
-
Karl from Bellaire, TX
-
Difficulty Level:Really Easy
-
Total Repair Time:Less than 15 mins
10 of 10 people
found this instruction helpful.
Was this instruction helpful to you?
Thank you for voting!
water valve failure
removed rear cover, removed screws, diconnected water line connections, cut off old water line connection, installed new compression water line connection, replace screws in water line housing, replace rear cover.
worked fine
worked fine
Parts Used:
-
Robert from Louisville, KY
-
Difficulty Level:Really Easy
-
Total Repair Time:More than 2 hours
-
Tools:Pliers, Screw drivers
13 of 20 people
found this instruction helpful.
Was this instruction helpful to you?
Thank you for voting!
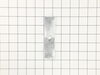
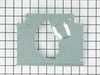
Rust had corroded Front Plate and Drive Blade
Installation was completed by following the online Parts diagram. Had to completely remove all parts, including the blades in ice crusher, and re-assemble. Glad the online diagram was clear and easy to read.
Parts Used:

-
Calvin from Massillon, OH
-
Difficulty Level:A Bit Difficult
-
Total Repair Time:1- 2 hours
-
Tools:Nutdriver, Screw drivers
11 of 15 people
found this instruction helpful.
Was this instruction helpful to you?
Thank you for voting!
Motor had failed due to ice ejector frozen to tray.
Removed the ice maker. Took off the cover and proceed to remove the motor. The only trick was to dis-assemble the electrical connector to replace the wires. I chose to do this rather than splice the new motor into the existing system and it was simple with a little patience.
Easiest repair to make and half / third the money for a new ice maker. The in-laws have ice again (it was over a year).
Easiest repair to make and half / third the money for a new ice maker. The in-laws have ice again (it was over a year).
Parts Used:

-
Christopher from Middletown, CT
-
Difficulty Level:Really Easy
-
Total Repair Time:15 - 30 mins
-
Tools:Nutdriver, Screw drivers
10 of 12 people
found this instruction helpful.
Was this instruction helpful to you?
Thank you for voting!
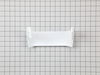
The freezer door bin broke while overstuffing it.
Well...The freezer door bin broke while over-stuffing it with frozen deer jerky. I called my local repair shop and they quoted me what was above retail for the piece...I checked online liked the prices and felt confident to buy from parts select. I bought on a Saturday and selected the slowest shipping (I think 5 days). I got a 'notice' it shipped on Monday and had it Tuesday when I got home from work. Excellent experience.
Parts Used:
-
Matthew from Wyomissing, PA
-
Difficulty Level:Really Easy
-
Total Repair Time:Less than 15 mins
10 of 13 people
found this instruction helpful.
Was this instruction helpful to you?
Thank you for voting!
My son pulled on the meat pan & cracked the right support.
The old support just unscrewed & then the new one screwed right on with two screws.
Parts Used:
-
Tina from Baroda, MI
-
Difficulty Level:Really Easy
-
Total Repair Time:Less than 15 mins
-
Tools:Screw drivers
9 of 10 people
found this instruction helpful.
Was this instruction helpful to you?
Thank you for voting!
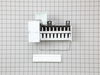
ice maker motor shorted out
loosen 2 screws
unplug connector
remove
replug
replace
tighten 2 screws
done
unplug connector
remove
replug
replace
tighten 2 screws
done
Parts Used:
-
Robert from DeFuniak Spgs, FL
-
Difficulty Level:Really Easy
-
Total Repair Time:15 - 30 mins
-
Tools:Nutdriver
9 of 10 people
found this instruction helpful.
Was this instruction helpful to you?
Thank you for voting!
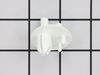
crisper drawer supports broke
The parts supplied were made to fit. The hardest part was getting the original broken tabs out of the internal walls of the fridge with out damaging the internal insulation. I punched the center locking pin through completely, dug out the broken tabs and then reached into the hole with a dental pick and pulled out the center pin. The new parts fit perfectly and with a plastic mallet, tapped the new locking pin into place.
Parts Used:

-
Timothy C. from Aberdeen, MD
-
Difficulty Level:Really Easy
-
Total Repair Time:15 - 30 mins
-
Tools:Pliers, Screw drivers
20 of 43 people
found this instruction helpful.
Was this instruction helpful to you?
Thank you for voting!
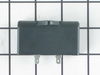
Freezer and refrigerator stopped cooling
The site offers a video for this part which worked perfectly. In addition to replacing the part, since the cardboard panel was off, we also cleaned all the dust off of the coils which someone recommended to do annually.
Parts Used:
-
Amy from PITTSBURGH, PA
-
Difficulty Level:Easy
-
Total Repair Time:Less than 15 mins
-
Tools:Screw drivers
8 of 8 people
found this instruction helpful.
Was this instruction helpful to you?
Thank you for voting!
Ice maker malfunctioned
We followed the video instructions and it went fairly smooth. After turning off the water at the street we found that the faucet at the wall had it's own "on/off" valve. When finished, we turned on the power and heard the gears going through their revolutions, but no ice was made. We waited 24 hours and still no ice. I removed the cover on the ice maker and adjusted the amount of water to see if that was malfunctioning. Still no ice was created. Waited another 24 hours - nothing. Waited another 24 hours (the site said that sometimes the ice maker would take time to reset itself) - nothing. Then on the fourth day after changing out the triple water valve we heard water being dispensed and later that day it put out the first ice in weeks. Another hour later another batch of ice cubes were ready and deposited into the bin. Since that time, we have had a full bin. I moved the set screw back to it's original setting because a little too much water was being delivered. The cubes weren't separating to individual cubes. That cleared up the problem. This was easily completed - we recommend others do their own work. Just be patient for the system to reset itself.
Parts Used:
-
Myron from Tumwater, WA
-
Difficulty Level:Easy
-
Total Repair Time:1- 2 hours
-
Tools:Nutdriver, Pliers, Screw drivers, Wrench (Adjustable)
9 of 12 people
found this instruction helpful.
Was this instruction helpful to you?
Thank you for voting!
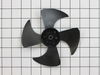
broken fan with vacumme cleaner
I remembered to unplug first. took the little cover off on the bottom, unscrewed the 3 screws. then just held the base that the fan is on and pulled rite off, pushed the other one rite on. it took me five min, i want to say thanks to parts select, had the part, fast shipping, great job, thank you.
Parts Used:
-
TIM from Lockport, IL
-
Difficulty Level:Really Easy
-
Total Repair Time:Less than 15 mins
-
Tools:Nutdriver
9 of 12 people
found this instruction helpful.
Was this instruction helpful to you?
Thank you for voting!
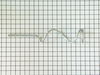
Ice Would Not Dispence
Took the ice storage bin out. Took the unit apart,and disamble the augar unit. Ordered parts from manufacture, which arrived in two days. As soon as I got the parts, I reassambled it. Work perfect. Good job!
Parts Used:
-
Jerry Baten from Pampa, TX
-
Difficulty Level:Really Easy
-
Total Repair Time:15 - 30 mins
-
Tools:Nutdriver, Pliers, Screw drivers, Wrench (Adjustable)
17 of 36 people
found this instruction helpful.
Was this instruction helpful to you?
Thank you for voting!
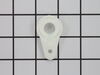
plastic closer plate broken
First removed food from the refrigerator door.
Second removed plastic cover plate and metal plate assembly from top of door.
Third lifted door of metal pin on bottom.
Fourth removed broken closer plate and replaced
with new closer plate.
Set door back in place.
Re secured the metal plate and plastic cover plate.
Replaced the door shelves and food. DONE.
Second removed plastic cover plate and metal plate assembly from top of door.
Third lifted door of metal pin on bottom.
Fourth removed broken closer plate and replaced
with new closer plate.
Set door back in place.
Re secured the metal plate and plastic cover plate.
Replaced the door shelves and food. DONE.
Parts Used:
-
Sandra from Alto, NM
-
Difficulty Level:Easy
-
Total Repair Time:15 - 30 mins
8 of 9 people
found this instruction helpful.
Was this instruction helpful to you?
Thank you for voting!