















2496X2 Roper Range - Instructions
Keep searches simple. Use keywords, e.g. "leaking", "pump", "broken" or "fit".
Wire broken going to one electric plug for burner
Replace the connector and bracket, spliced the wires, put heat to the schrink wrap and I was done.
Parts Used:

-
John from Shelby Township, MI
-
Difficulty Level:Really Easy
-
Total Repair Time:Less than 15 mins
-
Tools:Screw drivers
0 of 1 people
found this instruction helpful.
Was this instruction helpful to you?
Thank you for voting!
no heat from burner
I raised the stove top, read the instructions to my son while he did the work, then I lowered the stove top, installed the burner, and it worked like magic.
Parts Used:
-
George from ST. Charles, MO
-
Difficulty Level:Really Easy
-
Total Repair Time:Less than 15 mins
-
Tools:Screw drivers
0 of 1 people
found this instruction helpful.
Was this instruction helpful to you?
Thank you for voting!
light bulb went out in my oven
My husband took the plastic cover off and took out old bulb and screwed in the new one. Then put the cover back on.
Parts Used:

-
Janet from Ada, MI
-
Difficulty Level:Really Easy
-
Total Repair Time:Less than 15 mins
2 of 7 people
found this instruction helpful.
Was this instruction helpful to you?
Thank you for voting!
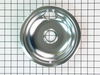
replacement of drip bowll
-
Gudrun from Santa Fe, NM
-
Difficulty Level:Really Easy
-
Total Repair Time:Less than 15 mins
0 of 1 people
found this instruction helpful.
Was this instruction helpful to you?
Thank you for voting!
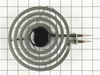
intermittent heat from burner
Pulled out electric heating element and replaced with new. I have had this frustrating problem for 2 years and after replacing the elements they now work like new! My only question, why did it take me so long to replace???
Parts Used:
-
Brian from Westport, CT
-
Difficulty Level:Really Easy
-
Total Repair Time:Less than 15 mins
0 of 1 people
found this instruction helpful.
Was this instruction helpful to you?
Thank you for voting!
contacts had gotten burnt out/blackened with age so burner was intermittent.
lifted the cover, unscrewed the ceramic wire fastners, put the new part in, and voila, job done and working perfectly
Parts Used:
-
john from reading, MA
-
Difficulty Level:Really Easy
-
Total Repair Time:Less than 15 mins
-
Tools:Screw drivers
0 of 1 people
found this instruction helpful.
Was this instruction helpful to you?
Thank you for voting!
large burners not working
Read instuctions first Turn breaker off to stove or unplug to be sure. Remove burner and drip pans. Remove scews holding socket in place if you are doing more than one make sure you keep in same location. Raise cook top untill supports latch in. Assemble plug it comes with two types holder compare to your plug. cut wire to old plug so you have enough wire to connect back with new. Strip wire back and place shrink tubeover wires wire nut together heat with a lighter or heat gun then do remaining plugges. place back in cover and replace scews. make sure wire are not to long to get under burner when cook top lowered. Lower cook top and clean burner plug ends with a little sandpaper to make sure they make good connection. replace pans and burner. turn on breaker or plug in stove making sure the burners come on when turned on good luck g.d.
Parts Used:
-
Greg from Versailles, IN
-
Difficulty Level:Really Easy
-
Total Repair Time:Less than 15 mins
-
Tools:Screw drivers
0 of 2 people
found this instruction helpful.
Was this instruction helpful to you?
Thank you for voting!
replace burner coil connector
Cut the two wires approx 1 inch behind old connector and removed one screws to remove old connector, stripped approx 3/4 inch off the wires and connected them to the new wires on the new connector with wire caps and shrink wraps which came with the new connector. Replaced the old screw with the new screw and the job was completed. Be sure and disconnect power before starting!!
Parts Used:
-
dicky from mcrae, AR
-
Difficulty Level:Really Easy
-
Total Repair Time:Less than 15 mins
-
Tools:Screw drivers
0 of 2 people
found this instruction helpful.
Was this instruction helpful to you?
Thank you for voting!
Bulb Replacement
I pulled down the wire around the glass cover. . . Released on end of the wire from its holder being careful to not let the glass cover drop. Unscrewed the bulb and replaced with replacement. Easy, easy.
Parts Used:
-
Judith from Phoenix, AZ
-
Difficulty Level:Really Easy
-
Total Repair Time:Less than 15 mins
0 of 2 people
found this instruction helpful.
Was this instruction helpful to you?
Thank you for voting!
burner not working
burner was shorting out replaced part works great
Parts Used:
-
gene from kent, WA
-
Difficulty Level:Really Easy
-
Total Repair Time:Less than 15 mins
-
Tools:Screw drivers
Was this instruction helpful to you?
Thank you for voting!
rusted drip bowl
remove burner by hand and remove old drip bowl replace with new bowl inspect burner for ware and insert back into slot.
Parts Used:
-
kyle from Schwenksville, PA
-
Difficulty Level:Really Easy
-
Total Repair Time:Less than 15 mins
Was this instruction helpful to you?
Thank you for voting!
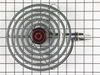
burner was broken
took it out of the packing material, wiped it off and plugged it into the cooktop. Works like a champ, needed no tools. My order was processed and sent out promptly, and arrived quickly. Thank you very much.
Parts Used:
-
Lois from Wayland, MA
-
Difficulty Level:Really Easy
-
Total Repair Time:Less than 15 mins
Was this instruction helpful to you?
Thank you for voting!
burner would not heat up the connection was bad
loosened the screw holding the block pulled it out toget to wire cut it about 4 inches long followed the inst.with block kit and it was a breeze. burner working fine now should have did it sooner.
Parts Used:
-
Earl from Union Mills, NC
-
Difficulty Level:Really Easy
-
Total Repair Time:Less than 15 mins
-
Tools:Screw drivers
Was this instruction helpful to you?
Thank you for voting!
Burner element partially heated
Pulled out old one, plugged in new. Replaced Drip bowl as well.
Parts Used:
-
William from Tucumcari, NM
-
Difficulty Level:Really Easy
-
Total Repair Time:Less than 15 mins
Was this instruction helpful to you?
Thank you for voting!
The surface burner socket that the burner plugs into melted.
Cut the old wires off, removed the screw holding the clamp, installed the new parts. Problems I encountered were the wire nuts. They were too small for the wire gage of the replacement part and the original oven. I had larger wire nuts in my workshop. Also, why so many extra parts like the shrink wrap tubing, two metal clamps to hold the socket, etc.
Parts Used:
-
Gary from Chesapeake, VA
-
Difficulty Level:Easy
-
Total Repair Time:Less than 15 mins
-
Tools:Screw drivers
Was this instruction helpful to you?
Thank you for voting!