















21962B Admiral Refrigerator - Instructions
Keep searches simple. Use keywords, e.g. "leaking", "pump", "broken" or "fit".
Freezer and Frig was not cooling down. The freezer side was all froze up on the coils.
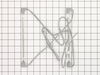
Unplug the Frig and left the freezer side total defrost. Mine was so frozen up, it took about 6 hours with the door open. I had a towel in the botton to catch all the water and ice that fell.
Removed all the shelving units. There are 3 screws that hold the ice maker in place. Loosen the 2 screws above the ice maker about 3 or so turns. Then remove the screw under the ice maker completely. Then lift the ice maker off of the 2 screws that you just loosened. Then with a small flat blade screwdriver, push the plastic clip that holds the connector of wires that plug into the ice maker.
Then remove the screws that hold the back plastic cover that conseals the coil.
Now you should see the coils. There is one heater unit in the middle and one at the botton. There is a screw on each side of the heater unit that you need to take out. They are screwed into a metal bracket that is part of the coil system. Once the screws are removed, you simply remove the heater units. They are plugged in at the top of the coil system on a circuit board. Unplug them from there, (one of the spades connector was slightly bigger then the other, so I new where to plug them back in). Fish all the wire and heater untis out and you are ready to re-oinstall the new units.
Getting the wires back up through the coils was tricky, but I was able to do it.
The hardest thing was working inside the freezer unit. It is not very wide and was sometimes hard to get both hand inside to work.
Removed all the shelving units. There are 3 screws that hold the ice maker in place. Loosen the 2 screws above the ice maker about 3 or so turns. Then remove the screw under the ice maker completely. Then lift the ice maker off of the 2 screws that you just loosened. Then with a small flat blade screwdriver, push the plastic clip that holds the connector of wires that plug into the ice maker.
Then remove the screws that hold the back plastic cover that conseals the coil.
Now you should see the coils. There is one heater unit in the middle and one at the botton. There is a screw on each side of the heater unit that you need to take out. They are screwed into a metal bracket that is part of the coil system. Once the screws are removed, you simply remove the heater units. They are plugged in at the top of the coil system on a circuit board. Unplug them from there, (one of the spades connector was slightly bigger then the other, so I new where to plug them back in). Fish all the wire and heater untis out and you are ready to re-oinstall the new units.
Getting the wires back up through the coils was tricky, but I was able to do it.
The hardest thing was working inside the freezer unit. It is not very wide and was sometimes hard to get both hand inside to work.
Parts Used:
-
David from Kalamazoo, MI
-
Difficulty Level:A Bit Difficult
-
Total Repair Time:30 - 60 mins
-
Tools:Screw drivers
1 of 3 people
found this instruction helpful.
Was this instruction helpful to you?
Thank you for voting!
Drive ring was cracked (power failure & froze-up when power came on)
I read what other people had done so I tried the easiest solution--Forced, without breaking, the plastic & fit the ring right where it needed to be.
Parts Used:

-
Joseph from Colonial Heights, VA
-
Difficulty Level:Easy
-
Total Repair Time:15 - 30 mins
0 of 1 people
found this instruction helpful.
Was this instruction helpful to you?
Thank you for voting!
small space to work in.
Removed all screws in rear panel & removed (this was easy) . unpluged heater wires & fished out not easy. Used string and 3/8" nut for weight, droped behind evaporator to pull elect wire from heater. ( this was not easy) replaced rear panel & all screws.
Parts Used:
-
clifford from dayton, OH
-
Difficulty Level:A Bit Difficult
-
Total Repair Time:1- 2 hours
-
Tools:Screw drivers
0 of 1 people
found this instruction helpful.
Was this instruction helpful to you?
Thank you for voting!
refrigator would cool properly
The most difficult part was determining what the problem was, was it the defrost timer, the themostat or the heater. Once I diagnosed the heater the ordering was easy. Installing it took about 30 minutes but waiting for the frig to cool to the point where the thermostat opened took a little longer than I thought. When I saw that orange glow from the heater I knew I saved myself a hundred buck.
Parts Used:
-
john from irvine, CA
-
Difficulty Level:A Bit Difficult
-
Total Repair Time:More than 2 hours
-
Tools:Pliers, Screw drivers
0 of 1 people
found this instruction helpful.
Was this instruction helpful to you?
Thank you for voting!
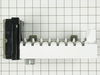
Motor burned out
removed all three screws, disconnected power. then I switched out the plug assembly (mine had different male adapter. Then the Control Arm, new arm was to wide and took up to much space when it was fully extended. Put it back in reverse order, and within 5 hours it was making ice.
Parts Used:
-
Earl from San Antonio, TX
-
Difficulty Level:Easy
-
Total Repair Time:15 - 30 mins
-
Tools:Screw drivers
0 of 1 people
found this instruction helpful.
Was this instruction helpful to you?
Thank you for voting!
Original drive ring broke
The most time-consuming part was removing the screws. First, remove the 8 screws that attaches the ice bin to the front cover. This will free up the auger enough to pull up the back end where the drive ring is held in place. The ring just pops right out. The only thing I recommend is as long as you have the bin out (and empty), go ahead and give it a good wash. Make sure it is thoroughly dry so that no ice freezes to the moving parts.
Parts Used:
-
George from Katy, TX
-
Difficulty Level:Really Easy
-
Total Repair Time:15 - 30 mins
-
Tools:Screw drivers
0 of 1 people
found this instruction helpful.
Was this instruction helpful to you?
Thank you for voting!
Ice maker auger wouldn't rotate, motor worked fine
To replace the broken drive coupling on the motor end of the auger requires sliding the ice bin out of the freezer section of the refrigerator. Remove the ice cubes and let it thaw out for a few minutes. Remove five screws holding the front face on the ice bin to remove the ice auger. slip the new drive coupling over the end of the auger. reassemble and replace the face plate with the five screws. Slide the ice bin back in the freezer. Less than fifteen minutes it was finished.
Parts Used:
-
Rob from Rome City, IN
-
Difficulty Level:Really Easy
-
Total Repair Time:Less than 15 mins
-
Tools:Screw drivers
0 of 3 people
found this instruction helpful.
Was this instruction helpful to you?
Thank you for voting!
noisey fan

-
Richard from Morgan, UT
-
Difficulty Level:Really Easy
-
Total Repair Time:15 - 30 mins
-
Tools:Nutdriver, Pliers, Screw drivers
0 of 4 people
found this instruction helpful.
Was this instruction helpful to you?
Thank you for voting!
I needed a new grate where the water dispenses.

-
Vickie from Lincoln, NE
-
Difficulty Level:Really Easy
-
Total Repair Time:Less than 15 mins
0 of 226 people
found this instruction helpful.
Was this instruction helpful to you?
Thank you for voting!
Refrigerator not cooling
Unloading the freezer and removing the back panel were the most time consuming aspect of this repair. Many models only have 4 screws, but this one has 9, and being a side by side it was a tight fit to reach them. Once defrosted we tested the thermostat, found it "dead", and ordered a new one. The part came within 3 business days. Installing it took minutes, since we had not permanently screwed in the back panel again. We didn't want to reload everything until we knew things worked properly, so we didn't put everything back right away. We thought we had further problems as the freezer got really cold but the frig still didn't get down to temp. Turns out we just needed to reinstall the fan shield which we'd taken off along with other parts to access and check the vents. The fan shield must be in place to direct the cold air into the vent to the refrigerator. Duh! It was an oversight that once caught made total sense! Now all works fine on this 20 year old Maytag side by side!
Parts Used:

-
John from Niles, MI
-
Difficulty Level:Easy
-
Total Repair Time:Less than 15 mins
-
Tools:Pliers, Screw drivers
Was this instruction helpful to you?
Thank you for voting!
Ice maker did not make ice
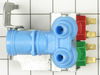
This review would not be helpful if limited to this part. So I will describe the whole repair. The ice maker was first receiving too much water. This resulted in huge cubes and water dripping out of the ice maker compartment. I tried reducing the amount of water using the valve to the supply line. But then the ice maker stopped making ice. I jumped to the conclusion that the solenoid water valve needed to be replaced. The new valve was easily replaced, but no water was delivered to the ice maker. I then went to the web site and saw that 87% of the time it was the ice maker itself that needed to be replaced. I ordered one and it arrived quickly. Installing it was easy although I might never had figured out how to remove the electrical supply line to the old unit if I hadn’t watched the video. After installation no water went to the ice maker tray.
I had read a review saying that the supply line had frozen where it went into the ice maker. To check out that possibility I removed the line from the solenoid valve and tried to blow air through it. No air would pass. So I removed the ice maker so I could get at the possible ice obstruction. I repeatedly inserted a knife honing steel which I heated and reheated in hot water. Finally I heard water dripping to the floor from the supply line which I had left detached from the solenoid valve. Then I hooked everything up and ice making proceeded nicely. If the solenoid valve ever needs replacing, I have a extra one.
I had read a review saying that the supply line had frozen where it went into the ice maker. To check out that possibility I removed the line from the solenoid valve and tried to blow air through it. No air would pass. So I removed the ice maker so I could get at the possible ice obstruction. I repeatedly inserted a knife honing steel which I heated and reheated in hot water. Finally I heard water dripping to the floor from the supply line which I had left detached from the solenoid valve. Then I hooked everything up and ice making proceeded nicely. If the solenoid valve ever needs replacing, I have a extra one.
Parts Used:
-
Bruce from Kewadin, MI
-
Difficulty Level:Really Easy
-
Total Repair Time:Less than 15 mins
-
Tools:Nutdriver, Wrench (Adjustable)
Was this instruction helpful to you?
Thank you for voting!
Condensor fan motor quit working
Pulled the fridge out, Took bottom panel off. Removed 3 screws holding motor. Unplugged connector, cut wires, attached old connector on new motor. put blade on new motor.installed in fridge, put cover back on.
Parts Used:
-
David from New Albany, IN
-
Difficulty Level:Easy
-
Total Repair Time:15 - 30 mins
-
Tools:Nutdriver, Screw drivers
Was this instruction helpful to you?
Thank you for voting!
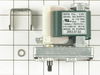
Two problems- auger motor and ice bucket rack
Had to replace ice bucket rack because auger motor broke the plastic backing and also the auger motor because shaft was bent on old auger motor. Just followed directions on web site to do repair.
Parts Used:
-
John from Greenville, SC
-
Difficulty Level:Easy
-
Total Repair Time:15 - 30 mins
-
Tools:Nutdriver, Screw drivers
Was this instruction helpful to you?
Thank you for voting!
Condensor motor was frozen
pull unit away from the wall, and unplug it. remove the grill, and cardboard guard on the lower back of the unit. remove Three screws for the motor bracket. Remove the bracket legs from the old motor and assemble them to the new motor. take the fan blade off the old motor, place it on the new. Cut the wires at the old motor, strip the insulation back, use supplied wire nuts to connect the new motor. Reverse order to reassemble. Plug in unit to test function.
Parts Used:
-
john from thibodaux, LA
-
Difficulty Level:Really Easy
-
Total Repair Time:15 - 30 mins
-
Tools:Nutdriver, Pliers
Was this instruction helpful to you?
Thank you for voting!
excessive water in condensate pan
just as video instructions said, very easy just following them ,part arrived in very short time and was exact fit completely satisfied, saved repair man service charges and wait time
Parts Used:
-
michael from woodstock, MD
-
Difficulty Level:Really Easy
-
Total Repair Time:15 - 30 mins
-
Tools:Pliers, Socket set
Was this instruction helpful to you?
Thank you for voting!