















10659914701 Kenmore Refrigerator - Instructions
Keep searches simple. Use keywords, e.g. "leaking", "pump", "broken" or "fit".
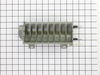
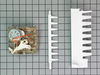
Heater on Ice Maker stopped working.
Repair was easy and producing ice within five hours.
Parts Used:
-
Andy from Lorena, TX
-
Difficulty Level:Easy
-
Total Repair Time:15 - 30 mins
-
Tools:Screw drivers, Socket set
17 of 22 people
found this instruction helpful.
Was this instruction helpful to you?
Thank you for voting!
Door would not auto close
I removed the screws on the upper hinge and removed the door. I removed the lower cam in about 2 minutes and had it replaced. The upper cam was a tight fit in the door and I resorted to vise-grips to remove it. Total time to replace cams and put the door back on was 30 minutes. This saved me $100.
Thanks
Thanks
Parts Used:


-
James from Hampton, NH
-
Difficulty Level:Really Easy
-
Total Repair Time:15 - 30 mins
-
Tools:Pliers, Screw drivers, Socket set
18 of 25 people
found this instruction helpful.
Was this instruction helpful to you?
Thank you for voting!
Water leaking from under refrigerator.
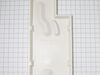
Water leaking from under refrigerator. Initially believed leak was from filter assembly. Removed filter and shut off water supply but leak appeared at different intervals again. Large puddle of water coming out from under refrigerator. Removed back lower panel and checked for leak, but didn't find any. My wife was also checking for leak and found a crack in drip tray. Only way we could get the drip tray out was to first remove front lower panel, disconnect and remove wiring harness in front of drip tray, unbolt water filter assembly, and unbolt water solenoid unit at rear of refrigerator. Their water lines connect to filter assembly. My wife controlled the water solenoid unit to give me play as I pulled the filter assembly out as much as I could from the front. I could now wiggle the cracked drip tray out from under the filter unit. Replaced drip tray and reinstalled wiring harness, water filter unit w/new filter, and re-bolted water solenoid unit at back of refrigerator. Replaced back lower panel after turning water back on and checking for leaks. Replaced front lower panel.
The reason still had leak after initially turning off water supply was because the drip tray is used to catch the water when refrigerator goes into the defrost cycle. Since the original drip tray had cracked, water only appeared on floor after defrost cycle.
The reason still had leak after initially turning off water supply was because the drip tray is used to catch the water when refrigerator goes into the defrost cycle. Since the original drip tray had cracked, water only appeared on floor after defrost cycle.
Parts Used:
-
Ronald from DELRAN, NJ
-
Difficulty Level:Difficult
-
Total Repair Time:1- 2 hours
-
Tools:Nutdriver, Screw drivers, Socket set
15 of 16 people
found this instruction helpful.
Was this instruction helpful to you?
Thank you for voting!
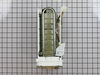
Water was leaking from bottom of ice tray
After watching the instr. film I found it very easy to do.
This is what motivated me to do the job and save a LOT of money. It was actually the second repair I did.
This is what motivated me to do the job and save a LOT of money. It was actually the second repair I did.
Parts Used:
-
Jim from Manitowoc, WI
-
Difficulty Level:Easy
-
Total Repair Time:30 - 60 mins
-
Tools:Nutdriver, Screw drivers
15 of 17 people
found this instruction helpful.
Was this instruction helpful to you?
Thank you for voting!
Replace broken ice machine feeder drum
Be advised that to do this job, you have to take the ice tray and feeder assembly completely apart. The only tricky part is that the nut, part 31 in the drawing, that holds everything together is reverse threaded. Since it's plastic, you're afraid you'll break it. If you know it's reverse threaded to begin with you can go ahead and apply the required force to get it off.
Parts Used:

-
David from League City, TX
-
Difficulty Level:Easy
-
Total Repair Time:30 - 60 mins
-
Tools:Pliers, Screw drivers, Wrench (Adjustable), Wrench set
14 of 15 people
found this instruction helpful.
Was this instruction helpful to you?
Thank you for voting!
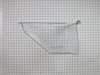
The edges of the Meat pan slide were broken.
I removed the glides under the edges of the meat pan, remove the old pan, put the new pan in and replaced the glides. I was very pleased with PartSelect. I ordered my part, and it arrived the very next day. I will definitely order my next replacement part thru PartSelect.
Parts Used:
-
Michael from Bakersfield, CA
-
Difficulty Level:Really Easy
-
Total Repair Time:Less than 15 mins
-
Tools:Screw drivers
15 of 18 people
found this instruction helpful.
Was this instruction helpful to you?
Thank you for voting!
Compresser would not kick in, it would click on and off.
Unplugged the starter from compresser and put the new part in and all worked. Great service and I like the OEM parts not aftermarket. Will definately do service with you again. Thanks for making my life easier.
Parts Used:


-
terry from farmington, MO
-
Difficulty Level:Really Easy
-
Total Repair Time:15 - 30 mins
-
Tools:Screw drivers
15 of 19 people
found this instruction helpful.
Was this instruction helpful to you?
Thank you for voting!
Ice stuck in mold. mold coating was peeling off.
Turn off water supply too ice maker and unplug the fridge power. using a nut driver remove one bottom screw from the bottom, near the front. The other two from the side atop the ice mold. (loosen screws and ice maker will lift up and off.)
I set the ice maker on the counter, snapped of the front cover by hand. using a phillips driver, remove two screws near the bottom corners.(they go through the circuit board into the ice mold)
circuit board in one hand, other end of ice mold in the other, slowly pull apart about 1 inch. remove the silver colored "on, off" bar at the end by snapping the retainer out of the ice mold. (the silver bar stays with the circuit board end)
Watch how the ice guide(white fingers stationary on side of ice mold) hooks too the ice mold on each end. swap ice guide to new ice mold, insert three guide pins on end into holes on the circuit board, while holding ice guide onto ice mold, watch rotation bar while inserting into motor.(it only splines one way.) when each piece is lined up, simply push together and reinstall two screws. snap circuit board cover into place. reinstall ice maker into freezer in reverse order.
I set the ice maker on the counter, snapped of the front cover by hand. using a phillips driver, remove two screws near the bottom corners.(they go through the circuit board into the ice mold)
circuit board in one hand, other end of ice mold in the other, slowly pull apart about 1 inch. remove the silver colored "on, off" bar at the end by snapping the retainer out of the ice mold. (the silver bar stays with the circuit board end)
Watch how the ice guide(white fingers stationary on side of ice mold) hooks too the ice mold on each end. swap ice guide to new ice mold, insert three guide pins on end into holes on the circuit board, while holding ice guide onto ice mold, watch rotation bar while inserting into motor.(it only splines one way.) when each piece is lined up, simply push together and reinstall two screws. snap circuit board cover into place. reinstall ice maker into freezer in reverse order.
Parts Used:
-
Martin from Shakopee, MN
-
Difficulty Level:Really Easy
-
Total Repair Time:15 - 30 mins
-
Tools:Nutdriver, Screw drivers
14 of 16 people
found this instruction helpful.
Was this instruction helpful to you?
Thank you for voting!
Ice Maker stripper arm cracked
This was a pretty easy repair...I removed the retaining screws and slid the assembly off its tracks. Disconneting the wiring hardness was a pain but after a few minutes I had that off (use gloves, it gets cold in the freezer after a minute)
Once I had the unit completely out of the freezer the replacement part took only minutes to replace.
Reversed the process putting the ice maker back in - a few hours later my ice buck was full again.
Simple repair - well worth the effort.
Once I had the unit completely out of the freezer the replacement part took only minutes to replace.
Reversed the process putting the ice maker back in - a few hours later my ice buck was full again.
Simple repair - well worth the effort.
Parts Used:

-
Mark from Newtown, PA
-
Difficulty Level:Easy
-
Total Repair Time:15 - 30 mins
-
Tools:Screw drivers, Socket set
14 of 16 people
found this instruction helpful.
Was this instruction helpful to you?
Thank you for voting!
Old motor was not resetting back to proper position halting ice production.
Removed the three motor screws pulled off old motor put new motor in place replaced screws and re-installed. It was producing ice three hours later. I originally tried to obtian these parts directly from Whirlpool in which twice they shipped me the wrong parts. Finally gave up on them and entered the whilrpool part number which crossreferenced to new part number which was correct the first try. Thank you!
Parts Used:
-
Kevin from Spring, TX
-
Difficulty Level:Really Easy
-
Total Repair Time:Less than 15 mins
-
Tools:Nutdriver, Screw drivers
13 of 14 people
found this instruction helpful.
Was this instruction helpful to you?
Thank you for voting!
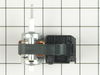
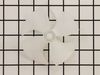
burned out Evaporator Fan Motor
simply removed wires from the old motor and gently lifted it out by by the metal clips - put the old bracket on the new motor, snapped on the new fan, replaced the wires, reinstalled the shield. All done in about 15 min.
Parts Used:
-
Robert from Surprise, AZ
-
Difficulty Level:Really Easy
-
Total Repair Time:15 - 30 mins
-
Tools:Screw drivers
16 of 23 people
found this instruction helpful.
Was this instruction helpful to you?
Thank you for voting!
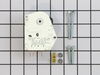
I had frost build-up in the freezer.
I took the cover off the control settings and found the timer. Removed two screws and replaced the defective one with the new one. Had to pay attention to directions since the timer is used in different ways and to make sure the loose wire was installed correctly (not the same way as the original ground was connected).
Parts Used:
-
David from Arnold, ME
-
Difficulty Level:Easy
-
Total Repair Time:Less than 15 mins
-
Tools:Nutdriver, Screw drivers
15 of 21 people
found this instruction helpful.
Was this instruction helpful to you?
Thank you for voting!
Refrigerator quit refrigerating
Removed 2 control panel knobs and face plate that is snaped in place using a knife to prey it causing to snape lose.
Removed 4 cover screws that gave me acess to Defrost Timer. Remove two fastining screws on timer unit. Remove electrical color coded 4 prong connector plug. Have to make sure black jumper wire on the new timer kit is connected to the correct one of the 4 prongs as to instruction sheet for my model refrigerator. Reassemble in reverse order. Bingo! Fixed.
Removed 4 cover screws that gave me acess to Defrost Timer. Remove two fastining screws on timer unit. Remove electrical color coded 4 prong connector plug. Have to make sure black jumper wire on the new timer kit is connected to the correct one of the 4 prongs as to instruction sheet for my model refrigerator. Reassemble in reverse order. Bingo! Fixed.
Parts Used:
-
William from Hudson, FL
-
Difficulty Level:A Bit Difficult
-
Total Repair Time:1- 2 hours
-
Tools:Nutdriver, Screw drivers
15 of 21 people
found this instruction helpful.
Was this instruction helpful to you?
Thank you for voting!
Icemaker intermittenly makes ice
Watched the website repair & adjustment video, ordered the part which was exactly like the one currently in the fridge. Took only 10 min. to install. Then, 2 hours later we had ice! And still have ice on a consitent basis. Easy fix, life's good!
Parts Used:
-
Vickie from Hays, KS
-
Difficulty Level:Easy
-
Total Repair Time:Less than 15 mins
-
Tools:Screw drivers
13 of 15 people
found this instruction helpful.
Was this instruction helpful to you?
Thank you for voting!
The freezer wouldn't freeze and the refrigerator wouldn't refrigerate.
Same as everybody else on this post. Real easy. Actually, I just wish I would have done it sooner.
Parts Used:
-
Leandro from Baldwin Park, CA
-
Difficulty Level:Easy
-
Total Repair Time:Less than 15 mins
-
Tools:Screw drivers
13 of 15 people
found this instruction helpful.
Was this instruction helpful to you?
Thank you for voting!