


How to Fix a 1E Code on a Samsung Washer
Nothing derails laundry day faster than seeing an error code pop up on your washer’s display. Depending on your model of Samsung washer, you may see one of the following error codes on your machine: 1E (may look like IE), LE, 1C, LC, LC1, 1 1C, or 1LC. These codes tell us that there is a water level issue or leakage error. In this article we'll walk you through these different codes and what they mean, along with the steps to inspect your Samsung washer to clear the 1E code from your machine.
Various Error Codes for Water Level Issues
Samsung Washer 1E/IE Error Code
Whether you have a top-load or a front-load Samsung washer, the 1E/IE code will be most likely to appear, especially if you have an older or base model machine. This code captures the various issues (water level issue, leakage error, or water level sensor error) but does not pinpoint the exact cause. If you see this code, you will likely need to work through the various troubleshooting steps below before you determine the cause of the code. As this is the most common code used, we’ll be referencing this one throughout the article.
Samsung Washer 1C / 1 1C Error Code
If your Samsung washer has a front-load design, you may see a 1C or 1 1C error code instead. This code provides more pinpointed information, as it indicates an issue with the water level sensor.
Samsung Washer LE or LC Error Code
An LE or LC error code is related to the machine leaking. LE is a leakage error, which can mean that water is somewhere it shouldn’t be, or there is a low water level error. An LC error code is more nuanced, as a dedicated sensor has detected the leak.
Troubleshooting the 1E Error Code on a Samsung Washer
Whichever code is displaying on your washer, follow the troubleshooting steps below to resolve the water level issue and clear the code from your machine.
Power Cycle (or Hard Reset) Your Samsung Washer
The first step is to reset your washer to see if that clears the error code. It should be noted that while this step may clear the code, it won’t resolve any issues that may cause the code to appear again.
- To hard reset (or “power cycle”) your Samsung washer, begin by turning it off and unplugging it from the wall.
- Then hold in the “power” button for 5 seconds, wait for 10 seconds, then hold in the “start/pause” button for 5 seconds.
- Wait 5 minutes for all the electricity to discharge from the machine.
- Plug it back in and turn the washer on.
- Then you can run a test cycle to make sure the washer is working properly.
If you require further information, review our article on how to reset your Samsung washer. If power cycling didn’t clear the 1E error code, continue with the next step.
Check if Your Samsung Washer is Leaking
Inspect around your washer for any water, especially near the back or under the machine. Water at the back of the machine can be due to loose or damaged water supply or drain hoses, or with the water inlet valve. Water under the washer may be an issue with the drain pump. If the pump has a blockage it won’t work as efficiently to drain your washer. Removing the block and cleaning the pump filters can resolve this issue. If you have a front load washer and there is a puddle at the front of the machine, you may have a damaged door seal or may have used too much detergent.
The video below will walk you through the various parts that may cause a leak on your front-load washer, along with how to fix them. If you require further information, visit our repair page on washer leaks to help you resolve this issue.

To prevent leaks from happening, ensure that your washer is level, don’t overload the machine with laundry, ensure the water hoses are properly connected, and only use the recommended amount of detergent. Excess suds could be the source of the leak! If there is no sign of leaking, you can move along to the next troubleshooting step.
Check the Water Supply and Pressure
This may seem obvious but check that the taps for your water supply are actually turned on and that there’s adequate water pressure. If the water pressure is too low, your washer may not fill at all, or it will take too long to fill which would result in an error code. Depending on your model, water pressure requirements for washing machines range from 20 psi to 120 psi. If you have access to a pressure gauge, you can test the water pressure to your washer to determine if this is causing your water level issues.
- Find the water supply valve that supplies water to your washer. It is typically located on the wall behind the washer or under a nearby sink.
- Turn off any other water fixtures in your home such as faucets, showers, or toilets.
- Attach the pressure gauge to the washer’s water supply valve.
- Slowly turn on the water supply valve to allow water to flow through the pressure gauge. Take note of the reading on the pressure gauge. As noted above, it should be between 20-120 psi to supply adequate water to your washer.
- If the pressure is low, you may need to call in a plumber or a professional technician to inspect for pipe blockages or issues with the plumbing.
If the water pressure from your pipes is fine, there may be a blockage in the hoses or filters. Continue through to the steps below to resolve these issues.
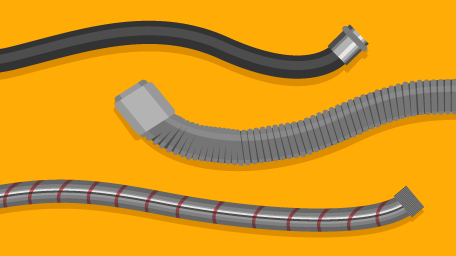
Inspect the Water Supply Hoses
Washers can move around during a cycle, especially if you’ve been running heavy or oversized loads of laundry. This may have caused the washer to shift in a way that it is now bending or kinking your water supply hoses. If the hoses are kinked, you won’t get an adequate water supply into your washer which may be causing the 1E (or similar) error code to display.
How to Clean the Water Inlet Filters
If fixing the kinks in the water hoses didn’t solve the issue, next check to see if the filters on the water inlet valve are clogged. These filters can eventually have a buildup of sediment or minerals, which will prevent water from flowing into the washer.
- To start, disconnect the washer from the power source.
- Next place a towel underneath where the water supply hoses connect to the washer, then unthread the hoses from the back of the machine.
- Using a pair of needle nose pliers, remove the mesh filter from the water inlet valve.
- The filter can be cleaned by gently scrubbing away any debris with an old toothbrush under running water and then reinstalled back into the washer.
- If the filter is damaged, a replacement filter will need to be purchased.
Check for Excess Suds
Using too much detergent, or a non-HE (High Efficiency) detergent can cause your washer to leak due to excess suds. Run an empty cycle (don’t add laundry or any more detergent) to check if suds form. Continue running these empty cycles until no more suds appear in the wash.
If you have inspected all the above areas and still haven’t resolved the 1E error code, the next item to check is the pressure switch/water level sensor.
How to Inspect the Water Level Pressure Switch on a Samsung Washer
The pressure switch (also referred to as the water level sensor) in the washer is used to detect the water level in the tub, by detecting the air pressure in the tube. When the correct water level has been reached, the switch will activate due to the pressure, and allow the wash cycle to continue. If the switch is faulty, you may be getting the 1E (or other variation) error code on your Samsung washer. You'll need a multimeter to accurately check the pressure switch for continuity.
- Begin by disconnecting the power and water supply to the washer.
- Pull the washer away from the wall enough to access its rear or top, depending on model.
- Remove the top panel or rear panel, whichever gives access to the pressure switch and pressure hose, depending on if you have a top-load or front-load model. You will need to remove the screws or clips holding the panels on.
- The pressure switch is a small plastic device, typically mounted near the top of the washer’s cabinet. It will have a hose connected to the tub to sense water pressure, and a wire harness connecting it to the control board.
- Examine the hose that connects the tub to the switch. Look for cracks, kinks, or splits that might cause leaks or improper pressure sensing. You can also check that the hose is properly clamped at both ends and if there is debris blocking the hose opening, gently clear it out.
- Next, test the continuity of the switch with a multimeter by setting the multimeter to continuity. Connect the probes to the switch’s terminals. Gently blow into the pressure hose (or use a syringe) to simulate pressure and watch for changes in continuity. If the reading doesn’t change, the switch is likely bad and will need to be replaced.
How to Replace the Water Level Pressure Switch on a Samsung Washer
If you’ve determined the pressure switch needs to be replaced here are the steps to complete that repair.
- Begin by disconnecting the power and water supply to the washer.
- Pull the washer away from the wall enough to access its rear or top, depending on model.
- Remove the top panel or rear panel, whichever gives access to the pressure switch and pressure hose, depending on if you have a top-load or front-load model. You will need to remove the screws or clips holding the panels on.
- Then disconnect the hose and wiring from the old switch. You can remove the wire harness from the switch by pushing in the tabs and gently pulling it off. The hose may have a clamp holding it in place. Remove that and gently pull the hose off the switch.
- Take out the old pressure switch from its mounting location and discard it.
- Mount the new switch in place by installing the switch into its bracket or mounting location. Fasten any retaining screws or clips to secure it solidly.
- Reconnect the pressure hose to the new switch’s port, using a clamp or clip if required, to prevent leaks or the hose coming loose.
- Reconnect the wiring harness onto the new switch’s terminals; ensure connectors snap in and are secure.
- Reassemble your washer, connect the power and water supply, and run a test cycle to ensure the machine is properly working again.
The video below is for a specific Samsung washer water level pressure sensor. The steps may vary slightly for your model, but this video will give you the general concept for replacing a similar part on your machine.
By working through these troubleshooting steps, you can usually resolve a 1E error code on your Samsung washer on your own. Keeping up with routine maintenance, along with proper use of your washer can help prevent issues like leaks from happening in the future. If the problem persists even after trying these solutions, it may be time to contact a qualified technician for a more in-depth repair.


Learn how to find, remove, and clean the parts of your washer like the drai...
Need to swap out your washing machine hose but unsure of which to buy? They...
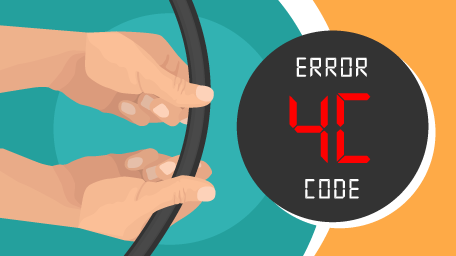
The Samsung washer 4C/4E error is a sign of a problem in the water supply. ...