


How to Fix an LG Dryer tE1 Error Code
Seeing an error code pop up on your LG dryer can be frustrating, especially when it interrupts your laundry routine. One of the more common messages you may encounter is the tE1 error code, which indicates a thermistor related issue within the dryer. Other relevant codes that may appear include tE2, tE3, and tE4. Proper temperature regulation is essential for both drying performance and safety, so it’s important to address this error as soon as possible. In this article, we’ll explain what the error codes means, and walk you through the steps to reset, inspect, and repair your dryer so you can get it back working properly.
What Does a tE1 Error Code Mean on an LG Dryer?
The tE1 error code on an LG dryer means there is an issue with the thermistor, which is a part that is used to regulate the temperature in the machine. If the thermistor is failing, it won't be able to communicate properly with the control board and can cause the machine to overheat. When the temperatures are out of range, the error code will appear. Another common cause of temperatures getting too hot is restricted air flow from a clogged vent. Once the machine reaches a point that an error code appears, your dryer will shut down and a reset and/or repair will be necessary to get things running again.
Other Related Error Codes on an LG Dryer
The codes below are also related to thermistor issues with your LG dryer, and the same troubleshooting steps can be used to help resolve them. If you see any of these on your display instead of tE1, here is what they mean.
tE2 Error Code on an LG Dryer
This error code also indicates a problem with the thermistor, but specifically when the weather outside is cold. Cold air can flow back into your dryer vent, and impact the temperature readings for the thermistor. Check to ensure that the vent and flaps haven’t been blocked by lint, snow, or ice and clear any blockages if necessary. Once any blockages are taken care of, resetting the machine should clear the error code.
If this code occurs when running LG’s “SteamFresh,” “Steam Sanitary” or “Steam Option” cycles, it’s possible that the duct is cooling down too quickly. You can correct this by first running a hotter dry cycle to warm up the ducts prior to running the steam cycle.
tE3 Error Code on an LG Dryer
This code also occurs when the thermistor detects a problem. This can happen when the thermistor itself is faulty, or if a lint buildup is causing the dryer temperatures to be out of range. Resetting the machine should clear this error code from the display.
tE4 Error Code on an LG Dryer
This code means that the temperature in the dryer is out of range. This can be caused by an issue with the thermistor itself, the wiring, or the main control board. Simply resetting the machine doesn’t typically resolve this code, and either or both the thermistor and control board should be inspected and may need to be replaced.
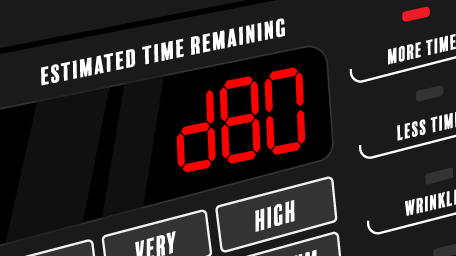
Are You Seeing a D80, D90, or D95 Code as Well?
If you have also seen a D80, D90, or D95 code on your LG dryer, that is informing you that your dryer has restricted airflow. These are used on LG dryers that have the "Flow Sense" system to alert you about blockages in the venting system. If your machine has this feature and you've been bypassing it, and now your dryer is showing tE errors, it is likely that clogged vents are causing the issue. You can learn more in our article about D80, D90, and D95 error codes.
How to Reset an LG Dryer to Clear an Error Code
The steps below should clear the various tE error codes from your dryer; however, it may not resolve the issue that caused the code to appear in the first place.
- Start by unplugging your dryer or flipping the appropriate breaker to cut off the power supply.
- Once the dryer is disconnected, press and hold the start/pause button in for 5 seconds.
- Reconnect power to the dryer and turn it on to run a dry cycle.
Power cycling the machine like this should clear the code and allow you to resume your laundry without issue. However if the error code returns when restarting your dryer, or comes back again later, continue reading to find out which parts to inspect and replace.
Parts to Inspect on Your LG Dryer
If you reset your machine and started another dry cycle, but the error code came back here's what to do next. The following parts of your dryer should be inspected and either cleaned or replaced if necessary.
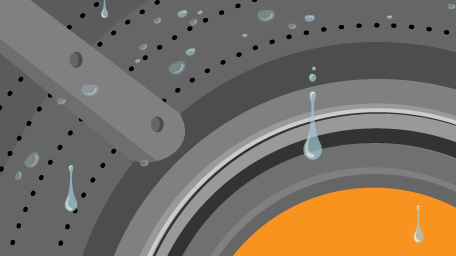
Dryer Vents and Lint Trap
You should be cleaning out the lint trap after every use, but if it is damaged or missing it should be replaced with a new lint filter. There is more than just the filter however; when is the last time you cleaned out the dryer vents? A buildup of lint will impact how efficiently your dryer runs, as the machine works harder to dry your laundry. A blockage will leave you with damp laundry as the moisture can't properly escape through the vent. In extreme cases, lint buildup can also cause a fire. Proper airflow is also necessary for the thermistor to regulate the temperature in the machine properly. Since the moist hot air is trapped within the machine, it can result in the thermistor sensing that temperatures are out of the normal range. The next step should be to inspect the lint traps and the vents to ensure there are no blockages and to clear them out if necessary.
If you have a lot of ducting between your dryer and the outside vent, or your vent is located on the roof, you may want to call a professional to perform the cleaning. Otherwise, cleaning out the vent is an easy job to do yourself. You’ll want to have access to equipment like a shop vac and rotary brush to get the job done.
How to Clean Your Dryer Vents
- Unplug your dryer and move it away from the wall so that you can access the back.
- Gently pull the vent off the back of the dryer and visibly inspect both the vent and the back of the dryer for lint and other debris buildup.
- If needed, vacuum these areas to remove the lint. If there was quite a bit inside the dryer itself, you may want to remove the cabinet so you can thoroughly clean out the machine. If lint has built up around the heating element, it will be a fire hazard.
- Reconnect the vent to the dryer, plug the dryer in, and start a dry cycle. This will force air through the vent, and then head outside to complete the next step.
- Once outside where your dryer vent expels, inspect the vent cap for signs of damage and buildup of lint. With the dryer running, the flaps should be open. If any of the flaps are cracked or missing, the vent cap should be replaced.
- If needed, remove the vent cap so that your rotary brush and vacuum hose can fit into place. Rotate the brush to dislodge any lint or debris from inside the ducting. With the dryer running you may not need to turn the vacuum on, but you can run it to catch the lint and debris from blowing out into your yard.
- Once all the lint has been cleared, the vent cap can be reinstalled, and you can go back inside and turn the dryer off.
- Reset the machine again, then check to see that the code is gone. If clearing the blockage doesn't resolve the error code, the thermistor may have failed and is the next part to inspect.

LG Dryer Thermistor
The thermistor is a part of your dryer that is responsible for communicating with the control board to regulate the temperatures within the machine. It does this by constantly measuring the temperature in the dryer through changes in resistance, and relaying that to the control board to adjust the heat to stay within the appropriate range. The thermistor is an important part for ensuring your dryer runs as energy efficiently as possible as it helps keep the temperatures at optimal levels for drying your laundry. As mentioned above, proper airflow is essential for the thermistor to function properly, so keeping lint traps and vent clear should be part of your regular dryer maintenance routine.
A thermistor is different from a thermal fuse, as the fuse can only be used once and will shut off power to the dryer if the fuse blows due to a high temperature. The thermistor is meant to regulate the temperature so that the machine doesn't get hot enough to cause the fuse to blow. If the thermistor is faulty or has failed, besides the error codes you may notice that your laundry is taking longer to dry, the dryer may stop mid-cycle, or it could overheat. Since a faulty thermistor can't communicate properly to turn the heating element on and off, you often experience either a "no heat" or "way too much heat" situation.
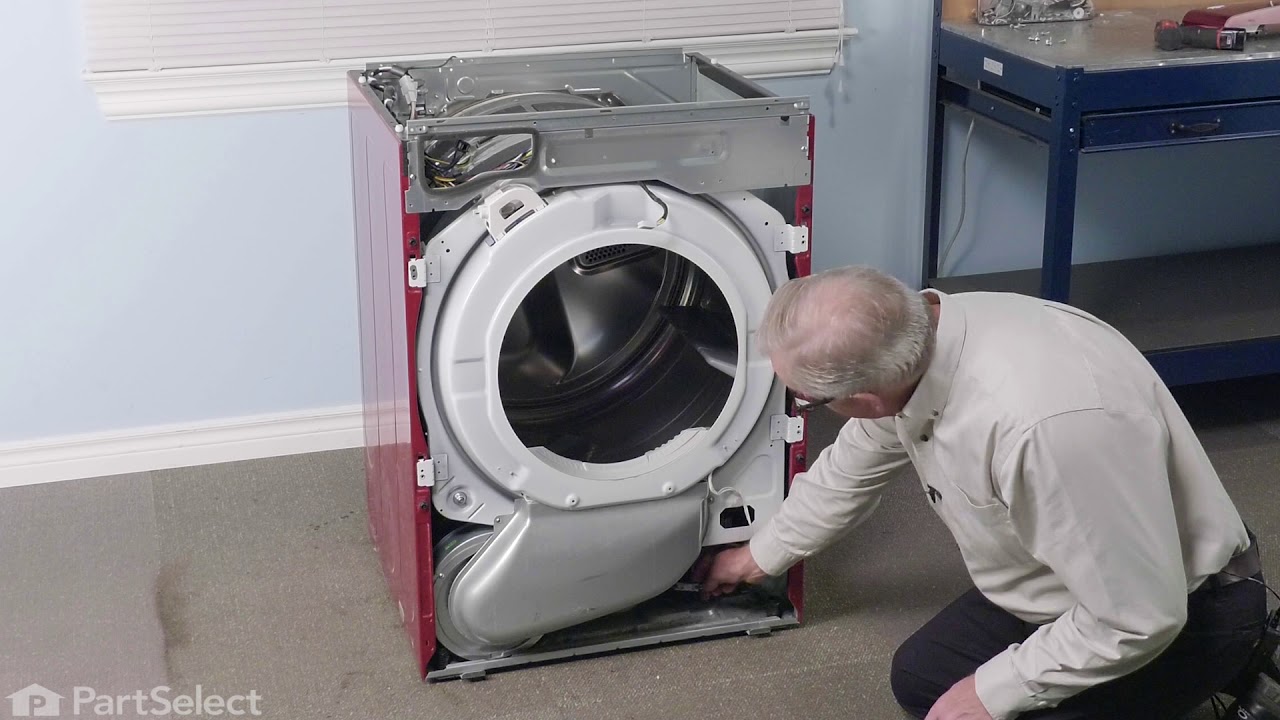
How to Access and Replace the Thermistor in an LG Dryer
The steps and video provided below will a general overview of the process to take apart your dryer and access the thermistor. The exact process will vary depending on your model of LG dryer, refer to your owner's manual for model specific information.
- Begin by disconnecting the power to dryer, either by unplugging or flipping the breaker.
- Next, the dryer cabinet will need to be removed to access the thermistor. This process may vary depending on your model, but these steps should provide a general guideline. First remove the top panel by removing the screws on the back of the dryer, then slide the top panel out of the slots and lift it away. It can be set aside until needed to reassemble the dryer.
- On the front control panel, disconnect the wiring harness and then remove any screws holding the panel in place. Lift up and tilt the control panel to disengage it from the dryer and set it aside.
- To remove the front panel of the dryer, open the door and remove the screws around the lint filter housing, then with the door shut remove the screws along the top of the panel. Disconnect the wire harness and then tilt the panel and lift up to remove it from its slots. Set the panel aside.
- The front bulkhead is the next piece to remove. Disconnect any wiring harnesses and remove the screws holding it in place. Lift up on the bulkhead to remove it from the dryer, and set it aside.
- To remove the drum from the dryer, you’ll need to reach underneath the drum to disengage the belt from the idler. This will add slack to the belt, and allow you to lift the drum off the rollers and out of the cabinet.
- With the dryer drum out of the way, you’ll now have access to the blower housing where the thermistor is located. Disconnect the wire harness and remove the screws holding the thermistor to the blower housing.
- With the thermistor removed from the machine, you can now follow the steps below to test it with a multimeter to determine if the part has failed.
- If the part has failed, you will need to replace it with a new thermistor. Installing a new thermistor simply involves reversing the steps above, by inserting and securing the thermistor to the blower housing and reconnecting the wire harness.
- Once you have reassembled the machine, plug the dryer back in and start a dry cycle to check that the error code has been resolved.
How to Test the Thermistor With a Multimeter
- Set your multimeter to read resistance (often represented by the Omega symbol).
- Touch each of the probes to the thermistor sensor.
- At room temperature, the thermistor should provide a reading between 10 to 11k ohms.
- If you get a reading outside of this range, the thermistor has failed and will need to be replaced.
LG Dryer Control Board
If you have reset your machine, cleaned out the lint trap and vents, and replaced the thermistor and are still getting the error codes, the last option would be to replace the control board. Testing the board with a multimeter does require more advanced electrical skills and familiarity with wiring schematics. However, there are visible inspections you can do, such as ensuring that the wiring is securely connected and that there are no signs of arcing or corrosion at any of the terminals.
How to Replace the Control Board in an LG Dryer
- Begin by disconnecting the power to dryer, either by unplugging or flipping the breaker.
- Next, remove the top panel by removing the screws on the back of the dryer, then slide the top panel out of the slots and lift it away.
- With the front control panel exposed, you may want to take photos of the set up as a reference to ensure you reconnect the wiring harnesses to the appropriate places.
- Disconnect the wiring harnesses and then remove any screws holding the panel in place. Lift up and tilt the control panel to disengage it from the dryer.
- Take your new control board, and using your photo as reference, position the board back into place and reconnect the wire harnesses and the screws to hold it in place.
- Before replacing the top panel, ensure that all wire connections are secure. Then slide the top panel into place and reinstall the screws to secure it.
- Plug the dryer back in and start a dry cycle to ensure that the error code has been resolved.
The tE1 error code on an LG dryer is most often tied to a problem with the thermistor or restricted airflow caused by lint buildup. While a simple reset may temporarily clear the code, it’s important to inspect key components such as the dryer vents, thermistor, and control board to prevent recurring issues or potential safety hazards. By following the troubleshooting and repair steps outlined above, you can easily get your dryer back up and running again.

Dealing with excess moisture and condensation in your dryer? Say goodbye to...
Are you getting error code D80, D90 or D95 on your LG dryer? We'll tell you...
Your dryer vents need to be cleaned at least once a year. Use this step-by-...