Your coupon for will be reflected when you check out!
✖
Your coupon for
✖
Hello!
You're visiting the PartSelect site in U.S.
Would you like to shop on the Canadian site?
Stay on this site
Go to Canadian site
✖
Model Number Locations
1Select Category Type
Select Category Type
2Select Product Type
Select Product Type
3Select {MODEL} Type
Select {MODEL} Type
Sample Model Number Tags
Model numbers can be made up of numbers (1005400, for example) or a combination of letters and numbers (LAT1000AAE). The model number will most likely appear on either a paper sticker or a metal plate. Your appliance's model number tag may look similar to the sample model number tags shown here (model number highlighted in yellow):
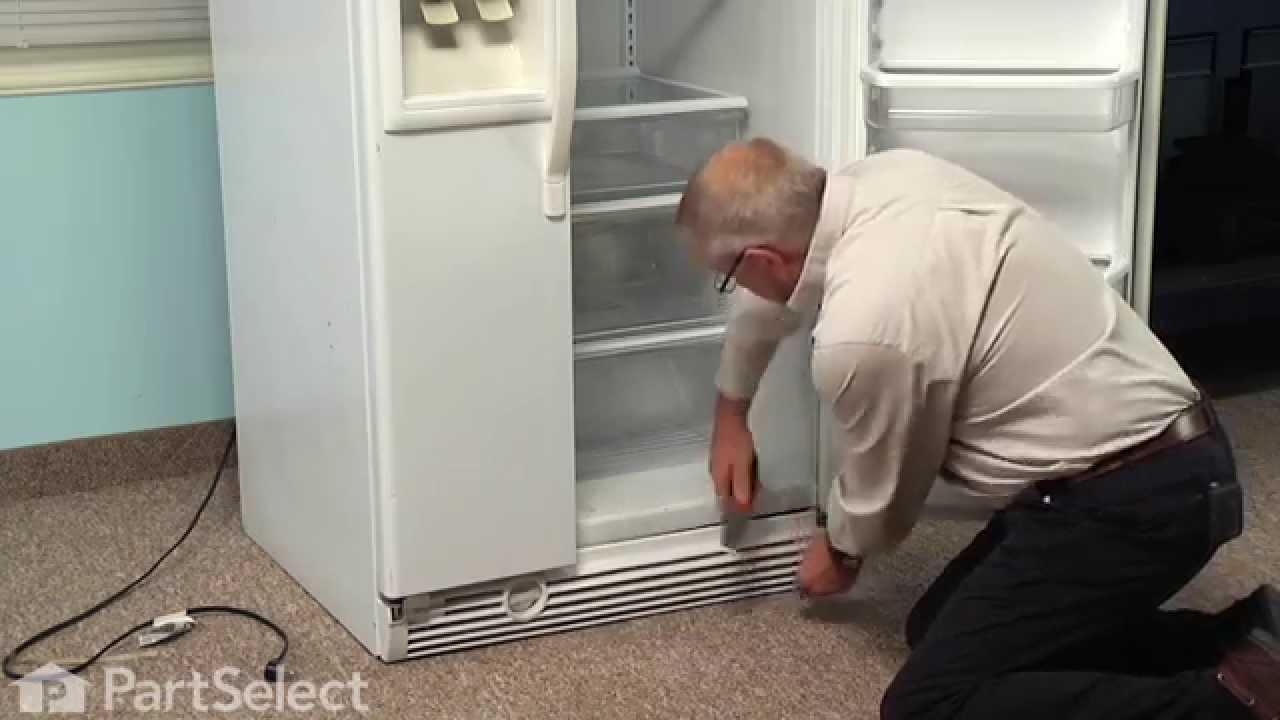
Boost the longevity of your refrigerator with this genuine Whirlpool drain pan. Designed to fit selected models of Whirlpool, KitchenAid, Maytag, Jenn-Air, Amana, Inglis, and Magic Chef refrigerators, this part ensures a neat and clean interior. The drain pan sits at the bottom of the cabinet, hidden behind the toe grille, and collects water that trickles out through the drain line during the defrost cycle. Please refer to your owner's manual for guidance during installation. Carefully verify compatibility with your model before purchasing, since parts may have subtle differences in size and shape. This drain pan will enhance your refrigerator's performance and is a quality investment for your kitchen.
How Buying OEM Parts Can Save You Time and Money
Why buy the real thing?
OEM stands for Original Equipment Manufacturer. Simply put, this means that the company who made your appliance is also supplying the replacement part for it.
Keep searches simple. Use keywords, e.g. "leaking", "pump", "broken" or "fit".
Sorry, we couldn't find any existing reviews that matched. Try using some different or simpler keywords.
★★★★★
★★★★★
Matt E - October 28, 2020
Verified Purchase
Worked as Expected
Took the cracked drip pan out & slid the new one in. No more leaks!
★★★★★
★★★★★
Rich L - December 21, 2018
Verified Purchase
Cracked Drip pan -Somewhat difficult repair
Part was an exact replacement.Had to disconnect the water line ,remove the back cover and disconnect the fan motor. Most difficult step is removing & replacing the fan assembly by sliding & tilting it out very carefully as to not break it, then removing
the drip pan is easy. Happy with replacement.
★★★★★
★★★★★
Raymond B - July 30, 2019
Verified Purchase
wrestle match
not being a small appliance repair person, we wrestled out the fan and the pan. And forced them both back into place with a little manipulation. Not that difficult.
★★★★★
★★★★★
Warren H - February 22, 2018
Verified Purchase
Part ok
Part was received quickly and in perfect shape. Disappointed I could not find instructions on site to install part.
< Prev
1
Next >
Customer Repair Stories
Average Repair Rating: 2.8 / 5.0, 1 reviews.
What's this?
Sort by:
< Prev
1
Next >
Search filter:
Clear Filter
Your search term must have 3 or more characters.
Keep searches simple. Use keywords, e.g. "leaking", "pump", "broken" or "fit".
Sorry, we couldn't find any existing installation instruction that matched.
drip pan was cracked
Removed rear cover, removed fan and than drip tray. install new tray and reassemblied
Brian from Bismarck, ND
Difficulty Level:
A Bit Difficult
Total Repair Time:
30 - 60 mins
Tools:
Nutdriver
28 of 82 peoplefound this instruction helpful.
Was this instruction helpful to you?
Thank you for voting!
< Prev
1
Next >
Questions and Answers
Ask our experts a question about this part and we'll get back to you as soon as possible!
3 questions answered by our experts.
Sort by:
< Prev
1
Next >
Search filter:
Clear Filter
Your search term must have 3 or more characters.
Keep searches simple. Use keywords, e.g. "leaking", "pump", "broken" or "fit".
Sorry, we couldn't find any existing answers that matched.Try using some different or simpler keywords, or submit your new question by using the "Ask a Question" button above!
Ytbarek Cuddus
March 13, 2018
How often and how to empty drip pan
For model number GB2FHDXWS03
Hello Ytbarek, thank you for your question. You should not have to empty the drip pan often. The little bit of water that drains to the pan should evaporate on its own. I hope this helps!
4 people found this helpful.
Was this helpful?
Thank you for voting!
Guillaume Gauvin
May 10, 2019
Is there a video demonstration to install a new pan -drip ?
Hello Guillaume, thank you for asking. We do not have a video for this specific Drip Tray, but there is a video for one that may be similar on our YouTube channel. Here is a link: https://www.youtube.com/watch?v=2o7SK-9x57M. We hope you find the video helpful.
3 people found this helpful.
Was this helpful?
Thank you for voting!
Ricky
May 30, 2022
When we have the icemaker arm down to make ice every couple of days we get a good amount of water under the fridge. Does not happen if the icemaker is off.
For model number 59672003014
Hello Ricky, Thank you for the question. We suggest removing the Ice Maker to check for any cracks or damage that can cause a leak. Also check the Fill Tube at the back wall to make sure there is no damage and it is properly seated so the water goes into the Ice Maker mold and does not miss the ice maker causing the leak. If they are both good, you can watch to see if the Ice Maker is over filling. If so, the Water Inlet Valve may be faulty. If you need help placing an order, customer service is open 7 days a week. Please feel free to give us a call. We look forward to hearing from you!