















ZSA1201J4SS General Electric Microwave - Instructions
Keep searches simple. Use keywords, e.g. "leaking", "pump", "broken" or "fit".
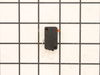
No cooking Power
Had to remove outer cover (special screws involved). Found the correct part at PartSelect.Com and it arrived 3 days later as promissed.
This oven has diffcult electrical connections at switch to get disconnected. I found it easier with the sw loose and in hand so that the connectors can be released with a small screwdriver.
One has to this in order to test the part wirh an ohm meter. I found the sw did not close but remained open and thus caused the oven not to function.
Removing interconnect switch is tricky but not difficult.
Outer cover replacement is not as easy as it should be, especially the sides.
All is well and working.
Microwaves are simple devices if you are know how to read and understand schemetic diagrams.
This oven has diffcult electrical connections at switch to get disconnected. I found it easier with the sw loose and in hand so that the connectors can be released with a small screwdriver.
One has to this in order to test the part wirh an ohm meter. I found the sw did not close but remained open and thus caused the oven not to function.
Removing interconnect switch is tricky but not difficult.
Outer cover replacement is not as easy as it should be, especially the sides.
All is well and working.
Microwaves are simple devices if you are know how to read and understand schemetic diagrams.
Parts Used:
-
Norbert from Minnetonka, MN
-
Difficulty Level:A Bit Difficult
-
Total Repair Time:15 - 30 mins
-
Tools:Pliers, Screw drivers
12 of 19 people
found this instruction helpful.
Was this instruction helpful to you?
Thank you for voting!
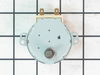
Turntable did not turn when anything on top
Turn off the circuit breaker to the microwave. Remove the 4 black wood screws that secure the microwave to the cabinet. Pull the microwave all the way out and set it on something that leaves you access to the middle access panel on the bottom. Remove the access panel on the bottom that has one screw. Unhook the 2 cables to the motor remembering which color goes where. Remove the 2 screws for the motor and replace the motor. Finish up in reverse...
Parts Used:
-
Javin from Waltham, MA
-
Difficulty Level:Easy
-
Total Repair Time:15 - 30 mins
-
Tools:Screw drivers
10 of 13 people
found this instruction helpful.
Was this instruction helpful to you?
Thank you for voting!
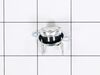
Lack of power to unit
This is the second time replacing this fuse, last time was exactly one year ago. The first time I replaced it, I removed the oven from the wall & disassembled a number of things to reach the culprit. This time I left the oven mounted & was able to access the 2 grille mounting screws on the top of the grille & remove it. Next comes the black plastic air deflector held by two screws & is mounted in front & on the right, it is shown on the parts list just above part #1434. After removing it, remove the two silver cover screws in the front, this cover also doesn't have a part # but is shown to the right of part #1410. At this point you can lift this cover enough to access the fuse which is on the left & held in place by one tiny screw through the clamp at the top, (careful not to drop it when removing). PS: Don't forget to cut the power to the microwave before starting!
Parts Used:
-
Neil from Williston, VT
-
Difficulty Level:Easy
-
Total Repair Time:15 - 30 mins
-
Tools:Screw drivers
11 of 16 people
found this instruction helpful.
Was this instruction helpful to you?
Thank you for voting!
after 3-4 minutes microwave display would blink and unit would just cut out.
This was the second time I've had to open up the microwave. 1st time display would blank out but system would continue to operate. Found solder connections on board to LED display were defective. Resoldered and unit was fine. This time I found the connection to the oven cavity temp cut-off was bad, plastic connection cover melted. When unit operated bottom lead and wire would heat up. Couldn't measure a Discernable distance so either wire or connector connection surface was not sufficient to carry the current. 1st replaced sensor still wire heated up. Replaced connector and there was no sign how heat from resistances.
Parts Used:
-
Larry from Brookfield, CT
-
Difficulty Level:A Bit Difficult
-
Total Repair Time:30 - 60 mins
-
Tools:Wrench set
12 of 20 people
found this instruction helpful.
Was this instruction helpful to you?
Thank you for voting!
installed charcoal filter in micorwave air filter
I just needed to remove 2 philp screws and insert filter. The filter fit perfectly and perfomred as expected.
Parts Used:
-
Otto from Flower Mound, TX
-
Difficulty Level:Really Easy
-
Total Repair Time:Less than 15 mins
-
Tools:Screw drivers
11 of 17 people
found this instruction helpful.
Was this instruction helpful to you?
Thank you for voting!
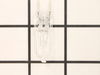
the halogen light above the stovetop burned out
the online instructions were ideal - just unscrewed the right-hand screw (the only screw) and replaced the bulb by inserting gently but firmly)...getting the old bulb out was a pain, b/c it shattered in my grasp (with little bits of glass all over the stove!), but that has nothing to do with the purchase and installation from this site - all a very good experience
Parts Used:
-
John from ORLANDO, FL
-
Difficulty Level:Easy
-
Total Repair Time:Less than 15 mins
-
Tools:Screw drivers
9 of 14 people
found this instruction helpful.
Was this instruction helpful to you?
Thank you for voting!
microwave would not heat
First remove all screws holding on outer metal casing of microwave. Next remove the back and bottom metal pieces. You will then be able to pull aside the outer casing so you can access the door switches. Check each switch with an ohm meter in both the open position and with the switch closed. If the ohm meter reads the same in both the open and closed position, the switch is bad. Check the top switch first. Replace switch and reassemble. Cheap fix for a costly microwave. Great customer service at Parts Select!
Parts Used:
-
John from Erie, PA
-
Difficulty Level:Easy
-
Total Repair Time:30 - 60 mins
-
Tools:Screw drivers
14 of 29 people
found this instruction helpful.
Was this instruction helpful to you?
Thank you for voting!
install filter
removed two screws, set in place. done. The best parts was that your ordering and shipping was out of this world. Never thought I would get the Filter that fast. Thanks You made my day.
Parts Used:
-
DAVID from RUSTBURG, VA
-
Difficulty Level:Really Easy
-
Total Repair Time:Less than 15 mins
-
Tools:Screw drivers
10 of 19 people
found this instruction helpful.
Was this instruction helpful to you?
Thank you for voting!
Lamp burned out.
Removed one screw, removed cover, and replaced lamp. Pretty straightforward.
Parts Used:
-
Gregory from Gastonia, NC
-
Difficulty Level:Really Easy
-
Total Repair Time:More than 2 hours
-
Tools:Screw drivers
6 of 7 people
found this instruction helpful.
Was this instruction helpful to you?
Thank you for voting!
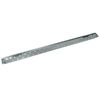
I needed to acquire and install a mounting plate for an over the range microwave
I attached the mounting plate to the wall as directed in the installation instructions which I had downloaded from GE. This procedure took 45 minutes to complete. I was then able to mount the microwave.
Parts Used:
-
Roy from Lakewood, CO
-
Difficulty Level:Really Easy
-
Total Repair Time:30 - 60 mins
-
Tools:Screw drivers
9 of 17 people
found this instruction helpful.
Was this instruction helpful to you?
Thank you for voting!
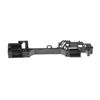
When door was opened, the microwave would turn on.
Looked on line and found a you tube that said to check the door micro switches (there are three of them. Found one of the switches had an actuator that was stuck down. I got the actuator working but problem was still present. Another you tube showed how to repair the contacts in the switch and that solved the problem. however the plastic piece that holds the switches was broken and would not hold the switches securely. Ordered that piece and a new switch. Remove the vent plate on top (one phillips) and the control panel (one phillips). The switch holder is held in place with 2 phillips and is a little tricky to get it out and undo the wires. Once out, it's just a matter of putting the switches into the new holder and reinstalling it. Google the model number and the problem and there's virtually a you tube to repair ANYTHING.
Parts Used:
-
David from HILTON HEAD, SC
-
Difficulty Level:A Bit Difficult
-
Total Repair Time:30 - 60 mins
-
Tools:Screw drivers
5 of 5 people
found this instruction helpful.
Was this instruction helpful to you?
Thank you for voting!
Remove and replace charcoal filter
Open microwave door and remove plastic cover running across top of the oven box by unscrewing 3 Phillips head screws above and behind plastic cover. (4th screw to the right is not related to this cover). DO NOT PULL COVER STRAIGHT OUT. Cover slides either right or left then pops out. Remove old filter and replace and reinstall cover. Filter lays at a 45 degree angle against metal tabs tilting toward you.
Parts Used:
-
Gary from KEY WEST, FL
-
Difficulty Level:Really Easy
-
Total Repair Time:15 - 30 mins
-
Tools:Screw drivers
5 of 6 people
found this instruction helpful.
Was this instruction helpful to you?
Thank you for voting!
Microwave bulb was burnt out
It is easy to repair the burnt out bulb if one has the correct bulb. Your website is very user friendly and your service is great. I was not able to replace the bulb at this time because our RV is at the repair shop for some other matters. I am sure the installation of the new bulb will go smoothly. Thanks for asking. Sharry Kiehl
Parts Used:

-
Sharry from Lititz, PA
-
Difficulty Level:Really Easy
-
Total Repair Time:Less than 15 mins
-
Tools:Screw drivers
7 of 12 people
found this instruction helpful.
Was this instruction helpful to you?
Thank you for voting!
Halogen lamps needed replacement
Easy to repair. One screw, remove bulbs, replace with new ones, secure screw.
Partselect.com shipped items quickly as promised, provided follow up email confirming receipt of order, a second email confirming shipment & a link to check shipping status.
Would not hesitate to do business with Partselect.com again!!!
Partselect.com shipped items quickly as promised, provided follow up email confirming receipt of order, a second email confirming shipment & a link to check shipping status.
Would not hesitate to do business with Partselect.com again!!!
Parts Used:
-
Don from Wildwood, MO
-
Difficulty Level:Really Easy
-
Total Repair Time:Less than 15 mins
-
Tools:Screw drivers
5 of 7 people
found this instruction helpful.
Was this instruction helpful to you?
Thank you for voting!
Light for cooktop burned out
Opened cover, pulled out old bulb, inserted new one, put cover back on. I was out of town when bulbs arived, my wife put it in. She said it was easy.
Parts Used:
-
Bryan from South Beach, OR
-
Difficulty Level:Really Easy
-
Total Repair Time:Less than 15 mins
-
Tools:Screw drivers
5 of 7 people
found this instruction helpful.
Was this instruction helpful to you?
Thank you for voting!